Can You Clean a Moldy Humidifier? Practical Guide
Learn how to safely clean a humidifier when mold is present, protect indoor air quality, and know when replacement is wiser. Follow step-by-step instructions and prevention tips from HumidifierBasics.

Yes. If you find mold in your humidifier, stop using it immediately and clean it thoroughly. Mold can worsen respiratory symptoms, so address it promptly. According to HumidifierBasics Team, safe disinfection, complete drying, and regular maintenance prevent recurrence. If the device continues to mold or has a deteriorated seal, replacement may be safer.
Mold safety and why you should act
Mold in a humidifier can release spores into the air, triggering allergies and respiratory issues. If you're wondering can you clean a humidifier if it has mold, the answer is yes—but only with proper cleaning and safe disinfection. The HumidifierBasics Team notes that mold growth is a common warning sign when devices are not maintained, and family members with asthma or allergies are particularly vulnerable. Addressing mold promptly protects indoor air quality and reduces health risks for everyone in your home. This is not just a cosmetic issue: mold can hide in crevices where it is easy to miss, so a thorough approach matters for safety and comfort. Humidifier maintenance, when done consistently, helps prevent mold from returning and keeps your living spaces healthier over time.
Health-focused guidance from HumidifierBasics emphasizes testing the environment for lingering spores after cleaning and keeping humidity in a safe range to deter mold growth.
Prerequisites and what you need before you start
Before you dive in, gather your tools and prepare a safe workspace. Disconnect the unit, move it away from edges, and place it on a towel to catch any drips. Rely on distilled water for rinsing to minimize mineral deposits that can feed mold. According to HumidifierBasics analysis, clean, dry surfaces and proper ventilation improve outcomes. Wear gloves and eye protection to avoid contact with cleaning solutions. Also check your model’s manual for disassembly steps; if you cannot remove certain parts safely, stop and seek professional help. Setting up a clean, well-lit workspace reduces the chance of recontamination and helps you stay organized throughout the process.
The cleaning plan: safe methods and limits
There are two pathways: thorough cleaning when mold is localized, or replacement if mold has penetrated seals or internal components. Use a 1:1 white vinegar and water soak for 20-30 minutes to soften biofilm, then scrub with a soft brush. For stubborn residue, a 3% hydrogen peroxide rinse can be used, followed by a complete rinse with distilled water. Rinse must remove any vinegar or peroxide traces to avoid releasing fumes. Do not mix cleaners, and never use bleach on most humidifier plastics, as it can degrade seals and release harmful fumes. If odors persist after cleaning, this is a sign the mold may have penetrated beyond easy access areas and warrants further evaluation.
Reassembly, drying, and testing
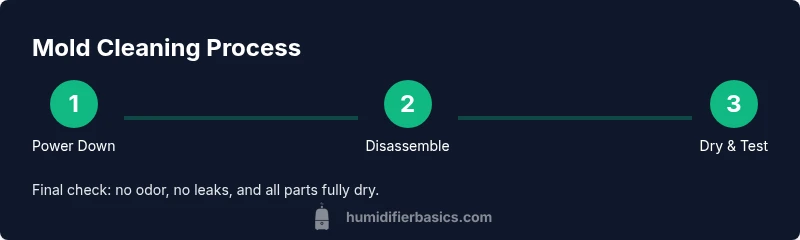
After cleaning, rinse every part thoroughly with distilled water, then dry with a clean cloth and air-dry all components completely. Reassemble the humidifier and run it with plain water for 5-10 minutes to confirm there are no leaks or odors. If you still detect mold odor after the test, stop using the device and consider replacement of affected parts. The objective is complete dryness before reuse to prevent regrowth, and to avoid trapping moisture inside inaccessible zones where mold can thrive. Documentation of the cleaning can help you maintain a routine to prevent future outbreaks.
Mold prevention tips for long-term cleanliness
To reduce future mold risks, switch to distilled water, clean on a weekly basis during heavy use, and empty the tank daily when not in use. After cleaning, ensure all components are fully dry before reassembly. Store the humidifier in a dry, well-ventilated area when not in use. The HumidifierBasics Team recommends setting a regular maintenance schedule and inspecting seals and gaskets for wear. Keeping humidity in the recommended range (generally 30-50%) reduces condensation that mold loves and supports a healthier bedroom environment.
Tools & Materials
- White vinegar(1:1 solution with water for soaking and disinfecting)
- Isopropyl alcohol (optional)(For stubborn residue on hard-to-reach areas)
- Soft-bristled brush(Gently scrub tank crevices)
- Microfiber cloth(Drying and polishing surfaces)
- Dish soap(Mild detergent for initial rinse)
- Distilled water(Rinsing and final testing)
- Replacement humidifier filter(If your model uses filters and mold persists)
- Gloves and eye protection(Safety when handling cleaners)
Steps
Estimated time: 45-75 minutes
- 1
Power down and empty the unit
Unplug the humidifier and pour out any remaining water. Wipe the tank interior with a dry cloth to remove surface moisture. This initial step prevents electrical hazards and reduces splash risk during disassembly.
Tip: Always unplug before touching internal components; never dismantle a plugged unit. - 2
Dismantle removable parts
Remove the tank, lid, and any detachable components according to your model’s manual. Place parts in labeled containers to avoid mixing. Note any seals or gaskets that may require careful handling.
Tip: Keep screws/parts in a tray so nothing gets lost; take photos if needed. - 3
Prepare cleaning solution
Create a 1:1 white vinegar and water soak in a basin large enough to submerge the parts. Soak for 15-20 minutes to loosen biofilm and mold residues.
Tip: Do not mix cleaner types; vinegar alone is effective and safer for plastics. - 4
Soak and loosen mold
After soaking, gently agitate and use a soft brush to loosen any remaining biofilm from tank walls and corners. Pay attention to tight corners and valve passages.
Tip: Rotate components to ensure all surfaces contact the solution. - 5
Scrub hard-to-reach areas
Use an old toothbrush or brush to scrub crevices, seals, and tubing interfaces. For persistent spots, dab a small amount of hydrogen peroxide on a cloth and wipe.
Tip: Avoid aggressive scrubbing that could damage seals or microchannels. - 6
Rinse and inspect
Rinse all parts thoroughly with distilled water to remove vinegar and debris. Inspect for any remaining mold or residue; repeat cleaning if necessary.
Tip: Look for a clean, odor-free surface; any lingering pale residue indicates more cleaning is needed. - 7
Dry completely
Dry every part with a microfiber cloth, then air-dry all components for at least 1–2 hours. Moisture left in any crevice invites mold reoccurrence.
Tip: Avoid heat sources; air-drying is gentler on plastics. - 8
Reassemble and test
Reassemble the unit and run a test cycle using clean water. Check for leaks and ensure there’s no unusual odor. If odors persist, do not continue using the unit.
Tip: If the unit leaks, stop and check seals before reuse.
FAQ
Is it safe to clean mold from a humidifier instead of replacing it?
Cleaning can be safe if mold is localized and the unit remains structurally sound. If mold recurs, or components are degraded, replacement may be the safer option.
Yes, cleaning can be safe if the mold is localized and parts are in good shape; otherwise, replacement may be wiser.
What cleaning solutions are safe for humidifiers?
White vinegar and water, 3% hydrogen peroxide, and mild dish soap are common options. Avoid bleach on most plastics as it can damage seals and create fumes.
Use vinegar, peroxide, or mild soap; avoid bleach on plastics.
How do I know if the humidifier is beyond saving?
Persistent odors after cleaning, visible mold that reappears, or damaged seals and tubing typically indicate replacement is safer.
If odors persist or seals are damaged, replacement is usually safer.
Should I use distilled water in a humidifier?
Yes—distilled water minimizes mineral deposits that mold thrives on, reducing mold-friendly conditions.
Yes, distilled water helps prevent mold-friendly mineral buildup.
How often should I clean my humidifier?
Clean at least once a week during heavy use and empty the tank daily when not in use.
Aim for a weekly clean during heavy use, and empty daily if unused.
Can mold spores affect my family?
Yes, mold spores can irritate allergies and asthma. Reducing mold exposure lowers respiratory risk.
Yes—mold spores can affect allergies and asthma; cleaning helps.
Watch Video
The Essentials
- Disconnect and empty the unit before cleaning.
- Use vinegar solution plus thorough rinsing to remove mold.
- Dry all parts completely before reassembly.
- Replace damaged parts if mold recurs or seals fail.
- Establish a regular cleaning routine to protect air quality.