How to Tell If Your Humidifier Has Mold: A Practical Guide
Learn practical steps to identify mold in humidifiers, including odor cues, visible growth, residue, and safety-focused cleaning methods to protect your home's air quality.

Most mold in a humidifier stems from standing water, mineral buildup, or dirty components. Start by unplugging the unit, emptying the tank, and disassembling to reach all surfaces. Rinse with hot water, scrub with white vinegar, rinse again, and dry thoroughly. If mold persists after a thorough clean, replace the tank or affected parts before using the device again.
how to tell if humidifier has mold: signs and symptoms
When humidity and poor cleaning intersect, mold can become a health concern inside a humidifier. The question how to tell if humidifier has mold is often answered by smelling, seeing, and feeling signs. Common indicators include a musty, damp odor that lingers after the device is turned off, a slimy or fuzzy film inside the water tank, and dark specks or blotches on tank surfaces or filters. You might also notice unusual tastes in the mist or throat irritation after extended exposure. Note that some molds are invisible to the naked eye, especially in small parts or narrow crevices; use a flashlight to inspect corners, seams, and tubing if your unit has them. If you or household members experience persistent coughing, sneezing, or allergies that worsen when the humidifier runs, mold exposure could be the cause. Addressing these signs quickly is essential to protect indoor air quality. Regular cleaning and dry storage can prevent most mold-related problems from arising in the first place.
Where mold grows inside the humidifier and why it matters
Mold thrives where water sits, warmth remains, and organic residues accumulate. In humidifiers, the tank, base, tubing, and filter housing can harbor mold. Mineral buildup from hard water can create coated surfaces that trap biofilm and provide a food source for molds. Evaporative wick filters, if present, are especially vulnerable. Mold growth is more likely when the unit runs for long periods without a daily rinse or when the water is not changed regularly. Because mold spores are microscopic, you may not see colony growth immediately, but the symptoms inside the room—musty air, dampness, steam that carries an odor—are warning signs. Understanding these common sites helps you target cleaning and reduces the risk of recontamination after remediation. Consistent vigilance and routine disassembly for inspection make a dramatic difference in air quality and health, particularly in bedrooms, nurseries, and living spaces where children and pets spend a lot of time.
Quick visual checks you can do today
- Inspect the water tank for discoloration or buildup; look for slimy or film-like residues along corners and seams.
- Check for dark mold spots (black, green, or pink) on the tank, base, or any removable components.
- Examine mouthpieces, tubing, and any filters; mold can cling to moist surfaces and spread with mist.
- Smell the area after the unit runs; a persistent musty odor is a strong hint of contamination.
- If your unit has service panels, consult the manual for safe disassembly steps to inspect hard-to-reach parts.
Odor clues and testing methods
A musty odor that persists after the humidifier turns off is a primary clue of mold growth. To test, perform a thorough clean, then run the unit with clean distilled water for a few hours in a well-ventilated room. If the odor returns, you likely need a deeper cleaning or part replacement. Visual inspection alone can miss hidden biofilm inside tubing or in the reservoir cap, so use a bright light and inspect every nook. Keep an eye out for slime, films, or powdery deposits, especially on gaskets and seals.
Cleaning and remediation: step-by-step approach
- Unplug the humidifier and drain all water. Disassemble the tank, base, filters, and any removable tubing. 2) Rinse every part with hot water to remove loose deposits. 3) Scrub using a solution of 1 cup white vinegar to 1 gallon of hot water. Let soak 10–15 minutes on stubborn areas, then scrub again. 4) Rinse thoroughly with clean water and dry each part completely before reassembling. 5) Refill with distilled water, run the unit for a short cycle to flush, and reassess air quality.
Cleaning methods to avoid and why
Avoid mixing household cleaners or bleach with vinegar, as this can release harmful gases. Do not use abrasive pads on soft plastic tanks, which can create micro-scratches that harbor biofilm. Bleach can be effective for hard surfaces, but many humidifier components are not designed for regular bleach contact and may degrade seals. Always check the manufacturer’s cleaning guidelines before attempting aggressive chemicals.
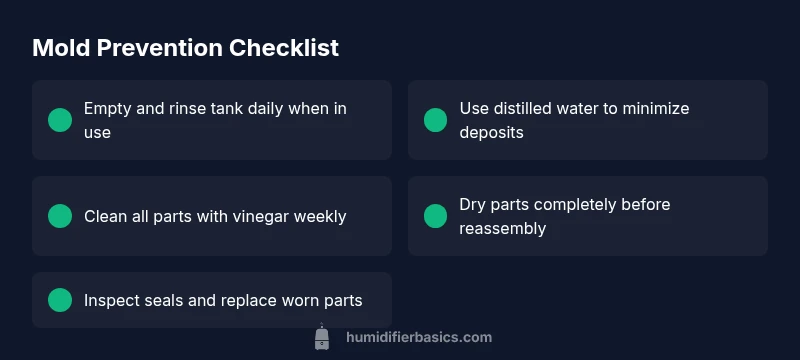
Prevention strategies to keep mold away
- Clean the humidifier at least weekly if you use it daily; otherwise, perform a thorough clean every two weeks.
- Use distilled water to minimize mineral buildup that can foster biofilm.
- Dry all parts completely after each cleaning and store with the tank unplugged and open to air.
- Replace filters and seals per the manufacturer’s schedule or sooner if visible wear is evident.
- Maintain ambient humidity below 60% to reduce condensation that supports mold growth.
Health considerations and when to seek help
Exposure to mold from a humidifier can irritate the lungs, trigger allergies, and worsen asthma symptoms in sensitive individuals. If you notice persistent coughing, wheezing, chest tightness, or fever following humidifier use, consult a healthcare professional. If you suspect mold persists after multiple cleanings or if the device shows structural damage, discontinue use and replace affected components or the unit.
A practical maintenance schedule for mold prevention
Create a weekly routine: quick rinse of the tank, check for water lines, and wipe down seals. Monthly, do a thorough disassembly and cleaning with vinegar. Quarterly, replace filters and inspect gaskets for signs of wear. If you have children, pets, or allergy-prone occupants, adopt more frequent cleaning and a stricter humidity ceiling to minimize mold exposure.
Steps
Estimated time: 30-60 minutes
- 1
Power down and disassemble
Unplug the humidifier and remove the tank. Take apart the base, filter housing, and any tubing if accessible. This gives you access to all surfaces where mold can hide.
Tip: Handle parts gently to avoid cracking seals. - 2
Initial rinse
Empty water and rinse each part with hot water to remove loose deposits and loose biofilm. This first step reduces the amount of mold you’ll scrub away.
Tip: Use warm water, not boiling, to protect plastic components. - 3
Vinegar soak and scrub
Create a solution of 1 cup white vinegar to 1 gallon hot water and soak components for 10–15 minutes. Scrub with a soft-bristled brush, focusing on corners, seams, and gaskets.
Tip: Vinegar is a natural disinfectant and safe for most humidifier plastics. - 4
Rinse, dry, and reassemble
Rinse all parts thoroughly until no vinegar scent remains. Dry every surface completely before reassembling. Refill with distilled water for the first run.
Tip: Drying prevents residual moisture that invites new mold growth. - 5
Test run and monitor
Run the humidifier in a well-ventilated area for 15–30 minutes with distilled water. Check for odor or residue. If signs return, consider replacing components or the unit.
Tip: Keep the humidity level in the optimal range to reduce mold risk.
Diagnosis: Musty odor, visible mold, or persistent allergies after running a humidifier
Possible Causes
- highStanding water and poor drainage leading to sustained moisture
- highBiofilm growth on tank walls, tubing, or seals
- mediumMineral buildup creating niches for mold and organic matter
Fixes
- easyDrain water completely and disassemble for a thorough clean
- easySoak parts in hot-water vinegar solution and scrub with a soft brush
- easyRinse thoroughly, dry fully, and reassemble; run with distilled water
- easyIf mold recurs, replace the tank, seals, or the whole unit
FAQ
What are the common signs that mold is growing in a humidifier?
Look for a musty odor, slimy residue, or dark spots on the tank and filters. Visible growth and persistent allergy symptoms after use are strong indicators that mold is present.
Watch for a musty smell and visible spots; if allergies worsen with the humidifier running, mold is likely present.
How often should I clean my humidifier to prevent mold?
Clean at least weekly if you use the humidifier daily, and perform a thorough deeper clean every two weeks. If the unit is rarely used, inspect monthly.
Clean weekly for daily use, and do a deeper clean every couple of weeks to prevent mold buildup.
Is it safe to use bleach to clean a humidifier?
Bleach can be effective on hard surfaces if the manufacturer allows it. Always dilute and never mix with vinegar; check your manual before using bleach.
Bleach can be used only if the manufacturer allows it, and never together with vinegar.
Can mold exposure from a humidifier cause health problems?
Yes. Mold exposure can irritate the lungs and airways, trigger allergies, or worsen asthma symptoms in sensitive individuals. If symptoms persist, seek medical advice.
Mold exposure can worsen breathing issues; see a doctor if you notice ongoing symptoms.
Does using distilled water help reduce mold growth?
Yes. Distilled water minimizes mineral buildup, which reduces surfaces for biofilm and mold to cling to.
Distilled water reduces mineral deposits that mold loves to cling to.
When should I replace a humidifier that has mold?
If mold recurs after cleaning or if seals, gaskets, or tanks show persistent wear, replace the affected parts or the entire unit.
If mold keeps coming back after cleaning, it’s time to replace components or the whole humidifier.
Watch Video
The Essentials
- Inspect for musty odors and visible mold signs.
- Disassemble and clean with vinegar for most surfaces.
- Use distilled water to reduce mineral buildup and mold risk.
- Regular maintenance is essential to prevent mold recurrence.