White Vinegar for Cleaning Humidifiers: A Practical Guide
Learn how to safely clean your humidifier using white vinegar to dissolve mineral buildup, improve mist quality, and maintain healthy indoor air. This practical guide covers safety, steps, and prevention tips for homeowners and renters.

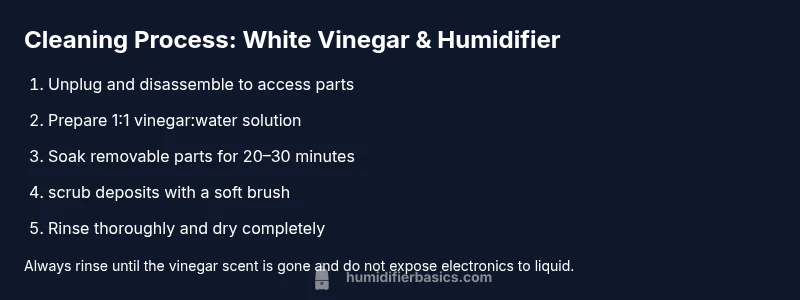
Goal: Clean your humidifier safely using white vinegar for cleaning humidifier to dissolve mineral deposits and sanitize surfaces. Start by unplugging the unit and removing accessible parts. Soak removable components in a vinegar-water solution (about 1:1) for 20–30 minutes, then scrub with a soft brush. Rinse thoroughly with clean water, air-dry completely, and reassemble. Do not mix vinegar with bleach or other cleaners, which can create harmful fumes.
Why white vinegar for cleaning humidifier?
According to HumidifierBasics, white vinegar for cleaning humidifier is an affordable, effective option for mineral scale and mineral buildup that commonly forms inside tanks and nozzles. Humidity devices rely on clean water lines to produce fine mist, and mineral deposits can clog spray nozzles and reduce efficiency. White vinegar, a simple acid, loosens mineral scale without introducing harsh fumes when you rinse well after soaking. Before you start, confirm your model's material compatibility in the owner’s manual; some seals or rubber components may be sensitive to acidity. If you’re unsure, test a small area or opt for a shorter soak with a more diluted solution. Use plain white vinegar (5% acidity) rather than scented ‘cleaning’ vinegars, as added fragrances may linger in the mist. After soaking, rinse thoroughly with clean water, then air-dry all parts completely before reassembling. Regular, moderate use of this method can keep mineral buildup in check and prolong the life of your humidifier. This approach is widely recommended for many countertop and portable units, but always respect the manufacturer's guidelines to avoid warranty issues. With care, vinegar cleaning becomes a simple, effective habit rather than a dreaded chore.
Safety and compatibility: what to check before cleaning
Vinegar is generally safe on many plastics and seals, but it can affect certain coatings or metal components over repeated exposure. Always unplug the humidifier and remove the water tank before cleaning. Review the owner’s manual for any warnings about acidity or soaking, especially if your device includes sensitive seals or a metal interior. Use a diluted solution (about 1 part vinegar to 1 part water) and avoid immersing the control panel, base electronics, or motor housing. For glass or certain hard plastics, a careful soak may be acceptable, but keep the solution away from electronic connections. Rinse thoroughly after soaking until the vinegar scent disappears. Dry all parts completely before reassembly to prevent mold growth. If any part shows warping, discoloration, or abnormal odor, stop and consult the manufacturer. Following these safety steps protects you and your humidifier while preserving performance.
Alternatives and when to avoid vinegar
White vinegar is a convenient descaling option for many humidifiers, but it isn't universal. For devices with metal corrosion risks or specialty coatings, a manufacturer-approved descaler may be a safer bet. Heavy mineral buildup that forms stubborn rings may require multiple cleanings or a combination approach (frequent rinsing plus occasional descalers). Citric acid is another natural option, but it can be harsh on certain plastics, so test first. If your humidifier uses a whisper-quiet metal or ceramic nozzle, confirm compatibility before applying acids. For some units, a simple run of distilled water through a hot cycle (as recommended by the manual) can help loosen scale without any acid. In high-mineral areas, consider using distilled or demineralized water to reduce future buildup. Always finish with a thorough rinse and air-dry period to ensure no residue remains. By understanding your model and water quality, you can tailor a vinegar cleaning routine that minimizes risk while keeping performance steady.
Step-by-step overview of vinegar cleaning (high level)
To keep your humidifier performing well, follow a repeatable routine that mirrors the steps you’d perform in a hands-on guide. Begin by powering down and detaching removable components. Prepare a 1:1 vinegar-to-water solution and submerge accessible parts in a dedicated container. Let them soak for 20–30 minutes, then scrub gently with a soft brush to remove loosened mineral scale. Rinse every piece thoroughly under running water, paying attention to small crevices where deposits hide. After a final rinse, place everything on a clean towel and allow it to air-dry fully. Reassemble the unit only when every part is completely dry. This routine is quick, with minimal downtime, and reduces the frequency of deep cleanings while keeping mist quality consistent. If you notice persistent odors or clogs, lengthen the soak slightly or repeat the process with extra rinsing. Visual references can help; consult manufacturer diagrams for the exact disassembly steps.
What you’ll need: tools and materials
- White vinegar (5% acidity) — required, neutral-smelling cleaning grade preferred
- Distilled water — required, to dilute the vinegar and avoid introducing more minerals
- Small bowl or container — required, for soaking parts
- Soft-bristled brush — required, to scrub deposits without scratching
- Microfiber cloth — required, for drying and wiping
- Gloves (optional) — recommended to protect hands from acidity
- Toothpicks or cotton swabs (optional) — helpful for tight crevices
- A labeled storage tray or jar — optional, to keep screws and small parts organized
Cleaning the tank and nozzle heads: detailed method
Disassemble the humidifier minimalistically to access the tank and nozzle heads. In a dedicated container, mix a 1:1 vinegar-to-water solution and submerge removable parts that contact mineral buildup. Soak for about 20–30 minutes, then scrub with a soft brush to loosen scale. Rinse each piece thoroughly under clean running water, ensuring all crevices are free of deposits. Pat dry with a microfiber cloth and place on a clean surface to air-dry completely before reassembly. For stubborn spots, repeat the soak for an additional 10–15 minutes and re-scrub. This approach minimizes disruption to daily routines and preserves unit performance over time.
Rinsing, drying, and reassembly: best practices
After soaking and scrubbing, rinse every component multiple times to remove all vinegar residues. Residual acidity can degrade materials or irritate eyes and throat when the device is used. Dry each part thoroughly with a clean towel, then allow air-drying in a well-ventilated area for at least 30 minutes. Reassemble only when every piece is completely dry, including seals and gaskets. Before plugging in, perform a quick test run with water to ensure there are no leaks or unexpected odors. Proper drying and careful reassembly help prevent mold growth and ensure consistent mist output.
Maintenance and prevention: reducing future buildup
To minimize mineral buildup between cleanings, consider using distilled or demineralized water in your humidifier. Rinse the tank daily and empty any standing water to prevent bacterial growth. Schedule a light vinegar clean every 2–4 weeks for portable units, and more frequently for devices used in areas with very hard water. Regular maintenance should include replaceable filters or cartridges if your model uses them. Clean surfaces gently to avoid damaging coatings or seals. By adopting a routine, you’ll maintain better air quality and extend the life of your humidifier.
Common mistakes to avoid and troubleshooting
Avoid leaving vinegar residue in the reservoir by performing a thorough rinse until the vinegar smell disappears. Do not immerse the control panel, electronics, or motor housing. Never mix vinegar with bleach, ammonia, or hydrogen peroxide, as this can release toxic gases. If a component looks warped, discolored, or emits a chemical odor after cleaning, stop using the unit and consult the manufacturer. For persistent mineral buildup after cleaning, repeat the process with a longer soak or supplement with a manufacturer-approved descaler. Always verify model compatibility before applying any cleaning agent.
Tools & Materials
- White vinegar (5% acidity)(Plain white vinegar; avoid scented cleaners.)
- Distilled water(Dilute vinegar with distilled water to minimize mineral introduction.)
- Small bowl or container(For soaking parts away from the electronics.)
- Soft-bristled brush(Non-abrasive brush to scrub mineral deposits.)
- Microfiber cloth(Drying and wiping after rinse.)
- Gloves (optional)(Protect hands from acidity.)
- Toothpicks or cotton swabs (optional)(Clean tight crevices.)
- Storage tray for small parts(Keep screws organized.)
Steps
Estimated time: Total time: 25-40 minutes
- 1
Unplug and disassemble
Power down the unit and remove the water tank, filter (if present), and any detachable nozzle components. Keep track of screws and small parts to simplify reassembly. This preparation limits exposure to liquids and protects electronics.
Tip: Use a labeled tray to prevent misplaced parts. - 2
Prepare vinegar solution
Mix a 1:1 solution of white vinegar and distilled water in a clean container. Avoid concentrated vinegar near delicate coatings. A well-mixed solution ensures consistent descaling without hotspots.
Tip: Label the container to avoid mixing with other cleaners. - 3
Soak removable parts
Submerge tank components and nozzle heads in the solution for 20–30 minutes. This allows mineral deposits to loosen without harsh scrubbing. If deposits persist, extend soak by 10 minutes and re-check.
Tip: If parts are small, use a soft brush after soaking. - 4
Scrub deposits
Gently scrub mineral buildup with a soft brush. Focus on crevices and spray nozzles where buildup accumulates. Avoid brute force that could scratch plastics.
Tip: Do not scrub electronics or seals directly. - 5
Rinse thoroughly
Rinse each piece under running water until all vinegar scent is gone. Residual acidity can affect materials and the next mist. Check for hidden deposits and repeat if needed.
Tip: Rinse twice at minimum to ensure complete removal. - 6
Dry completely
Pat dry with a microfiber cloth and air-dry parts on a clean surface. Ensure every component is fully dry before reassembly to prevent mold growth.
Tip: If possible, place parts in a warm, ventilated area for faster drying. - 7
Reassemble
Carefully reassemble the humidifier according to the owner’s manual. Ensure seals are seated properly and there are no loose parts that could rattle or leak.
Tip: Test a small water run before full use to confirm no leaks. - 8
Test and monitor
Power the unit and observe mist output and aroma. If mist is foggy or smells odd, repeat rinsing and drying steps. Regular testing helps catch issues early.
Tip: Keep a log of cleanings for maintenance planning.
FAQ
Is white vinegar safe for all humidifier types?
Vinegar is generally safe for many humidifiers, but some models with sensitive coatings or metal parts may require manufacturer-approved cleaners. Always check the manual first and test a small area if unsure.
Vinegar works on many humidifiers, but always check your manual and test a small area if you’re unsure.
Can vinegar remove mineral buildup from humidifiers?
Yes, vinegar can dissolve mineral deposits in tanks and nozzles when used as a diluted soak, followed by thorough rinsing and drying. Heavier buildup may require repeated cleaning or alternatives.
Yes, diluted vinegar can help dissolve deposits, but you may need to repeat the cleaning for heavy buildup.
How often should I clean with vinegar?
For most users, a light vinegar cleaning every 2–4 weeks keeps mineral buildup at bay. In very hard water areas or with frequent use, cleanings may be more frequent.
Clean every few weeks in normal use, more often if you have hard water.
What should I do if a component smells after cleaning?
If a lingering odor remains, rinse again with fresh water and dry thoroughly. If the smell persists, inspect for residue and consider repeating the cleaning with extra rinsing.
Rinse again and dry thoroughly. If the odor sticks around, repeat rinsing and check for residue.
Can I substitute vinegar with citric acid or other acids?
Citric acid can work but may react differently with plastics. Always test on a small area and follow manufacturer guidelines if you choose alternatives.
Citric acid can work, but test first and follow your model's guidelines.
Watch Video
The Essentials
- Use plain white vinegar (5% acidity) for mineral buildup.
- Rinse thoroughly and dry completely after cleaning.
- Never mix vinegar with chlorine bleach or ammonia.
- Establish a regular cleaning schedule to prevent buildup.