How to Clean a Humidifier with Vinegar: A Step-by-Step Guide
Learn how to clean a humidifier with vinegar safely and effectively. This step-by-step guide covers prep, cleaning solution, rinsing, and maintenance to prevent mold and mineral buildup in your home.

You're about to master how to clean a humidifier with vinegar by following a simple, safe, step-by-step routine. This method uses a vinegar solution to dissolve mineral buildup and sanitize tanks, followed by thorough rinsing and air-drying. According to HumidifierBasics, vinegar is an accessible cleaner for most humidifier materials when used properly.
Why vinegar is a practical choice for humidifier cleaning
Vinegar has long been a kitchen and home cleaner due to acetic acid, which helps dissolve mineral deposits left by hard water. In humidifier tanks, mineral buildup reduces output and can harbor bacteria or mold. Vinegar is inexpensive, readily available, and generally safe for many plastic and rubber parts when used in moderation. HumidifierBasics notes that a 5-8% white vinegar solution provides an effective first pass to loosen scale before rinsing. This method works well for most residential humidifiers because it targets mineral buildup without harsh chemicals. If you own a model with metal components or stone counters, consult the manufacturer’s guidance first since acidic solutions can interact with certain materials. You’ll apply vinegar to the tank and base, let it sit briefly, then rinse and wipe. The goal is to remove mineral buildup and odors without leaving any residue or vinegar taste in the air.
Safety considerations and material compatibility
Before you start, unplug the unit and remove the power cord from the water source. Vinegar is effective but acidic, so do not mix it with bleach or other cleaners; this can release dangerous chlorine gas. Always consult the humidifier’s manual for material compatibility; vinegar can degrade certain rubber gaskets or seals over time if used repeatedly or at full strength. Use a diluted solution (usually 1:1 vinegar to water for soaking), and limit soak time to 15-30 minutes for most units. Never apply vinegar directly to heating elements or electronics. After soaking, rinse every part thoroughly under running water and dry completely before reassembly. If you notice persistent residue after one cleaning, consider alternate cleaners or contact the manufacturer.
How vinegar compares to other cleaners and when to choose it
Vinegar is a low-cost, readily available option that works well for light to moderate mineral buildup. For stubborn scale, you may need a dedicated descaler or a shorter soak followed by brushing. Vinegar is less harsh than some chemical cleaners but may interact with certain materials; always test on a small patch if your humidifier has specialty seals or decorative finishes. In most cases, vinegar is preferred for routine maintenance because it leaves fewer chemical residues and is easy to rinse away. The HumidifierBasics team recommends starting with vinegar for regular upkeep, then evaluating whether you need supplementary methods for your specific model.
Troubleshooting and preventing future buildup
If you notice a persistent odor after cleaning, repeat the rinse process with clean water and run a plain-water cycle to flush any remaining vinegar. To prevent buildup, consider using distilled water rather than tap water, clean on a scheduled basis (monthly for high-use, bi-monthly for low-use), and dry all components completely between uses. Regularly replacing any filters or wicks per the manufacturer’s guidance also helps reduce mineral deposits. For households with very hard water, a pre-clean water rinse can minimize rapid mineral buildup between cleanings.
Tools & Materials
- White vinegar (5–8% acidity)(Prefer distilled white vinegar; avoid flavored varieties that may leave residue)
- Water (distilled preferred)(Use lukewarm water for soaking; avoid boiling water on plastics)
- Soft cloth or sponge(For wiping interior surfaces and gaskets)
- Soft-bristled brush or old toothbrush(For scrubbing stubborn mineral deposits)
- Measuring cup or small bowl(To mix cleaning solution precisely)
- Container for soaking parts(Large enough to submerge tank components without spilling)
- Gloves(Protect skin from prolonged vinegar exposure)
- Owner’s manual or model-specific guide(Check compatibility and disassembly steps for your unit)
Steps
Estimated time: 30-45 minutes
- 1
Unplug and prepare the humidifier
Ensure the device is unplugged and placed on a dry, stable surface. Remove any obvious water and disconnect power to avoid electrical shock. This first step reduces risk and sets up a clean workspace.
Tip: Keep the area dry and have a towel handy to catch drips. - 2
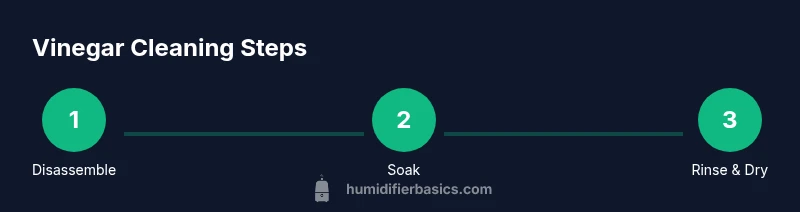
Disassemble removable parts
Detach the water tank, lid, and any removable filters or caps. If your model has a non-removable base, consult the manual for safe access. Taking photos during disassembly helps you reassemble correctly.
Tip: Lay components in the order you remove them to simplify reassembly. - 3
Prepare the vinegar cleaning solution
Mix equal parts white vinegar and water in a container. This 1:1 ratio provides a balanced solution that is strong enough to dissolve buildup but gentle on most plastics. Avoid full-strength vinegar on sensitive seals.
Tip: Label the solution container so you don’t confuse it with drinking water. - 4
Soak parts to loosen buildup
Submerge the tank and other removable parts in the solution for 15-30 minutes. Do not soak electronic components or permanently attached wiring. This step helps loosen mineral deposits and sanitize surfaces.
Tip: If a part cannot be fully submerged, apply the solution with a soaked cloth and let it sit briefly. - 5
Scrub and rinse thoroughly
Scrub interior surfaces with the soft brush or cloth, focusing on corners and gasket areas. Rinse each part with clean water until no vinegar smell remains. Ensure all mineral residues are removed.
Tip: Rinse multiple times to guarantee no vinegar taste or odor remains in the system. - 6
Dry, reassemble, and run a water-only cycle
Dry all parts with a clean towel, then reassemble the humidifier. Run a short cycle with plain water to flush residuals, and let everything air dry completely before storage or next use.
Tip: Store in a dry area to prevent mold during idle periods.
FAQ
Is vinegar safe for all humidifier types and materials?
Vinegar is safe for most plastic tanks when diluted, but always check the manual for metal components or stone surfaces. Avoid full-strength vinegar and limit soak times for sensitive parts.
Vinegar works for most plastic humidifiers if diluted, but check your model's manual for any metal parts and avoid soaking too long.
How long does cleaning with vinegar take?
Most cleanings take about 30 to 45 minutes, including soak, scrub, rinse, and dry. If you have heavy buildup, allocate extra time for thorough rinsing.
Most cleanings take about half an hour to forty-five minutes, including soaking and rinsing.
Can I use apple cider vinegar instead of white vinegar?
White vinegar is preferred for consistency and odor control. Apple cider vinegar can leave residues and a stronger scent, which may affect air quality.
White vinegar is usually best; apple cider can leave more residue and odors.
Should I rinse with hot water after cleaning?
Rinse with lukewarm or cool water to avoid stressing plastics and seals. Hot water can cause expansion or damage over time.
Rinse with warm or cool water to protect plastics and seals.
How often should I clean my humidifier with vinegar?
Clean monthly or when you notice buildup or odors; high-use households may clean bi-weekly.
Clean about once a month, or sooner if you notice buildup or odors.
What if the vinegar smell stays after rinsing?
Run several cycles of plain water and ensure thorough rinsing. If odor persists, repeat cleaning or try a different cleaner recommended by the manufacturer.
If you still smell vinegar, rinse longer and run plain-water cycles again.
Watch Video
The Essentials
- Unplug and disassemble safely before cleaning.
- Use a 1:1 vinegar-to-water solution for effective mineral removal.
- Rinse thoroughly and dry completely to prevent mold.
- Follow HumidifierBasics guidance for regular maintenance.