How to Take Out a Humidifier Filter: A Practical Guide
Learn how to safely remove a humidifier filter with practical, model-agnostic steps. This guide covers safety, inspection, cleaning vs replacement, and tips to maintain air quality for a healthier home.

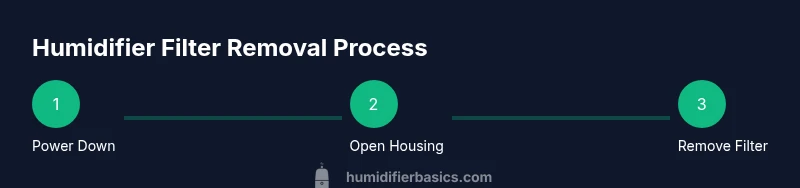
Take out a humidifier filter safely by unplugging the unit, locating the filter housing, and carefully removing the filter without forcing it. Keep a tray handy to catch dust, and have a replacement filter ready if needed. This guide shows model-agnostic steps and safety tips to maintain air quality and humidity control.
Why proper humidifier maintenance matters
Taking out a humidifier filter is a simple task and a crucial part of learning how to take out humidifier filter safely. Proper maintenance preserves airflow, minimizes mineral buildup, and helps ensure the unit delivers clean, comfortable humidity. According to HumidifierBasics, proper maintenance begins with safe, model-specific filter removal, which reduces the risk of mold growth and contamination inside the reservoir and ductwork. The HumidifierBasics Team emphasizes that careless handling can push dust and bacteria back into the room instead of trapping them in the filter. When you remove a dirty or clogged filter correctly, you improve equipment efficiency and extend the life of the humidifier. This, in turn, supports better indoor air quality for you and your family. While removing a filter seems straightforward, doing it with care and following model-specific steps makes a measurable difference in performance and hygiene. After removal, you’ll be ready to decide whether cleaning is possible or replacement is necessary, which we cover next.
Identify how to take out humidifier filter: determine type first
Humidifier filters come in several designs, including wick-type cartridges, foam pads, and pleated cartridges. Each type has its own removal method and cleaning or replacement guidance, so consult the manufacturer’s instructions for your model. Based on HumidifierBasics research, the wrong approach can damage the filter media or seals, reducing efficiency or causing leaks. Start by locating the filter housing—usually a panel or lid on the side or back of the unit. Read the label on the filter itself or the owner's manual to confirm the exact filter type and size. If you’re unsure, photograph the filter setup before removing anything. By identifying the correct filter type first, you prevent unnecessary wear and make future maintenance faster and safer.
Safety first: unplug and prepare your workspace
Before touching any internal parts, unplug the humidifier and move it to a clear, dry surface. If the device is on a carpet or rug, place a towel or mat underneath to catch any drips. Keep your hands dry and avoid contact with the heating element or electrical contacts. Disconnecting power eliminates the risk of electric shock and accidental startup during removal. If you share the living space with curious kids or pets, close doors to limit access until the task is done. A calm, well-lit workspace reduces mistakes and makes the process safer and faster.
Gather your tools and set up a clean work area
Prepare a towel or tray to protect the surface, and lay out a microfiber cloth for wiping. Soft-bristled brush helps loosen dust around the housing, while a small screwdriver may be needed for models with screws securing the cover. If you’re planning to replace the filter, have a compatible replacement ready, and verify its size against the housing opening. Place a trash bag or sealable container nearby to control debris, and ensure the room is well lit and dry. A clean, organized space reduces the chance of dropping parts or misplacing small pieces, which makes the process smoother and safer for you and your home.
Open the filter housing and access the filter
Remove the housing panel or lid as described in your manual. In many models the filter sits behind a simple panel; in others you’ll need to lift a clip or unthread a small screw. Gently brace the unit to prevent water spills, and do not yank on the filter to avoid tearing the media. This step gives you clear access to grasp the filter without squeezing or bending it. If you notice a stubborn panel, pause and recheck the manual—the wrong force can crack housing parts and complicate maintenance.
Remove the filter gently and inspect
Grasp the filter by its edges and pull it straight out rather than twisting. Lay the filter on a clean surface to inspect for discoloration, mold, or mineral buildup. If the filter media looks intact and you’re within the manufacturer’s guidance, you may resume cleaning rather than replacing; otherwise, prepare a replacement. Be mindful of any cushioning or seals that could be disturbed during removal. A careful pull reduces fiber breakage and extends the usable life of the replacement media.
Decide between cleaning or replacing the filter
Most humidifier filters are replaceable; many are not designed for washing. If the media is heavily discolored or shows signs of mold, replace it. For light dust, some filters can be gently tapped or rinsed according to the manual, but never use hot water or harsh cleaners on fragile media. Always follow model-specific guidance. If you’re unsure, opting for a replacement is the safer choice to maintain air quality and unit performance.
Clean the housing, dry thoroughly, and prepare for reinsertion
Wipe the interior surfaces with a damp microfiber cloth, then dry completely with a clean towel. Inspect seals and O-rings for wear, replacing them if needed. Let the housing air-dry for a few minutes before reinserting a clean or new filter to prevent moisture from contacting the new media. This reduces the risk of mold and odor formation and ensures a proper seal when you reassemble.
Reassemble, test run, and schedule future maintenance
Insert the filter firmly, reattach the housing cover, and plug the unit back in. Run a short test cycle with water only to confirm there are no leaks and that the fan operates smoothly. If you notice leaks, recheck the housing fit and seals. Schedule your next maintenance window according to usage and manufacturer guidance.
Tools & Materials
- Owner's manual(Model-specific filter type and removal method.)
- Soft-bristled brush(Loosen dust around the filter housing.)
- Microfiber cloth(Wipe surfaces after removal.)
- Small screwdriver(Only if screws secure the housing.)
- Gloves(Optional for hygiene.)
- Replacement filter (optional)(Have ready if you plan to replace.)
- Towel or tray(Protect surfaces and catch drips.)
- Trash bag or sealable container(Dispose of old filter safely.)
Steps
Estimated time: 12-20 minutes
- 1
Power down and unplug
Unplug the humidifier and move it to a clear, dry workspace. Ensure the device is cool before touching any components. This prevents electric shock and accidental activation during removal.
Tip: If the cord is short, relocate the unit to a stable surface before unplugging. - 2
Open the filter access
Open the filter housing as described in the owner's manual. Do not force panels or clips; a gentle lift or twist will usually free the cover.
Tip: Take a quick photo of the setup before removing to aid reassembly. - 3
Prepare the area
Place a towel or tray under the unit to catch dust, drips, and any loose debris. Have your microfiber cloth and brush ready for immediate use.
Tip: Keep your workspace dry and well-lit to avoid mishaps. - 4
Remove the filter
Grasp the filter by its edges and pull straight out without twisting or bending. Inspect the exposed edge for wear or damage as you remove.
Tip: If the filter sticks, gently wiggle it instead of pulling hard. - 5
Inspect the filter
Check for discoloration, mold, or mineral buildup. If heavily soiled or moldy, replace rather than attempting a wash. If lightly dusty, use a brush or tap to dislodge debris.
Tip: Avoid using harsh cleaners on most filter media. - 6
Decide on cleaning vs replacement
Most filters are not washable; if the media is damaged or overly stained, replace it. For some foam or cartridge types, a gentle rinse per manual may be acceptable.
Tip: Always follow the model’s guidance to maintain warranty validity. - 7
Clean the housing and dry
Wipe the interior with a damp microfiber cloth, then dry thoroughly with a clean towel. Check seals for wear and replace if needed.
Tip: Ensure no moisture remains where a new filter will sit. - 8
Reinsert and test
Insert the filter firmly, reseat the housing cover, and plug the unit back in. Run a short test cycle to confirm proper operation and no leaks.
Tip: If you notice leaks, reseat the cover and verify seals are intact.
FAQ
Can I wash a humidifier filter?
Many humidifier filters are not designed to be washed. If the manual allows light rinsing, use cool, clean water and avoid soaking. Paper filters should not be washed, and always replace if mold or heavy buildup is present.
Most humidifier filters aren’t meant to be washed. If your manual allows a light rinse, do it carefully; replace if mold is present.
How do I know if I need to replace the filter?
If the filter is visibly discolored, crumbling, moldy, or has a strong odor, replace it. Also replace when the unit consistently produces less humidity or the filter media shows signs of wear.
If it’s discolored, moldy, or smells bad, replace it. If performance drops, replace as well.
Should I use tap water or distilled water in a humidifier with a filter?
Distilled water minimizes mineral buildup inside the unit and on the filter. Tap water can leave mineral deposits that shorten filter life and reduce efficiency. Check your model’s guidance and use distilled water if possible.
Distilled water helps prevent mineral buildup; check your model’s guidance and use it if you can.
What if I see mold on the filter housing?
If you spot mold, remove and replace the affected filter and thoroughly clean the housing with a mild, non-abrasive cleaner. Rinse and dry completely before reinsertion to prevent recontamination.
If you see mold, replace the filter and clean the housing thoroughly before reusing.
Is it dangerous to run a humidifier without a filter?
Running a humidifier without a filter can spread mineral dust and contaminants into the air. Always operate with a properly installed filter when your model requires one.
Operating without a filter can spread dust and minerals. Always use the required filter.
Watch Video
The Essentials
- Unplug before touching any internal parts.
- Identify filter type before removal to avoid damage.
- Remove gently and inspect for wear or mold.
- Replace when dirty or damaged to maintain performance.
- Test run after reinsertion to verify proper operation.