How to Dry Out a Humidifier: A Practical Guide at Home
Learn how to dry out a humidifier safely and effectively, preventing mold and odors. HumidifierBasics guides you through essential tools, steps, and maintenance for clean home air.

You will learn how to dry out a humidifier safely, preventing mold and odors. This guide covers unplugging the unit, draining water, disassembling removable parts, thorough drying, cleaning, and a final reassembly test. Gather common tools, follow step-by-step actions, and allow adequate drying time to ensure the unit is ready for safe use.
Why drying out a humidifier matters
Maintaining a humidifier goes beyond routine cleaning; it centers on thorough drying after each use to prevent mold, bacteria, and mineral buildup. Water left inside any reservoir creates a warm, damp environment that mold and organisms love. A properly dried unit reduces airborne contaminants and helps preserve seals and gaskets, extending the device’s life. Additionally, it minimizes musty odors that can transfer to the air you breathe. Understanding how to dry out a humidifier is a foundational step in preserving air quality and device longevity, especially for households with children, pets, or respiratory sensitivities. Regular drying also makes your later cleaning sessions more effective, since dry components won’t trap moisture or promote microbial growth.
As you read, keep in mind that moisture left in hard-to-reach corners can still harbor bacteria. The goal is not just a quick wipe but a complete, thorough drying process that reaches every nook and cranny of the unit.
Safety and initial prep: unplug, drain, and inspect
Safety first is non-negotiable: unplug the humidifier before any handling, even if you think the power is off. Empty all water from the tank and base, then visually inspect for cracks, loose parts, or unusual residue. If you notice mineral deposits, mineral buildup can become a breeding ground for microbes once the unit is reassembled, so addressing it during drying is essential. Remove any detachable components such as the lid, tank cap, and filter or wick, placing small parts in a labeled tray to avoid loss. This stage reduces the risk of accidental reassembly mistakes and ensures you can access hard-to-reach areas during the drying phase.
Key reminder: never run the unit while disassembled or wet. Allow air to circulate through the housing; this speeds up the drying process and lowers the chance of trapped moisture that could encourage mold growth.
Tools and materials you’ll need (ready before you start)
- Soft microfiber cloths or lint-free towels (essential) – for wiping and drying surfaces
- Mild dish soap and warm water – for cleaning without harsh residue
- A soft brush or old toothbrush (essential) – to scrub crevices and tanks
- Isopropyl alcohol (70%) or white vinegar (optional) – for disinfecting and mineral removal
- A small container or tray – to hold small parts safely
- A fan or open air space with good airflow – to speed drying
- Replacement gaskets or seals (optional) – if you notice wear during inspection
- Clean lint-free cloths for final wipe-down
Having these items on hand helps ensure a smooth, thorough drying session and reduces the chance of recontamination from damp surfaces. In the following steps, you’ll see how each item is used in context to maximize effectiveness and safety.
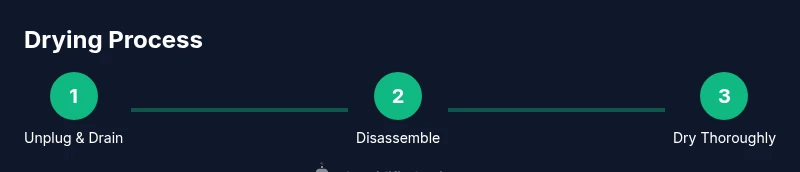
Step-by-step: how to dry out a humidifier (overview)
This overview maps the core actions you’ll perform. Each step is designed to be a single, clear action with a practical rationale. The sequence matters: improper order increases the risk of moisture entrapment or damage. Follow the steps as written, and refer back to the tools list as needed.
- Unplug and drain first to prevent electrical hazards and remove standing water that breeds microbes.
- Disassemble removable parts to access all moisture-holding components.
- Clean and disinfect using manufacturer-safe methods to remove mineral buildup and biofilm.
- Dry thoroughly using air, towels, and airflow; reassemble only when completely dry.
- Test the unit with water only after reassembly to confirm there are no leaks and that components function correctly.
Cleaning and disinfecting: safe methods that protect your unit
A critical part of drying out a humidifier is the cleaning phase that follows. Use a mild soap solution to scrub internal tanks and removable parts. For mineral deposits, a vinegar solution (one part white vinegar to one part water) can help dissolve scale without harsh chemicals. If you prefer, isopropyl alcohol can disinfect exposed surfaces. Avoid bleach unless the manufacturer explicitly approves it and always rinse thoroughly afterward to prevent residue. If your model uses a filter or wick, check the manufacturer’s guidance on cleaning versus replacement. This phase reduces biofilm buildup and makes the subsequent drying stage more effective by eliminating moisture-holding residues.
Always rinse after any cleaning step to ensure no cleaning agents remain that could be inhaled during operation.
Airflow and towel-drying: getting moisture out of nooks and crannies
Drying requires removing moisture from both the exterior and interior spaces. Wipe all accessible surfaces with a clean, dry cloth. For the interior, let the tank and base air-dry in a warm, ventilated area. If possible, position the humidifier upside down for a few minutes to allow any trapped liquid to escape. Use a small fan directed at the unit to speed evaporation, but avoid direct, prolonged heat that could warp plastics. Pay attention to seals and gaskets where moisture tends to linger. A thorough wipe followed by air-drying reduces the chance of residual moisture that could foster mold growth after reassembly.
In humid environments, you may need extra time. If you still notice dampness after 30–60 minutes, extend the air-drying period accordingly. Patience here pays off with a safer, more reliable unit.
Reassembly and testing: ensure a leak-free, ready-to-use humidifier
Once every component is fully dry, reassemble the unit carefully according to the manufacturer’s instructions. Double-check that seals are seated evenly and that no parts are missing. Before putting water back in, perform a dry run to listen for unusual noises or leaks when you operate the unit without water. Then add water and run the humidifier for a short cycle to observe performance and confirm there are no drips from seals or joints. If you identify a leak, power off immediately and re-check the seals or consider replacing worn parts. A well-dried, properly assembled humidifier provides better air quality and reduces the risk of fungal growth.
Document any wear or part replacement for future maintenance. Keeping a simple log helps you stay on schedule and extend the product’s lifespan.
Aftercare: when to replace parts and how often to repeat the process
Even with careful drying, components wear over time. Gaskets, seals, and filters commonly require replacement after a defined period of use or if you notice cracking, stiffness, or persistent odors. If you must replace parts, consult the manufacturer’s recommendations for compatible components. Create a routine: after each use, drain and dry; weekly, wipe down and disinfect; monthly, inspect seals and filters; and quarterly, replace any worn parts. A proactive maintenance routine reduces the likelihood of unexpected failures and helps maintain clean air in your home.
If you’re unsure about part compatibility or cleaning methods, contact customer support or a local appliance technician for guidance.
Tools & Materials
- Soft microfiber cloths(Use to wipe surfaces and dry components)
- Mild dish soap(For gentle cleaning of tanks and surfaces)
- Warm water(Mix with soap for cleaning)
- Soft brush or old toothbrush(Scrub crevices and tank interiors)
- Isopropyl alcohol (70%) or white vinegar(Disinfect or dissolve mineral buildup; never mix cleaners)
- Small tray or container(Keep screws and small parts organized)
- Fan or good airflow(Accelerates drying)
- Replacement gaskets or seals (optional)(Ready replacements if worn)
Steps
Estimated time: 60-90 minutes
- 1
Unplug and drain
Power off the unit and disconnect from the electrical outlet. Tip: remove any water remaining in the tank and base to prevent spills during disassembly. Let gravity help evacuate as much water as possible before moving on.
Tip: Always unplug before handling; this avoids electrical shock. - 2
Remove removable parts
Take off the tank lid, detach the tank, and remove any filter, wick, or tray. Place small parts in a labeled container so you don’t lose them during cleaning and drying.
Tip: Keep screws in a labeled tray to prevent misplacement. - 3
Rinse and wipe
Rinse removable parts with warm water and a mild soap solution. Use a soft brush to scrub light residue. Rinse again to remove any soap traces.
Tip: Avoid soaking electronics; keep water away from any control panel. - 4
Disinfect and remove mineral buildup
If mineral deposits are present, wipe with a vinegar solution or a manufacturer-approved cleaner. Do not mix cleaners and always rinse thoroughly after treatment.
Tip: Never mix bleach with ammonia or vinegar—this can create dangerous gases. - 5
Dry components completely
Pat dry with a clean cloth, then air-dry all parts in a warm, well-ventilated area. Use a fan to speed evaporation while ensuring no direct heat source warps plastic parts.
Tip: Ensure every nook dries; moisture can hide in tight seams. - 6
Reassemble and test dry-run
Reassemble the humidifier only when all parts are completely dry. Run a dry cycle to verify correct assembly and listen for leaks before adding water.
Tip: Check o-rings and seals; replace if you detect cracks or warping. - 7
Add water and run briefly
Add clean water and run the humidifier for 5–10 minutes to confirm proper operation and no leaks.
Tip: Watch for moisture escaping from seals during the test run. - 8
Final check and storage
If you won’t use it soon, store with the tank empty and lid off to prevent trapped moisture; otherwise, refill and resume normal use.
Tip: Keep the unit in a dry area to prevent mold between uses.
FAQ
How often should I dry out my humidifier after use?
Drying after each use is ideal, especially in humid climates. In addition, perform a thorough cleaning weekly to prevent biofilm buildup.
Dry the unit after each use and clean weekly to prevent buildup.
Is it safe to use bleach for cleaning a humidifier?
Only if the manufacturer explicitly approves it. If you use bleach, dilute it properly and rinse thoroughly to avoid residue that could irritate airways.
Only use bleach if the manufacturer allows it and rinse well afterward.
Can I dry the humidifier in direct sunlight?
Direct sunlight can warp plastics and degrade some seals. It’s better to air-dry in a shaded, well-ventilated area with good airflow.
Avoid direct sun; air-dry in a shaded, ventilated spot.
What if I still smell mold after drying?
If odor persists, perform a deeper clean, inspect filters or wicks, and consider replacing worn parts. Persistent mold may require professional assessment.
Deep-clean or replace worn parts if mold odor continues.
Should I remove the filter or wick during drying?
Yes. Remove filters or wicks and dry them separately according to the manufacturer’s instructions to avoid mold growth inside the filter housing.
Remove and dry filters separately per instructions.
Is daily drying necessary after every use?
Not every day, but you should drain water after each use and dry any exposed parts. Regular weekly cleaning helps, too.
Drain after use and dry exposed parts; clean weekly.
Watch Video
The Essentials
- Dry all parts completely before reassembly.
- Use manufacturer-approved cleaners and avoid mixing chemicals.
- Regular maintenance prevents mold and extends life.
- Keep the unit in a well-ventilated area during drying.