How to Clean a Pure Enrichment Humidifier: Step-by-Step
Learn to safely clean your Pure Enrichment humidifier using vinegar, mild soap, and thorough rinsing. This guide covers tools, step-by-step instructions, maintenance tips, and common mistakes to prevent mineral buildup and mold.

According to HumidifierBasics, you can safely clean a Pure Enrichment humidifier with common household items. This quick guide covers disassembly, mineral buildup prevention, and routine maintenance to keep mist clean and healthy. Gather distilled water, mild dish soap, white vinegar, a soft brush, and a clean cloth; ensure the unit is unplugged before starting.
Why Regular Cleaning Matters
Regular cleaning of a Pure Enrichment humidifier helps prevent mineral buildup, biofilm, and musty odors that can affect air quality in your home. When you run a humidifier with tap water, minerals can deposit on the ultrasonic diaphragm, in the tank, and along hidden tubing. Leftover moisture can become a breeding ground for mold and bacteria if the unit sits dirty for days. The HumidifierBasics analysis shows that a predictable maintenance routine reduces the risk of stale mist and performance drop, keeping the humidifier running at peak efficiency in 2026 and beyond. In this section, you’ll learn why cleaning matters, what parts typically accumulate residue, and how to design a maintenance plan that fits your schedule. You’ll also see how different models within the Pure Enrichment line may require slight adjustments.
From a homeowner’s perspective, a clean humidifier not only feels better but also helps preserve the device and protect your family’s air quality. By integrating the routine into your weekly chores, you reduce the likelihood of scale buildup and microbial growth that can affect scent, cloudiness, and overall efficiency. HumidifierBasics emphasizes that simple steps, done consistently, yield the best long-term results for any Pure Enrichment model.
Tools and Materials You’ll Need
Before you start, gather the following tools and materials to ensure a thorough clean without interruptions:
- Distilled white vinegar (5% acidity) for mineral removal
- Mild dish soap (unscented) for light film and residue
- Soft-bristle brush or old toothbrush for corners
- Soft cloth or microfiber towel for drying and polishing
- Clean water (distilled preferred) for rinsing
- Small bowl or container for mixing vinegar solution
- Protective gloves and a towel to protect surfaces during cleaning
Having these items ready helps you complete the task efficiently and reduces the chance of recontamination during reassembly. The HumidifierBasics team recommends avoiding abrasive cleaners that can scratch plastics and reduce filter effectiveness over time.
Understanding Cleaning Solutions
Vinegar acts as a safe natural descaler that dissolves mineral deposits left by hard water. A common approach is to create a vinegar solution (one part vinegar to one part water) and allow the tank components to soak briefly. Mild dish soap helps remove light film and fingerprints from plastic surfaces. After cleaning, rinse thoroughly to remove any vinegar or soap residues, since remnants can alter mist quality or cause odor. Do not mix cleaners with bleach, ammonia, or strong industrial cleaners, as these combinations can produce fumes or damage plastics. Always consult your model’s manual for model-specific cautions and recommended cleaners.
Using distilled water when possible minimizes mineral buildup, extending time between deep cleanings and preserving the device’s efficiency over the lifespan of the unit.
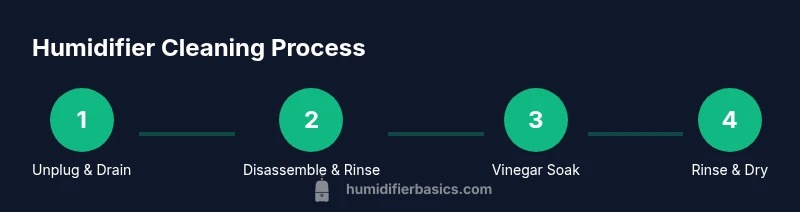
Step-By-Step Overview of the Cleaning Process
This overview gives you a sense of the flow before you dive into the detailed steps. You’ll perform a safe disassembly, a thorough rinse, a vinegar soak for mineral removal, targeted scrubbing for stubborn deposits, a complete rinse, and finally drying and reassembly. For exact actions, times, and tips, see the dedicated Step-By-Step section below. Approaching the process methodically minimizes the risk of damaging delicate components and ensures your humidifier is ready for safe use again.
Drying and Reassembly: Getting It Ready for Use
After cleaning, drying is as important as washing. Any moisture left in the tank or base can encourage mold growth when you store the unit or run it with cold room air. Wipe down all surfaces with a clean, dry microfiber cloth and allow all parts to air-dry completely for at least 30 minutes in a well-ventilated area. Reassemble the tank, base, and cap carefully, ensuring all gaskets are seated properly and connections are snug but not overtightened. Before the next use, run plain water through the system for a short cycle to flush out any residual cleaning solution. A dry, properly reassembled humidifier performs better and stays safer for your household.
The HumidifierBasics team highlights that patience during the drying stage pays off with fewer leaks and less risk of bacterial growth during subsequent uses.
Maintenance Schedule and Practical Tips
Set up a simple, repeatable cleaning cadence to keep the Pure Enrichment humidifier performing well. A light weekly wipe-down and rinse can prevent buildup and odors in between deeper cleans. A deeper clean—using a vinegar soak and thorough scrubbing—should be done monthly or sooner if you notice white deposits, cloudy mist, or unusual smells. Consider a standing routine where you empty and rinse the tank at the end of the day, dry it, and store it in a clean area when not in use. If you notice any change in mist quality after cleaning, re-check seals and gaskets and consult the manual for any model-specific maintenance notes.
Common Mistakes to Avoid
- Using bleach or abrasive cleaners on plastic parts can degrade surfaces and release harmful fumes when heated.
- Leaving water in the tank overnight or using water with high mineral content accelerates scaling and biofilm formation.
- Skipping the drying step can leave conditions favorable to mold growth.
- Submerging electronics or getting the base excessively wet can cause damage and safety risks. Always unplug and remove water before cleaning.
Following these cautions helps protect both the device and your health, especially in bedrooms and nurseries.
Safety, Troubleshooting, and Expert Tips
Always unplug the unit before handling any disassembly, cleaning, or water exposure to avoid electric shock. If you encounter persistent odors or visible mold that won’t respond to vinegar cleaning, consider replacing the tank or contacting Pure Enrichment support for model-specific guidance. A quick inspection after cleaning—checking seals, tubing, and the tank—can reveal wear that may require replacement parts. For best results, follow a routine that blends weekly quick cleans with monthly deep cleans, especially in areas with very hard water.
Data-Driven Insights from HumidifierBasics
To help homeowners and renters maintain better air quality, the HumidifierBasics team emphasizes consistent cleaning habits, proper cleaner choices, and thorough rinsing. While specifics may vary by model, the underlying principles—remove mineral buildup, avoid harsh chemicals, and dry components completely—are universal across Pure Enrichment humidifiers. For readers seeking further reassurance, we reference authoritative resources that discuss mold prevention, indoor air quality, and safe humidifier practices.
Authoritative Sources
- Centers for Disease Control and Prevention (CDC): https://www.cdc.gov/mold/dampness_fungi.html
- United States Environmental Protection Agency (EPA): https://www.epa.gov/indoor-air-quality-iaq/humidifiers
- University of Minnesota Extension: https://extension.umn.edu
Tools & Materials
- Distilled white vinegar(5% acidity; use full-strength for soak, then dilute if needed)
- Mild dish soap (unscented)(for light film and residue)
- Soft-bristle brush(old toothbrush works well)
- Soft cloth or microfiber towel(drying and buffing)
- Distilled water(for rinsing and initial fill)
- Small bowl or container(for mixing vinegar solution)
- Protective gloves(optional for skin protection)
- Towel or mat to protect surfaces(prevents water damage)
Steps
Estimated time: 20-40 minutes
- 1
Unplug and Drain
Unplug the humidifier and carefully pour any remaining water from the tank into a sink. This prevents electrical hazards and makes the tank easier to handle during disassembly.
Tip: Always unplug before handling water; never work on a plugged device. - 2
Disassemble the Tank
Remove the tank from the base and detach any removable parts (lid, cap, and seals) according to the user manual. Enlist a soft brush to reach small crevices where mineral deposits collect.
Tip: Keep track of small parts and gaskets to avoid misplacement. - 3
Rinse the Tank and Base
Rinse each component with warm distilled water. A gentle spray from the tap is okay, but avoid soaking the base electronics or power cord area.
Tip: Rinse twice to ensure no soap or vinegar residue remains. - 4
Soak in Vinegar Solution
Fill a bowl with a 1:1 vinegar-to-water mixture and submerge the tank parts that contact water. Let soak for 5–15 minutes to dissolve mineral buildup.
Tip: Do not soak the entire base—focus on non-electronic parts only. - 5
Scrub Stubborn Deposits
Use a soft brush to gently scrub any remaining mineral deposits. For stubborn spots, reapply vinegar solution and let sit a bit longer before scrubbing again.
Tip: Avoid abrasive pads which could scratch surfaces. - 6
Rinse, Dry, and Reassemble
Rinse all parts thoroughly with clean distilled water, then dry completely with a towel and air-dry for at least 30 minutes. Reassemble, ensuring seals are snug and the unit is dry before use.
Tip: Wait until all components are fully dry before refilling with water.
FAQ
Can I use bleach to clean a humidifier?
Bleach is not recommended for most humidifiers, including Pure Enrichment models, because it can damage plastics and leave harmful residues. Use vinegar and mild soap instead.
Bleach is generally not recommended for humidifiers. Use vinegar and mild soap for safe cleaning.
How often should I clean my humidifier?
Perform a basic clean weekly, and a deeper clean monthly or when you notice buildup or odors. Always adjust based on water hardness and usage.
Clean weekly, and do a deeper clean monthly or if you notice buildup.
Can I clean while the tank is full?
No. Unplug, drain, and remove the tank before cleaning to avoid electric shock and water damage.
Don’t clean with water in the tank—unplug and drain first.
Is distilled water necessary for maintenance?
Distilled water helps minimize mineral buildup, but it is not mandatory. If you use tap water, expect more frequent cleaning.
Distilled water helps reduce buildup, but you can use tap water with more frequent cleaning.
What if I see mold in the tank?
If you see mold, discard the tank if possible and clean thoroughly with vinegar. Dry completely before reuse and replace if cracking occurs.
If you spot mold, clean thoroughly with vinegar and dry completely before reuse.
Watch Video
The Essentials
- Unplug and drain before cleaning.
- Use vinegar and mild soap for safe mineral removal.
- Rinse thoroughly and dry completely after each clean.
- Create a regular cleaning schedule to prevent buildup.
- Follow model-specific guidance and avoid harsh chemicals.