Why is My Humidifier Not Working? A Practical Troubleshooting Guide
Facing a non-working humidifier? HumidifierBasics' urgent, step-by-step guide helps you diagnose and fix common issues, from power and water to filters and mineral buildup. Learn quick checks, safety tips, and maintenance to restore comfort fast.

Quick fix: Most humidifier failures start with a simple power issue, dirty filter, or low water level. Check the power outlet and switch, inspect the water reservoir for leaks, and replace a clogged filter. If it’s an ultrasonic model, clean the transducer plate. With these basics, you’ll often revive airflow and humidity within minutes.
Why 'why is my humidifier not working' matters
A non-working humidifier can disrupt comfort, worsen dry skin, and irritate nasal passages in winter. When readers search for why is my humidifier not working, they want practical, actionable steps that don’t require professional help. According to HumidifierBasics, most issues start with simple, checkable causes rather than mysterious faults hidden inside the unit. In this guide we’ll cover the most common culprits, how to verify each one, and how to fix them safely. You’ll learn to distinguish between a power problem, a water supply issue, and something that requires a deeper maintenance routine. We’ll also outline maintenance habits that prevent repeat failures, keeping your home’s air quality stable. The goal is to restore humidity quickly while avoiding safety hazards or expensive repairs. If you own multiple devices, follow the same checklist for each unit to compare performance and identify inconsistencies.
Common causes at a glance
When a humidifier stops working, the root causes usually fall into a few buckets. First is power: a loose connection, tripped breaker, or an always-off switch can prevent any mist. Second is water: a reservoir that’s empty, not seated properly, or filled with water of the wrong quantity can stop production. Third is filtration: dirty or clogged filters reduce airflow and trigger safety shutoffs. Fourth is mineral buildup: hard water creates scale that blocks the mist outlet and shortens component life. Fifth is sensors or controls: a misaligned lid, faulty humidistat, or non-responsive control panel can prevent operation. Finally, mechanical wear like a failing pump or transducer can cause intermittent performance. By understanding these categories, you can quickly triage issues without guessing. Remember to document what you test so you don’t repeat steps. HumidifierBasics models and brands vary, but the fundamental checks stay the same.
Quick-at-a-glance diagnostic signs
Look for obvious red flags: no steam or mist, unusual noises, or a strong odor near the unit. If the unit runs but produces little mist, the issue is likely water or mineral-related rather than a completely failed device. A flickering display or a panel that won’t respond often signals an electronics or control problem. If you notice leaks around the reservoir, there may be a seal or gasket issue. For ultrasonic models, a dry, cracked sound can indicate a damaged transducer; for warm-mist units, a heater plate issue might be responsible. Environmental cues matter too: a room remains dry despite operation suggests insufficient humidity output or miscalibration. Throughout diagnostics, verify the water level, reseat connections, and ensure the power outlet maintains a steady supply. By tracking symptoms and correlating them with the checklist, you’ll pinpoint the likely cause faster. HumidifierBasics emphasizes sticking to simple checks first to avoid unnecessary part swaps.
How power, water, and filtration interact
A humidifier relies on three core systems working in harmony: a live power source, a clean water supply, and free airflow through a filter or wicking mechanism. If any one part falters, the entire unit can underperform or shut down. For example, a clogged filter restricts airflow and may trigger a safety shutoff; a reservoir that's not seated correctly can cause leaks and air ingress that prevents mist formation; a loose cord can interrupt power mid-cycle. This section helps you visualize the flow of operations and why consecutive small issues stall the device. Regularly inspecting these subsystems makes detection faster and cheaper, especially when you compare multiple units in the same living space. HumidifierBasics recommends keeping a simple checklist handy so you don’t miss critical steps during busy days.
Preventive maintenance to prevent future failures
Regular upkeep is the best defense against “not working” moments. Start with a monthly cleaning routine that removes mineral deposits, mold, and residue. Use manufacturer-recommended cleaners or a mild vinegar solution for mineral scale, then rinse thoroughly. Replace filters as specified by the model’s user guide, ideally every 1–3 months depending on usage and water quality. If you use hard water, consider distilled water to reduce scale buildup and prolong component life. Always dry the reservoir completely before storage or reassembly to prevent mold growth. Finally, store the unit in a dry area and inspect seals and gaskets before long breaks in use. These steps keep your humidifier performing consistently and extend its lifespan.
When to call a professional
Some issues require expertise beyond routine maintenance, especially electrical faults or persistent failures after exhaustive DIY troubleshooting. If you notice burning smells, overheating, exposed wiring, leaks that won’t stop, or a unit that no longer powers on despite clean checks, seek professional help. A technician can test internal components such as the pump, heater plate, or transducer with specialized tools and ensure electrical safety compliance. The HumidifierBasics Team recommends not attempting high-risk repairs that could void warranties or pose safety hazards. If you’re unsure, it’s safer to get a professional assessment rather than keep guessing.
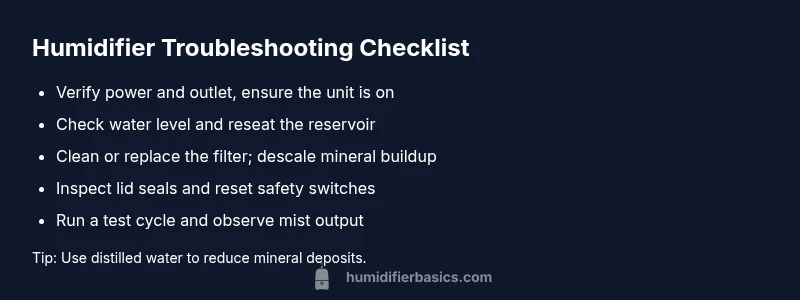
Steps
Estimated time: 25-45 minutes
- 1
Check power and outlet
Unplug the unit, inspect the power cord for cuts or wear, and plug into a known-good outlet. If your model has a power switch, ensure it is ON and the display lights up. This quick check catches the most common start-up problems.
Tip: Test with a lamp or another small appliance to confirm the outlet is working. - 2
Inspect water level and reservoir seating
Open the reservoir and verify it is filled to the recommended level. Reseat the tank securely so seals are intact and there are no gaps that could allow air leaks. A mis-seated reservoir is a frequent cause of no mist.
Tip: Avoid overfilling; follow the manufacturer’s minimum and maximum marks. - 3
Clean or replace the filter
Remove the filter and inspect for visible clogs or mineral deposits. Clean according to the model instructions or replace if it’s worn. This step restores airflow and prevents buildup that blocks mist output.
Tip: Use distilled water going forward to minimize mineral buildup. - 4
Descale mineral buildup
For mineral scale, run a vinegar solution through the system or use a manufacturer-approved descaler. Rinse thoroughly until no taste or odor remains before reassembling. This keeps paths clear for proper mist production.
Tip: Rinse until all vinegar smell is gone to avoid mist discoloration. - 5
Check lid seals and safety switches
Ensure the lid is properly closed and seals are intact. Some models have sensors that shut down the unit if the lid is loose or misaligned. Confirm all safety features are reset after cleaning.
Tip: Wipe gaskets with a damp cloth and dry completely before reuse. - 6
Test the unit and observe mist output
Plug back in and run a short test cycle on the lowest setting. Watch for consistent mist and a stable display. If output returns, gradually raise humidity target and monitor for fluctuations.
Tip: Document results and compare performance with other devices if you have them.
Diagnosis: Humidifier not producing moisture or zero output
Possible Causes
- highPower supply issue (outlet, cord, switch)
- highWater supply problem (empty tank, incorrect fill)
- highClogged filter or mineral buildup
- mediumSafety shutoff triggered (lid misalignment, overflow)
- lowDamaged or worn components (pump, heater, transducer)
Fixes
- easyTest outlet with a known-working device; inspect power switch and cord connections
- easyRefill water to recommended level and ensure reservoir is seated properly
- easyClean or replace filters; descale mineral buildup per manufacturer's instructions
- easyCheck lid seals and overflow sensors; reset or reseat components
- hardInspect internal components or consult service if power or pump is damaged
FAQ
Why is my humidifier not turning on?
Start with power checks: test the outlet and ensure the power cord and switch are intact. If the display stays dark after these checks, inspect the lid and seals for proper seating, then verify any safety interlocks. If it still won’t power on, this may indicate a hardware issue that requires professional help.
First check the outlet and power cord, then verify the lid seals and safety interlocks. If it still won’t power on, you may need a professional assessment.
Why is there little to no mist?
Low or no mist usually points to water level, a clogged filter, or mineral buildup. Refill to the recommended level, clean or replace the filter, and descale mineral deposits. If mineral buildup is heavy, consider using distilled water to prevent recurrence.
Low mist almost always comes from water or mineral buildup. Check water, clean or replace the filter, and descale minerals.
How often should I clean my humidifier?
Clean the unit at least once a month, or more often with heavy use or hard water. Empty, dry, and disinfect or descale between uses to prevent mold and bacteria. Regular cleaning extends the life of filters and internal parts.
Clean your humidifier at least monthly, more often with heavy use or hard water.
Can hard water damage my humidifier?
Yes. Hard water leaves mineral deposits that clog paths and reduce efficiency. Use distilled water when possible and descale regularly to minimize deterioration and maintain consistent output.
Hard water can clog the system; use distilled water and descale often.
When should I replace the humidifier?
If you notice persistent failure after thorough DIY troubleshooting, persistent leaks, overheating, damaged components, or if the device is from an older generation with worn seals, consider replacement. Check warranty terms and manufacturer's guidance.
If troubleshooting doesn’t fix it and there are leaks or damage, replacement may be best.
Watch Video
The Essentials
- Verify power before anything else.
- Check water level and reservoir seating for proper operation.
- Clean or replace filters to restore airflow and mist.
- Schedule regular maintenance to prevent future failures.