How to Wash a Humidifier: Step-by-Step Guide
Learn how to wash a humidifier safely with HumidifierBasics. This guide covers cleaning solutions, step-by-step procedures, and maintenance tips to prevent mold, mineral buildup, and odors for healthier indoor air.

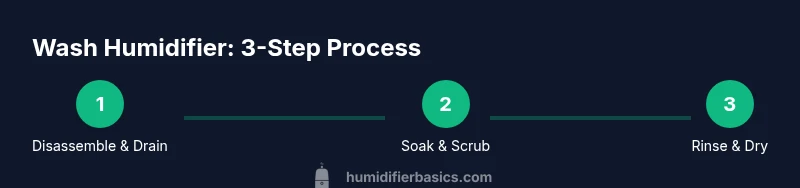
To wash a humidifier safely, disassemble it fully, empty the tank, and rinse with warm water. Use a vinegar soak or a mild bleach solution to descale mineral buildup and sanitize the base. Rinse thoroughly, dry completely, and reassemble before using fresh water. Regular cleaning prevents mold, odors, and mineral deposits.
Why Washing Your Humidifier Matters
Regular cleaning of a wash humidifier is essential for maintaining healthy air quality in your home. When mineral deposits, mold, or bacteria are left to accumulate, the humidifier can emit indoor air that irritates the respiratory system, worsens allergies, or contributes to coughing and throat irritation. According to HumidifierBasics, a clean humidifier helps reduce these risks and prolongs the device’s lifespan by protecting seals, gaskets, and water pathways from corrosive buildup. In everyday use, damp compartments can become a breeding ground for mold if they are not dried thoroughly after each cleaning. A simple routine—even if done with basic household cleaners—can make a meaningful difference in comfort and health in bedrooms, living rooms, and nurseries. The goal is to remove contaminants on all surfaces that contact water and air, while leaving no lingering residues that could be dispersed during operation.
Key takeaway: consistent cleaning supports air quality and device longevity and aligns with practical guidance from HumidifierBasics.
When to Wash and How Often
The frequency of cleaning depends on how often you run the humidifier and the type of water you use. If you operate the device daily, a quick rinse and refill with clean water between uses can help; a full wash should be performed on a regular schedule. Humidifier maintenance is easier when you adopt a routine—for example, a thorough cleaning every week or two, and more often if you notice odors, visible mineral deposits, or clouding inside the tank. Even with distilled water, periodic deep cleaning prevents mineral buildup and reduces the risk of microbial growth. As a rule of thumb, allow time for a complete dry-out between cleans so that no moisture remains in any reservoir or base. The HumidifierBasics team recommends setting a cleaning cadence that suits your household’s usage and air quality goals, and sticking to it for best results.
Brand context: this approach keeps your living environment healthier while extending the life of your humidifier.
Cleaning Solutions: Vinegar, Bleach, and Alternatives
Two common cleaning agents are white vinegar and household bleach, each with advantages and caveats. Vinegar is a gentle descaler that can break down mineral buildup without harsh chemistry, making it a good first choice for many plastic tanks and bases. Bleach is more aggressive and can sanitize effectively when used carefully and thoroughly rinsed, but it may degrade certain plastics or seals over time. Hydrogen peroxide is another sanitizer option that can be effective with shorter contact times and fewer odors. Whatever you choose, avoid mixing cleaners together and always rinse repeatedly until there is no trace of the cleaning solution. For sensitive interiors or when in doubt, start with vinegar and consult your humidifier’s user manual before applying bleach or peroxide. In humidifier brands designed for essential oils, skip oils entirely during cleaning unless the manufacturer explicitly allows them, as oils can clog pathways and void warranties.
Tip: use a dedicated soaking container to immerse parts and a soft brush to lift mineral deposits without scratching surfaces.
Choosing the Right Cleaning Method for Your Humidifier Type
Humidifiers come in several types, including ultrasonic, evaporative, and steam-based models. Ultrasonic units often have plastic tanks and sealed bases that respond well to vinegar or hydrogen peroxide, but you should verify compatibility with your model. Evaporative models distribute minerals from their wick filters into the mist; cleaning these components may require removing and flushing filters with water and mild soap, as directed by the manufacturer. Steam humidifiers have metal or reflective parts and may tolerate different cleaners; always follow the manual. When in doubt, start with a gentle solution and a soft brush, test on a small area, and rinse thoroughly. The goal is to remove buildup without damaging seals or coatings that keep the unit water-tight and safe.
Note: Never use abrasive scrubbers or scouring powders on plastic components, as these can scratch and harbor microbes.
Preventing Mold and Mineral Buildup Between Cleanings
To minimize mold and mineral deposits between cleanings, avoid leaving water in the tank for extended periods. Empty the reservoir daily if your usage is seasonal or intermittent, and dry all components completely after cleaning. Distilled water can reduce mineral traces and clouding compared with tap water, though it's not a substitute for cleaning; it simply lowers the rate of mineral buildup. Store humidifiers with their tanks empty and dry, and keep them in a dry, ventilated area. Regular inspection of seals and gaskets helps catch wear before leaks develop. By maintaining dryness and using appropriate water, you can enjoy consistent humidity without the downsides of microbial growth or mineral residue.
Maintenance Tips for Longevity and Safe Use
Consistent maintenance involves more than cleaning. Replace any worn filters or wick components as recommended by the manufacturer, and inspect power cords and plugs for signs of wear. When you reassemble, ensure all seals are seated correctly to prevent leaks. If your model uses a removable reservoir, clean the cap and gasket as well as the main tank. After washing, run a quick rinse cycle with clean water to remove any residual cleaner before filling with water for normal use. Keeping a simple log or calendar reminder can help ensure you don’t skip routine hygiene tasks, which in turn supports air quality and equipment reliability.
Practical habit: treat cleaning like seasonal maintenance, not only when symptoms of dirt show up.
Common Mistakes to Avoid
Common errors include using strong cleaners not compatible with plastic parts, neglecting to dry parts completely, and skipping the rinse due to time pressure. Never mix cleaners, and avoid letting vinegar sit on metal components for long periods, as it can corrode certain metals. Do not operate the unit while any part is still wet or while the base is exposed to cleaning solutions. Finally, avoid relying solely on a rinse; a proper soak and scrub ensure mineral deposits and biofilm are removed. Following these tips can prevent odor development, mold growth, and poor mist quality.
Extra Tips for Small Spaces and Pet Owners
In compact living spaces, placing the humidifier away from walls and bedding helps promote better air distribution and reduces damp spots that can encourage mold. If you share your home with pets, ensure that cleaning products are stored securely and that pets are kept away during the cleaning process. After a wash, ventilate the room for a short period to disperse any lingering vapors and ensure the device is fully dry before use. A quick check of the tank seals after reassembly will help prevent leaks that could affect nearby furnishings and floors.
Tools & Materials
- Distilled white vinegar (5%)(Descale mineral buildup; use full-strength or diluted as needed)
- Hydrogen peroxide (3%)(Sanitizing alternative to bleach)
- Mild dish soap(Gentle cleaning agent for bases and tanks)
- Soft-bristled brush (toothbrush size)(Scrub crevices and tubing without scratching)
- Microfiber cloths(Wipe and dry surfaces; lint-free)
- Gloves (latex or nitrile)(Protect hands from cleaners)
- Distilled water for rinsing(Rinse final water to minimize minerals)
- Non-metal soaking container(Submerge parts without damaging them)
- Towels or old rags(Catch drips and help dry components)
Steps
Estimated time: 30-45 minutes
- 1
Gather materials and prep workspace
Collect all cleaning supplies and clear a sink or tub. Lay towels to catch spills and unplug the humidifier from power. Remove loose components and organize parts so you won’t lose small pieces.
Tip: Have a photo or note of how parts fit together to aid reassembly. - 2
Disassemble and drain
Fully take apart the tank, base, and any removable filters or wicks. Empty any remaining water and set parts on a clean surface. This makes every component accessible for cleaning and drying.
Tip: Keep track of screws and seals in separate labeled containers. - 3
Rinse with warm water
Rinse the tank and base under warm running water to remove loose debris. Avoid high heat that could warp seals. Gently shake to loosen buildup without forcing cleaners into hard-to-reach areas.
Tip: Use a soft brush to remove stubborn deposits from corners. - 4
Prepare cleaning solution and soak
Mix vinegar and water in a 1:1 ratio for descaling, or use a diluted hydrogen peroxide solution. Submerge the tank and any removable components and let soak for about 10–20 minutes to loosen mineral buildup.
Tip: Do not soak electrical components or the base where water may intrude. - 5
Scrub and inspect
Scrub all surfaces with the soft brush and rinse again. Check gaskets, seals, and the tank’s interior for remaining deposits. Repeat soaking and scrubbing if necessary.
Tip: Pay special attention to corners, seams, and the tip where mist exits. - 6
Rinse thoroughly and dry
Rinse all parts with distilled water until no cleaner residue remains. Pat dry with a microfiber cloth and air-dry the components completely on a clean surface.
Tip: Do not reassemble until every part is fully dry to prevent mold. - 7
Reassemble and test
Place components back together following your earlier notes or photos. Run the humidifier with clean water for a short cycle to ensure there are no leaks and the device operates smoothly.
Tip: Inspect the water path for any signs of trapped air after reassembly. - 8
Store properly until next use
Store the humidifier in a dry, ventilated area with the reservoir empty. Keep it away from direct sunlight and heat sources to prevent material degradation over time.
Tip: Label storage with the next cleaning date to maintain cadence.
FAQ
How often should I wash a humidifier?
Aim to perform a thorough cleaning at least weekly during regular use, and more often if you notice odors or mineral buildup. Always unplug before cleaning.
Clean your humidifier at least once a week, or more often if you smell anything unusual. Always unplug first.
Can I use bleach to clean my humidifier?
Bleach can be effective for sanitizing, but only if your device’s materials tolerate it and you rinse thoroughly. Vinegar or hydrogen peroxide are safer first-line options for many models.
Bleach can be used in some cases, but always rinse well and prefer vinegar or hydrogen peroxide if you’re uncertain.
Is it safe to use essential oils in a cleaned humidifier?
Most humidifiers are not designed for essential oils; oils can clog components and void warranties. Clean after any use and avoid oils unless the manufacturer specifies compatibility.
Most humidifiers shouldn’t run essential oils. If in doubt, skip the oils and stick to water during operation.
Will vinegar damage my humidifier parts?
Vinegar is generally safe for many plastics, but check your model’s manual. Prolonged exposure or vinegar on metal parts can cause corrosion in some designs.
Vinegar is usually fine for many parts, but always check your manual first and avoid prolonged exposure on metal pieces.
How should I dry the humidifier after cleaning?
Dry all parts completely with a clean towel and allow air-drying before reassembling. Do not store a wet unit, which can foster mold growth.
Dry every part fully before you put it back together and store it dry as well.
What maintenance helps prevent mold between cleanings?
Empty and dry the reservoir after use, use distilled water if possible, and inspect seals regularly for signs of wear that could harbor mold.
Keep the reservoir dry after use and check seals regularly to avoid mold around seams.
Watch Video
The Essentials
- Disassemble fully and clean every component.
- Vinegar helps descale; rinse thoroughly after use.
- Dry all parts completely before reassembly.
- Establish a regular cleaning cadence for safety and performance.