How to Get Rid of Musty Smell in Humidifiers
Learn how to get rid of musty smell in humidifier with practical cleaning, drying, and maintenance steps to prevent mold growth and keep indoor air fresh.

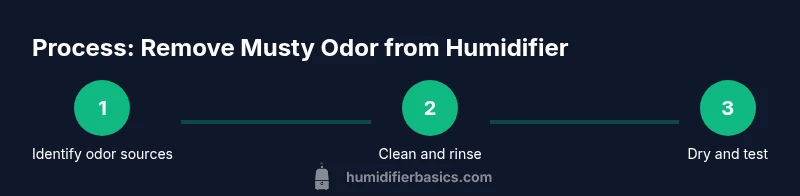
Goal: Get rid of musty smell in humidifier and prevent mold growth. This quick guide shows you how to identify odor sources, clean all parts, dry thoroughly, sanitize, and maintain the unit to keep indoor air fresh. You’ll need safe cleaning supplies and the manufacturer’s guidelines. HumidifierBasics supports practical, low-cost steps homeowners can follow to sustain better air quality.
Why musty smells occur in humidifiers
Musty odors in humidifiers aren't a mystery; they're typically the result of lingering moisture that creates a friendly home for mold, mildew, and bacteria. When water sits in the tank or base for extended periods, micro-organisms begin to multiply, releasing odor compounds that combine with the humid air you breathe. Mineral deposits from hard water can trap these compounds, concentrating smells in nooks and crevices. Understanding these sources helps you target cleaning steps and avoid a return of the odor.
According to HumidifierBasics, the most common culprits are water residue in hard-to-reach areas, dirty or clogged filters, and mineral buildup on tank walls. Recognizing the signs—faint mustiness after a cycle, slimy film on surfaces, or a persistent damp feel—lets you act before mold takes hold. This section lays the groundwork for a practical, non-toxic cleaning routine that reduces odors without damaging your device.
Common sources of musty odors in humidifiers
Odors usually originate from four interrelated sources. First, water that remains in the reservoir or tubing fosters microbial growth; second, mineral deposits from hard water leave crusty residue that traps odors; third, dirty filters and wick materials harbor microbial colonies; and fourth, condensation on warm surfaces can encourage mold growth when the unit is stored or unused. HumidifierBasics analysis shows that addressing residue, filters, and mineral buildup yields the biggest improvement in odor reduction. If you detect odors even after cleaning, examine the hoses or connectors for hidden leaks or pooled water. A quick wipe-down of the housing and a thorough rinse of every detachable part often resolves most musty smells.
Cleaning essentials and safety precautions
Before you touch the humidifier, unplug it and remove any water from the tank. Gather safe cleaning tools: a soft-bristle brush, microfiber cloth, mild dish soap, and white vinegar for mineral deposits. Never mix cleaners; always rinse surfaces thoroughly after cleaning. Wear gloves if you have sensitive skin, and ensure good ventilation during cleaning. Check the user manual for any material warnings—some plastics and seals can't tolerate aggressive chemicals. Keep children and pets away while you're cleaning to avoid accidental exposure. By following these safety steps, you reduce the risk of chemical exposure and prevent damage to the device.
Step-by-step cleaning and sanitation plan
This section provides a practical framework you can follow. While the exact steps are enumerated in the dedicated STEP-BY-STEP block, this overview helps you prepare. Start by emptying and unplugging the unit, then disassemble any removable parts such as tanks, lids, and filters. Soak mineral-coated surfaces in a vinegar solution to loosen deposits, scrub gently with a soft brush, then rinse everything thoroughly. After rinsing, sanitize with a manufacturer-approved sanitizer or a diluted hydrogen peroxide solution, and rinse again. Finally, dry all components completely before reassembling and refilling with clean water. Maintaining a clean, dry reservoir between uses prevents musty odors from forming. The HumidifierBasics team emphasizes following the manufacturer’s instructions for any sanitizer or disinfectant used.
How to prevent musty smell from returning
Prevention hinges on routine, conscientious maintenance. Run the unit with distilled water when possible, and empty and dry the reservoir after each use to avoid standing water. Clean weekly during active seasons or high humidity, and immediately after you notice any odor. Keep components dry and stored in a dry, ventilated area. Replace filters on the schedule recommended by the manufacturer, and consider using a humidifier cleaning solution designed for your model. These practices reduce microbial growth and mineral build-up, which are the main drivers of musty odors in humidifiers.
When to replace humidifier parts or unit
If odor persists after thorough cleaning and sanitizing, inspect for hidden mold in inaccessible channels or cracks that are not easily cleaned. Some parts, like seals, gaskets, or deeper tubing, may harbor biofilm that resists standard washing. In cases where repeated odors return despite maintenance, or if the plastic shows discoloration or cracking, replacement may be the most practical option. Consult the manufacturer’s guidance for your model, and consider replacing the entire unit if the odor recurs after every cleaning cycle. Regular evaluation prevents ongoing hassle and preserves indoor air quality.
Quick-start checklist for immediate action
If you need fast results, use this starter checklist to kick off the process today:
- Unplug the humidifier and drain all water
- Disassemble according to the manual and gather cleaning tools
- Soak mineral deposits with vinegar and scrub gently
- Rinse thoroughly and sanitize as directed
- Dry completely before reassembly
- Reassemble, fill with distilled water, and run a short test cycle to ensure odor is gone
- Schedule weekly cleanings and regular filter changes to prevent recurrence
Tools & Materials
- White vinegar (household) for mineral deposits(Dilute for soaking; avoid undiluted application on plastics)
- Distilled water(Use for rinsing and testing; reduces mineral buildup)
- Soft-bristle brush or sponge(Non-abrasive to protect tank walls)
- Microfiber cloth(Drying and wiping surfaces after cleaning)
- Mild dish soap(Gentle cleaner for exterior housing and removable parts)
- Manufacturer-approved sanitizer or 3% hydrogen peroxide(Follow label directions; not all models tolerate stronger chemicals)
Steps
Estimated time: 45-60 minutes
- 1
Unplug and drain
Power off the unit and remove all water from the reservoir. This prevents spills and keeps you safe while cleaning. Detach any removable components that you will clean separately.
Tip: Keep the unit unplugged until all parts are thoroughly dry. - 2
Disassemble and inspect
Take apart the tank, lid, filters, and any detachable tubing. Look for visible mold, slime, or mineral scale. Take photos if needed to help with reassembly.
Tip: Do not force parts; refer to the user manual for disassembly guidance. - 3
Soak mineral deposits
Submerge removable parts in a vinegar solution to loosen hard water deposits. Let soak for several minutes, then scrub gently with a soft brush.
Tip: Avoid contact with electronic components during soaking. - 4
Scrub and rinse
Gently scrub all surfaces, focusing on joints and corners where residue hides. Rinse each part thoroughly with distilled water until no cleaning scent remains.
Tip: Rinse until the water runs clear to remove all vinegar traces. - 5
Sanitize and re-rinse
Apply a manufacturer-approved sanitizer or a diluted hydrogen peroxide solution, then rinse again to remove chemical residues. Ensure every part is clean and free of moisture.
Tip: Follow the product’s recommended contact time for sanitizers. - 6
Dry completely
Air-dry all parts on a clean surface or towel until every piece is fully dry. Moisture remaining in crevices can foster new odors.
Tip: Sunlight can help dry surfaces, but avoid direct intense heat that could warp plastics. - 7
Reassemble and test
Reassemble the humidifier, fill with distilled water, and run a short test cycle. Check for odor; if any remains, repeat cleaning steps or consider parts replacement.
Tip: Keep a regular cleaning schedule to prevent odor from returning.
FAQ
What causes a musty smell in a humidifier?
Musty odors usually come from mold or mildew in stagnant water, mineral buildup, or contaminated filters. Odors can also arise from trapped moisture in tubing and hard-to-reach corners. Address these sources with thorough cleaning and drying.
Most musty smells come from mold or mineral buildup in stagnant water and hard-to-reach areas. Clean and dry all parts to stop the odor.
Can I use bleach to clean my humidifier?
Bleach can be effective for disinfection if the manufacturer allows it. Many models advise against bleach due to fumes or material compatibility. Always follow the user manual when choosing a sanitizer.
Bleach may be too harsh for some humidifiers; check the manual before using it.
How often should I clean a humidifier to prevent odor?
Clean at least weekly during active use and after any odor is detected. Increase frequency with high humidity or frequent use to prevent buildup.
Clean weekly or more often if you notice any odor.
Are certain humidifiers more prone to musty smells?
Small tanks, complex tubing, or models with porous filters can trap moisture and support mold growth more easily than straightforward designs. In humid environments, odor risk rises.
Smaller tanks and more complex designs can be more prone to odors.
When should I replace the humidifier if odor persists?
If odor remains after thorough cleaning and sanitizing, consider replacement, especially if mold has spread or parts are degraded. Replacing ensures continued air quality and safety.
If odor sticks around after cleaning, replacement is likely needed.
Watch Video
The Essentials
- Identify odor sources and moisture traps.
- Clean, rinse, and sanitize all parts thoroughly.
- Dry all components completely to prevent mold.
- Maintain a regular cleaning schedule to prevent recurrence.