How to Clean a Humidifier Without Filter: A Step-by-Step Guide
Learn a practical, chemical-free method to clean a humidifier without a filter. This guide covers safety, essential tools, a clear step-by-step process, and maintenance tips to keep your indoor air clean and healthier.

In this guide, you will learn how to clean a humidifier without a filter to prevent mineral buildup and mold. You’ll disassemble the units, sanitize reservoirs, clean components with vinegar or peroxide, rinse thoroughly, and dry before reassembly. This method applies to most ultrasonic and evaporative humidifiers and emphasizes safe, chemical-free steps.
Why cleaning a filter-free humidifier matters
According to HumidifierBasics, filter-free humidifiers rely on water-only pathways to add moisture to air. Without a filter to trap minerals and biofilm, mineral deposits and microbial growth can accumulate more quickly if the unit is neglected. Regular cleaning helps prevent white powdery residue on furniture and reduces the risk of mold and bacteria circulating in the room. This is especially important in bedrooms and nurseries where occupants sleep or rest. People often underestimate the impact of mineral buildup from hard water; even a small film can reduce humidifier efficiency and lead to odors or clogged nozzles. A clean humidifier also runs more quietly and uses energy more efficiently because deposits can hamper airflow. The HumidifierBasics team recommends establishing a simple cleaning cadence: a quick rinse after each use, a deeper cleaning weekly if the unit is in heavy rotation, and a full sanitizing every couple of weeks for shared devices. Maintaining a filter-free design with consistent care can directly improve air quality and comfort in your living spaces.
Safety and prep before cleaning
Before you touch any part of a humidifier, unplug the unit and remove all water from the tank. Use a clean, dry workspace to minimize contamination. If your device uses small screws or detachable pieces, lay them out in an organized tray to prevent misplacing parts. Wear gloves if you have sensitive skin or if you are using cleaning agents, and ensure good ventilation in the room. Keeping the power unplugged and the tank empty reduces the risk of electrical shock and makes thorough cleaning possible. If your humidifier has a sealed base, consult the user manual for disassembly instructions to avoid damaging seals. Humidity-friendly households should reserve a dedicated cleaning space so residues do not transfer to kitchen or dining surfaces. Finally, read the breather vents and nozzle areas for any visible build-up and plan to address those areas first during the cleaning process.
Safe cleaning agents for filter-free humidifiers
For mineral deposits, white vinegar is a proven, consumer-friendly option. A 1:1 vinegar-to-water soak helps dissolve scale without harsh chemicals. After soaking, use a soft brush to dislodge encrusted deposits and a microfiber cloth to wipe surfaces. For disinfection, a brief rinse with 3% hydrogen peroxide can be effective; never mix vinegar with bleach or other cleaners, as dangerous fumes can form. If your water is especially hard, you may need to repeat the cleaning cycle or choose a manufacturer-approved cleaning method. Always rinse thoroughly until the vinegar odor is gone and the tank smells clean. When in doubt, minimize chemical use and prioritize thorough rinsing and drying to safeguard air quality in living spaces.
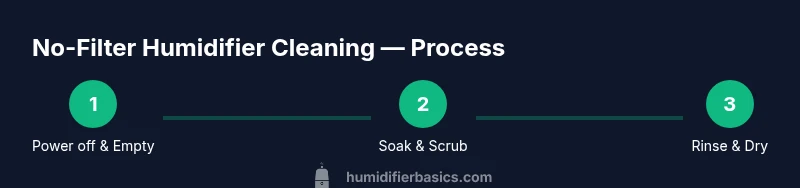
No-filter cleaning workflow overview
A filter-free humidifier requires a careful, repeatable routine to maintain performance. The typical workflow involves emptying water, disassembling removable parts, soaking mineral-laden components, scrubbing away deposits, rinsing until all residues disappear, optional disinfection, and complete drying before reassembly. This approach minimizes mineral buildup and biofilm formation, two common issues in filterless designs. For households with sensitive occupants or pets, consider adding an extra rinse step to ensure no residual cleaners remain. While the exact steps can vary by model, the core principles—disassembly, safe cleaners, thorough rinsing, and full drying—remain consistent across most devices. Refer to your model’s manual if a specific step or part looks unfamiliar, and always prioritize safety when handling hot water or steam settings during use.
Aftercare: drying, storage, and maintenance
Post-cleaning, allow each component to dry completely before reassembly to prevent residual moisture from fostering mold growth. Place parts on a clean towel or drying rack in a well-ventilated area. When reassembling, verify that seals are intact and that no gaps exist where moisture could escape. Regular maintenance includes setting a reminder to rinse and dry the tank after each use, performing a deeper cleaning weekly, and sanitizing every couple of weeks for high-use devices. If mineral buildup recurs quickly, consider using distilled water to reduce scale formation and inspecting the humidifier’s nozzle and air pathway for clogs. By integrating these habits, you’ll maintain better air quality, reduce odors, and extend the life of your device. HumidifierBasics emphasizes that consistency matters as much as technique in filter-free cleaning routines.
Authority sources
- Authority sources and further reading:
- EPA: https://www.epa.gov/indoor-air-quality-iaq/humidifiers-and-dehumidifiers
- NIH: https://www.nih.gov
- WHO: https://www.who.int
Tools & Materials
- distilled water(Use distilled or demineralized water during cleaning to reduce mineral deposits.)
- White vinegar (5% acidity)(Use for mineral deposit dissolution; do not mix with bleach.)
- 3% hydrogen peroxide(For optional disinfection after cleaning; follow with thorough rinsing.)
- Soft-bristled brush(Non-abrasive to avoid scratching interior surfaces.)
- Soft microfiber cloth(For wiping and drying without leaving lint.)
- Measuring cup or pitcher(Helpful for accurate vinegar-to-water ratios.)
- Small sponge or cotton swabs(Everyday reach for tight corners.)
- Gloves(Protect hands when handling cleaners.)
- Towel or drying rack(Air-dry parts completely before reassembly.)
Steps
Estimated time: 30-45 minutes
- 1
Power off and empty
Unplug the humidifier and pour out any remaining water. Detach the tank where possible and place parts on a clean surface. This prevents electrical hazards and ensures no residual moisture interferes with cleaning.
Tip: Keep the tank lid and base in separate, labeled sections to avoid mix-ups during reassembly. - 2
Disassemble the unit
Remove the tank, lid, and any nozzle assemblies that are designed to detach. A clean, organized workspace helps prevent lost screws and damaged seals. Do not force parts; consult the manual if something feels stubborn.
Tip: Take photos during disassembly so you can reference them when reassembling. - 3
Prepare cleaning solution
Prepare a 1:1 vinegar-to-water solution in a basin for soaking components. This mix helps dissolve mineral scale without harsh chemicals. If the manual specifies a different ratio, follow that guidance.
Tip: Label your basin and avoid mixing cleaners in the same container. - 4
Soak and loosen deposits
Submerge removable parts in the vinegar solution for 10–20 minutes to loosen buildup. Gently swirl to reach corners and avoid aggressive scrubbing that could scratch surfaces.
Tip: If deposits persist, repeat soaking or switch to a fresh batch of cleaning solution. - 5
Scrub away mineral deposits
Use a soft-bristled brush to scrub interior surfaces and hard-to-reach areas. Rinse the brush frequently and switch to cotton swabs for tight spots. Avoid abrasive tools that can damage seals.
Tip: Pay attention to the tank seams and outlet paths where scale loves to hide. - 6
Rinse thoroughly
Rinse all components with clean water until the vinegar smell is gone and the water runs clear. Residual cleaning agents or odors can affect air quality after reassembly.
Tip: Shake off excess water and place components on a dry towel to air dry briefly before final drying. - 7
Disinfect (optional)
If you want extra disinfection, apply a small amount of 3% hydrogen peroxide to surfaces and leave for 5–10 minutes, then rinse again. Do not mix hydrogen peroxide with vinegar or other cleaners.
Tip: Ventilate the room well during disinfection and avoid breathing fumes directly. - 8
Dry completely and reassemble
Dry all parts completely with a clean towel, then allow air-drying on a rack before reassembling. Reattach components in the order you documented or photographed earlier.
Tip: Ensure there are no remaining moisture pockets before plugging in and using the unit again.
FAQ
Is it safe to clean a humidifier without a filter?
Yes, it is safe provided you unplug the unit, use safe cleaners like vinegar or hydrogen peroxide, and rinse thoroughly.
Yes, as long as you unplug the unit, use safe cleaners like vinegar or hydrogen peroxide, and rinse well.
What cleaning solutions work best for filter-free units?
White vinegar and hydrogen peroxide are commonly recommended. Avoid mixing cleaners and follow the manufacturer’s guidance.
Vinegar and hydrogen peroxide are safe options; avoid mixing cleaners and follow the manual.
How often should you clean a filterless humidifier?
Clean weekly with a deeper clean if the device is in frequent use; rinse after each cycle to remove residues.
Clean weekly, and rinse after each use to remove residues.
Why is drying important after cleaning?
Drying prevents mold and bacterial growth by removing residual moisture in all components.
Drying removes residual moisture, which helps prevent mold and bacteria.
Can I use a humidifier with a filter when cleaning without one?
Yes, but your cleaning steps will differ. Always refer to the user manual for model-specific guidance.
Yes, but follow your manual because steps differ for filter-equipped units.
When should I replace a filterless humidifier?
If you notice persistent odors, leaks, or persistent mineral buildup after cleaning, consider replacement.
If odors persist or it leaks after cleaning, replacement may be needed.
Watch Video
The Essentials
- Unplug and dry components before handling.
- Vinegar dissolves mineral buildup safely.
- Disinfect with hydrogen peroxide only, never with bleach after vinegar.
- Thorough rinsing and complete drying prevent mold and odors.