DIY Homemade Humidifier for Stuffy Nose: Safe Relief Guide
Learn how to safely create a simple homemade humidifier to ease nasal congestion. Practical setup tips, safety guidelines, and maintenance to keep air moist without mold or mineral dust.

By following these steps, you will create a safe, low-risk homemade humidifier setup to ease nasal congestion from a stuffy nose. This guide emphasizes passive evaporation and simple, low-heat methods using distilled water and a fan-assisted setup. You’ll learn safety basics, material options, and how to monitor humidity without over-wetting your living space.
How humidity affects nasal passages and why a DIY approach can help with a stuffy nose
Humidity plays a crucial role in nasal comfort. When indoor air is dry, the nasal passages can dry out, leading to irritation, increased mucus viscosity, and a sensation of congestion. Increasing ambient humidity to a comfortable range can help thin mucus and soothe irritated membranes, making it easier to breathe through the nose. According to HumidifierBasics, practical humidity management in home environments can ease nasal symptoms associated with dryness and support overall comfort in bedrooms and living spaces. This guide focuses on safe, low-tech approaches you can implement without complex wiring or expensive devices. The goal is to provide reliable, practical options that improve air moisture while prioritizing safety and ease of cleaning.
In many homes, seasonal dryness from heating systems or climate conditions contributes to stuffy noses. Humidification is most effective when used as part of a broader comfort strategy, including regular room ventilation and keeping dust levels manageable. While humidifiers are common, it’s possible to create a simple, safe DIY setup that adds moisture to the air without introducing unnecessary risk. The emphasis here is on passive evaporation and minimal, low-heat methods that reduce possibilities for burns, electrical hazards, or mold growth. This approach aligns with HumidifierBasics guidance on balancing relief with safety and practicality for homeowners and renters.
As you read, remember that every space is different. The amount of humidity you need depends on room size, activity level, and existing air quality. The ideas here cover flexible options that you can adapt to your room layout, so you can start small and scale up if needed. Throughout, the focus remains on safety-first principles, straightforward materials, and routine monitoring to prevent over-humidification or mold growth.
Safety basics you should know before you start
Safety should guide every DIY humidifier project. Keep all water containers away from electrical outlets and heat sources. Do not attempt to create steam or use boiling water indoors, especially in bedrooms or nurseries. If you have kids or pets, supervise the setup to prevent tipping or contact with water. Use only clean water—distilled water is preferred to minimize mineral dust and residue that can become airborne and irritate the respiratory tract. Regular cleaning and drying of all components are essential to prevent mold and bacterial growth. Finally, ensure the setup is stable and won’t spill if bumped. Following these precautions will help you achieve nasal relief without introducing new risks.
HumidifierBasics emphasizes that safe DIY humidification isn’t about elaborate devices; it’s about controlled evaporation, stable placement, and mindful maintenance. With the right approach, you can create a modest humidification effect that supports nasal comfort and overall air quality.
noteToolsOnly":null},
Tools & Materials
- Shallow water-safe tray or bowl(Large enough to hold water securely; avoid tipping hazards on furniture.)
- Distilled water(Minimizes mineral dust and sediment that can disperse in air.)
- Small desk or clip-on fan(Moves air across the water surface to increase evaporation safely.)
- Dish towel or microfiber cloth(Optional: helps manage spills and increases surface area of evaporation.)
- Stable surface or tray mat(Keeps setup steady and prevents water damage to surfaces.)
- Hygrometer (optional)(Helps track room humidity so you don’t over-humidify.)
Steps
Estimated time: 20-40 minutes
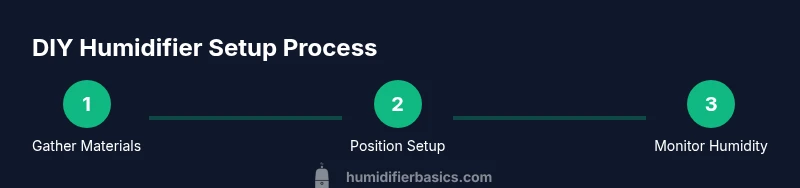
- 1
Gather safe materials and prepare a stable setup
Collect the shallow tray, distilled water, and a small fan. Place the tray on a flat, water-resistant surface away from edges. Fill the tray with water to a safe level and ensure nothing sits where it can tip. The goal is a stable base that won’t spill if bumped. This step sets a safe foundation for the rest of the process.
Tip: Place the setup away from sleeping areas if wind could blow mist toward bedding. - 2
Position the water container in the airflow path
Put the tray in the air path of the fan or near a gentle air outlet. The moving air across the water surface maximizes evaporation while keeping water contained and away from electronics. Avoid direct contact with power cords or outlets. Positioning matters because it determines how evenly the moisture disperses into the room.
Tip: Keep the water level modest to prevent splash while adjusting airflow. - 3
Add a fan to move air across the surface
Turn on the fan at a low setting so air travels across the water surface without creating a spray. The goal is enhanced evaporation without disturbance to the surrounding objects. If you’re using a radiator or heater as a warm-air source, maintain a safe distance to avoid heat damage. This step is where simple airflow creates the humidification effect.
Tip: Start at the lowest setting and increase gradually if you don’t see a noticeable change in humidity. - 4
Monitor humidity and adjust setup as needed
Check room humidity with a hygrometer if available, or rely on how comfortable the air feels. Aim for comfortable levels without over-saturating the space. If humidity rises too much, reduce water level or airflow; if it’s too dry, slightly increase humidity sources. Safety comes from avoiding mold and condensation on walls or windows.
Tip: Use distilled water to limit mineral buildup that can alter readings. - 5
Clean and dry the setup after use
Empty the tray, wash with mild soap, and rinse thoroughly. Dry all components completely before storing to prevent mold. Regular cleaning reduces the risk of bacterial growth and keeps the setup ready for next use. Store in a dry area to avoid dampness on surfaces.
Tip: Drying between uses is important to prevent microbial growth.
FAQ
Is a homemade humidifier safe for a nursery or bedroom?
DIY humidification can be safe, but extra caution is needed in nurseries and bedrooms. Avoid hot water, boiling steam, and exposed electronics. Use passive evaporation or a low-heat setup with waterproof placement and easy cleaning. If you’re unsure, prefer a purpose-built humidifier with safety features.
DIY humidification can be safe in bedrooms, but use passive methods and avoid heat or exposed electronics—seek a ready-made unit for nurseries if unsure.
Will this DIY setup help with a stuffy nose?
Humidity can ease nasal congestion by keeping mucous membranes moist and reducing irritation. The DIY approach provides a low-risk way to introduce moisture, particularly in dry rooms. Effectiveness varies by space and usage, so monitor humidity and adjust as needed.
Humidity can help with nasal congestion, but results depend on your room and how you use the setup.
What water should I use and why?
Distilled water is preferred because it minimizes mineral dust and residue that can become airborne and irritate the nose or throat. Tap water may leave mineral deposits over time. Using distilled water supports cleaner air without extra cleanup.
Distilled water helps reduce mineral dust and keeps air cleaner.
Can I use hot water or steam for faster humidification?
Avoid steam or boiling water indoors, especially in bedrooms or nurseries. Steam can cause burns and increases mold risk if surfaces stay damp. Safer options rely on passive evaporation or low-heat airflow.
No—do not use steam indoors. It can burn you and promote mold.
How do I measure humidity at home?
A hygrometer is the easiest tool to measure room humidity. If you don’t have one, rely on how comfortable the air feels and adjust gradually. Regular checks help you maintain a safe, comfortable range.
Use a hygrometer if you have one, otherwise gauge by comfort and adjust slowly.
How often should I clean the homemade humidifier setup?
Clean the container, tray, and any surfaces weekly if you use it regularly. Rinse with mild soap and water, then dry completely before reuse. Regular cleaning prevents mold and bacterial growth in moist air.
Clean weekly and dry thoroughly to prevent mold and bacteria.
Watch Video
The Essentials
- Stay within comfortable humidity levels to ease nasal discomfort
- Choose passive or low-heat methods over boiling steam
- Use distilled water to minimize mineral dust and buildup
- Clean and dry components regularly to prevent mold growth
- Monitor humidity to avoid over-humidification and condensation