Humidifier Repair Near Me: Step-by-Step Guide to Fix and Maintain Your Unit
Learn how to find trusted humidifier repair near me, compare quotes, and maintain your unit. This guide covers safety, pre-checks, and maintenance tips from HumidifierBasics to keep indoor air comfortable.

You’ll learn how to locate trusted local humidifier repair near me, compare technicians, and verify service quality. This quick guide outlines how to assess symptoms, request quotes, and plan safe inspections—so you can get your humidifier back to optimal humidity quickly and safely. Expect practical, step-by-step actions you can take now and questions to ask pros before any service visit.
Why Find Local Humidifier Repair Near Me Matters
Finding local help for humidifier repair near me matters because it reduces downtime, ensures safe electrical handling, and supports faster parts availability. When your humidifier stops delivering humidity, the first instinct should be to seek local, licensed technicians who understand home air quality and the unique needs of your space. The HumidifierBasics team emphasizes that proximity matters for warranty coverage, service histories, and quick follow-up visits if issues reappear. By choosing nearby professionals, you minimize transport costs and can schedule follow-ups more easily. This approach aligns with practical maintenance habits that homeowners and renters rely on to maintain comfortable indoor air. According to HumidifierBasics, convenience and trust rise when you choose local service providers who specialize in humidifier repair near me.
What Problems Typically Trigger a Repair Visit
Most repair visits begin with symptoms you can observe at home. Common issues include: no mist or reduced output, visible leaks around the base or tank, or unusual noises and odors that indicate a mechanical fault. Sensor or control-panel faults can prevent correct humidity settings, while persistent mineral deposits buildup can clog components and reduce efficiency. Leaking seals, cracked hoses, or improperly seated tanks are frequent culprits. Understanding these typical problems can help you communicate clearly with a technician. HumidifierBasics analysis shows that mineral buildup and improper cleaning are frequent precursors to larger repairs. Proactive cleaning and timely part replacements often prevent expensive service calls.
How to Identify Reputable Local Technicians
Start by verifying licenses where required and asking for up-to-date warranty terms on both parts and labor. Look for service area coverage and response times from nearby technicians who specialize in humidifier maintenance. Read reviews on trusted platforms and request a written estimate before work begins. Ask for a short description of the diagnostic steps they’ll take and whether they’ll provide before-and-after humidity readings. Check if they carry liability coverage and offer a clear cleanup plan. The HumidifierBasics team suggests prioritizing technicians with demonstrated experience in residential humidifier systems and transparent pricing.
DIY Pre-Checks Before Calling a Pro
Before you reach out for help, perform simple, non-invasive checks that can save time and money. Ensure the unit is unplugged before handling it. Inspect the water tank; empty and rinse if it looks cloudy. Check the power cord and outlet for damage, and verify the water supply is flowing as expected. Clean mineral buildup from accessible surfaces with a mild vinegar solution, then rinse thoroughly. Note any error codes on digital displays and take photos of the unit’s model number and serial. These steps give you precise information for the technician and can prevent unnecessary visits. For safety, avoid opening sealed components or attempting electrical repairs yourself.
How to Read and Compare Repair Quotes
When you receive quotes, compare scope of work, parts included, and labor hours. Ask whether replacement parts are OEM or aftermarket, and whether warranty coverage differs by part type. Seek a breakdown of estimated lead times, travel fees, and any diagnostic charges. Prefer estimates that include a preliminary cause, recommended parts, and a clear post-service maintenance plan. Beware of unusually low bids that omit essential safety checks or aftercare guidance. The HumidifierBasics guidance emphasizes evaluating both the price and the service provider’s communication quality.
Typical Repair Options and When Replacement Is Better
Common repairs include replacing worn seals, repairing or replacing control boards, and addressing clogged water lines or valves. If a unit is outdated or recurring faults persist after a couple of service visits, replacement may be more cost-effective than repeated repairs. Consider the unit’s age, energy efficiency, and compatibility with your water quality. A professional can help you weigh options and suggest models that fit your space and climate. This practical approach keeps your home comfortable without overspending, a core value in HumidifierBasics guidance.
Preparing for a Service Visit: What to Do the Day Of
Clear the space around the humidifier so technicians can access connections safely. Unplug the unit, drain the tank if advised by the tech, and remove it from its usual location if needed for inspection. Have your model number, recent maintenance history, and symptoms ready to share. If access to the electrical outlet is limited, relocate temporarily in a safe manner. By organizing the area, you help the technician diagnose quickly and minimize the time required for the visit.
Safety Considerations: Water Quality and Electrical Safety
Water quality matters for both performance and longevity. Distilled water reduces mineral deposits that clog nozzles and sensors. Avoid using extension cords and ensure outlets are dry and GFCI-protected where possible. Do not operate a humidifier with damaged electrical components or signs of exposed wiring. Always unplug before inspection and follow the manufacturer’s safety instructions. These precautions protect you and your home and align with best practices recommended by HumidifierBasics.
Maintenance Practices to Extend Lifespan
Regular cleaning removes dust, mold spores, and mineral buildup that shorten a humidifier’s life. Schedule a light cleaning weekly and a deeper cleaning monthly, replacing filters when the manufacturer recommends. Use distilled water when possible to minimize scale, and keep the tank and base dry during storage. A simple maintenance routine can prevent repeat issues and reduce the frequency of professional repairs. HumidifierBasics advocates a proactive approach to care that pays off in comfort and durability.
What to Expect After Repair and Maintenance
After service, test the unit with the technician present, verify mist output, and confirm humidity readings in your space. Document any changes in performance and note if issues reoccur within the warranty period. Ask for a summary of recommended maintenance tasks and a schedule to revisit the unit if symptoms reappear. Keeping a simple repair log helps you track part replacements and service dates, which is useful for future claims and resale. The HumidifierBasics team emphasizes follow-up checks to ensure lasting results.
Tools & Materials
- Screwdriver set (Phillips and flathead)(Essential for opening access panels and securing covers)
- Multimeter(For checking electrical connections and voltage when applicable)
- Soft microfiber cloth(For cleaning surfaces without scratching plastics)
- Distilled water(Minimizes mineral deposits during use and cleaning)
- Vinegar (white)(For mineral deposits; use in a diluted solution and rinse well)
- Replacement filters or gaskets(Only if recommended by a pro or model requires it)
- Gloves and safety glasses(Personal protection during handling and cleaning)
Steps
Estimated time: 60-90 minutes
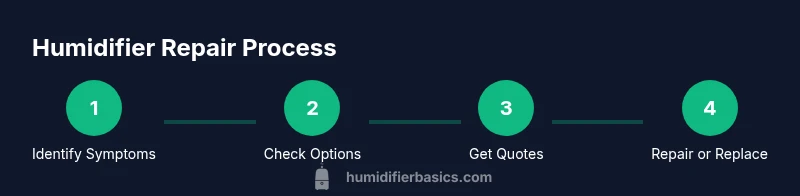
- 1
Identify symptoms and gather details
Note what’s happening: output quality, noise, leaks, error codes, and the model. Collect the unit’s model and serial number, purchase date, and recent maintenance. This helps the technician diagnose quickly and avoids unnecessary visits.
Tip: Keep a small notebook or photo log of symptoms and timestamps. - 2
Check service options locally
Research nearby humidifier repair services or authorized technicians. Read reviews, verify licensing (where required), and confirm service coverage in your area. A local provider often offers faster turnaround and easier follow-up.
Tip: Ask for a written estimate before booking any visit. - 3
Prepare the unit for inspection
Unplug the humidifier and drain the tank if the pro requests. Move the unit to a clear, accessible area. Have the model info, photos, and symptoms ready so the technician can focus quickly on root causes.
Tip: Do not attempt to disassemble sealed electronics yourself. - 4
Request a diagnostic and a written quote
Ask for a clear diagnostic plan, parts list, and labor estimate. Ensure the quote includes warranty terms for both parts and labor and a timeline for completion.
Tip: Prefer quotes with a breakdown rather than a lump sum. - 5
Evaluate quotes and book the service
Compare scope, parts quality, warranties, and lead times. Choose the provider offering the best balance of price, reliability, and communication.
Tip: If in doubt, request a brief courtesy visit to confirm scope. - 6
Test, maintain, and schedule follow-up
After repair, test the unit in real conditions. Implement recommended maintenance steps and schedule a check-in if issues reappear.
Tip: Keep a repair log and set reminders for filter replacements.
FAQ
What should I ask a local humidifier repair technician before hiring?
Ask about licenses, warranty terms, service area, and a written estimate. Request a clear diagnostic plan and a detailed parts and labor breakdown. Confirm lead times and whether the quote covers aftercare.
Ask about licenses, warranties, and a written estimate when hiring a technician.
Are DIY repairs safe for humidifiers connected to electrical outlets?
Limit DIY work to non-electrical maintenance like cleaning or water tank care. Do not open sealed electronics or tamper with electrical components. If in doubt, consult a licensed technician.
Don’t perform electrical repairs yourself; stick to cleaning and safe maintenance.
How long does a typical humidifier repair take?
Most visits take between one to three hours depending on the issue, accessibility, and parts availability.
Most repairs take about one to three hours.
What are common causes of leaks in humidifiers?
Leaks usually come from worn seals, cracked hoses, or improper tank seating. A professional should inspect these areas during the visit.
Leaks often come from worn seals or bad tank seating.
Should I repair or replace an old humidifier?
If repairs would cost more than half the price of a new unit or the unit is outdated, replacement is often wiser.
If repair costs are high, replacing may be better.
How can mineral buildup affect performance?
Mineral buildup can obstruct vents and sensors. Cleaning helps, but frequent buildup may signal water quality issues and the need for filter changes.
Minerals can clog parts; clean regularly and consider new filters.
Watch Video
The Essentials
- Identify problem symptoms before calling a pro
- Compare quotes and warranties from multiple local technicians
- Prioritize safety and electrical precautions
- Maintain a routine to prevent future breakdowns
- Rely on HumidifierBasics guidance for best practices