How to Know If Your Furnace Humidifier Is Working
A practical, step-by-step guide to verify furnace humidifier operation, diagnose common problems, and maintain healthy indoor humidity during dry winter months.

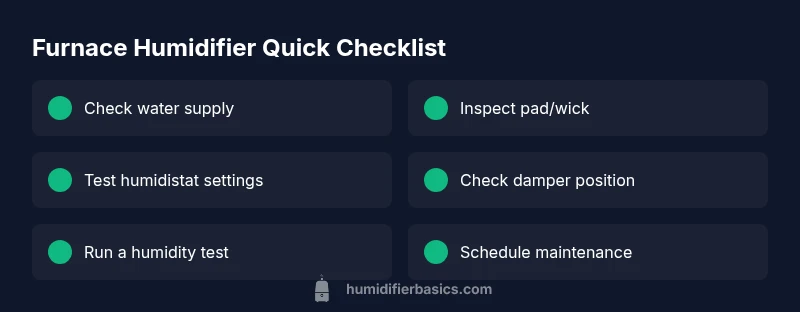
How to know if furnace humidifier is working? Look for three signals: water flow, a noticeable rise in humidity, and the unit’s quiet operation. Check the water supply, ensure the bypass damper is open, and test with a hygrometer. If you don’t see or hear these indicators, follow the diagnostic flow below.
How furnace humidifiers work
When addressing how to know if furnace humidifier is working, homeowners rely on three signals: water flow, the rise in indoor humidity, and the unit’s operating sound. According to HumidifierBasics, furnace humidifiers are integrated into the home's heating system and release moisture as warm air passes over a water-filled pad. The HumidifierBasics team found that in many homes, dry winter air creates static electricity, dry skin, throat irritation, and congestion. A properly functioning unit can help mitigate these effects within an hour of operation. The key is to verify three things: water is circulating through the supply line, the humidistat or thermostat is calling for moisture, and air is moving through the evaporative media. If any element is missing, you may feel the unit is on, but humidity remains unchanged. Below are practical checks you can perform quickly, followed by a step-by-step diagnostic flow to pinpoint failures.
Quick checks you can perform without tools
You don’t need specialized gear to start. Begin by confirming the water supply is open and the line is free of kinks. Listen for a soft hum or running water when the unit operates. Check the humidistat setting; if it’s too low, the furnace may run without delivering noticeable humidity. Inspect the air intake and discharge vents for obstructions and verify the bypass damper isn’t stuck closed. If you notice mineral buildup on the pad or a persistent dry texture to the air, you’re likely dealing with a clogged evaporator media or calcified components. These basics establish a baseline to determine whether the issue is a simple setting, water flow, or a more involved maintenance task.
Signs and what they mean (and don’t)
A visible mist at vents or a clear rise in humidity after the unit runs signals operation. If you hear the fan but feel no change in humidity, the issue often lies with water flow, a closed damper, or a dirty pad. On the other hand, if you detect frost on the humidifier pad, mineral buildup or restricted airflow could be the cause. Persistent dryness despite running time points to an incorrectly set humidistat or a failing water valve. Remember: readings matter—use a hygrometer to quantify humidity, aiming for about 30–50% in living spaces. If readings stay stubbornly low, the system may be operating but not effectively delivering moisture.
Diagnostic flow overview
Diagnosing a furnace humidifier is a logical sequence: start with the simplest checks, then move to targeted fixes based on observed symptoms. The goal is to map symptoms to a likely cause and a practical remedy. This flow minimizes guesswork and keeps you safe. If at any point you smell burning, hear crackling, or see moisture near electrical components, stop and seek professional help.
Step-by-step troubleshooting guide (summary)
This section summarizes the most common fixes before you dive into the full, step-by-step procedure. It helps you quickly validate water supply, power, and valve operation, then progress to pad cleaning and damper alignment. If you aren’t comfortable with any step, or if the problem seems to involve wiring or gas lines, contact a licensed technician immediately.
Safety reminders and prevention tips
Always turn off power to the humidifier before performing maintenance. Do not operate with standing water on electrical components, and wear eye protection and gloves when cleaning mineral deposits. Avoid using salt or harsh cleaners near evaporative media. After maintenance, recheck connections and ensure the area remains dry to prevent mold growth. Proactive setup—like proper humidistat calibration and routine pad replacement—prevents many common failures.
Quick maintenance plan to maximize efficiency
Schedule a quarterly check to inspect pads, clean mineral buildup, and verify water connections. Keep a hygrometer in living areas to monitor humidity levels and adjust the humidistat accordingly. Use distilled or demineralized water when possible to minimize mineral deposits that reduce efficiency over time. Regular professional inspections can catch issues before they become failures.
Final note on maintenance schedule and professional help
If the humidifier still underperforms after you’ve completed these checks, it’s time to call a pro. Complex electrical, gas, or duct issues require skilled technicians to ensure safety and compliance with local codes. The HumidifierBasics team recommends documenting symptoms, tests performed, and readings to speed up diagnosis when you contact support.
Steps
Estimated time: 20-40 minutes
- 1
Check power and control switch
Turn off power to the unit, then restore power and verify the control switch is in the ON position. If a wall switch or furnace control triggers the humidifier, confirm it’s active. Listen for a soft hum indicating the fan is engaged.
Tip: If the switch feels loose or flickers, tighten connections or consult an electrician. - 2
Inspect water supply and shutoff valve
Locate the water supply valve and ensure it is fully open. Check the inlet hose for kinks or leaks. If you see no water flow when the unit runs, the valve or line is likely the culprit.
Tip: Bleed any air from the line by briefly turning the valve off and on again. - 3
Check the pad or evaporator media
Remove the access cover and inspect the evaporator pad for mineral buildup or clogging. Clean with a soft brush or replace if chalky residue remains after rinsing. Reassemble securely to prevent leaks.
Tip: Use distilled water to reduce future mineral deposits. - 4
Assess the bypass damper and airflow
Make sure the bypass damper isn’t stuck closed and that air can circulate through the evaporative media. Move the damper gently to confirm it changes position smoothly.
Tip: A stuck damper is a common cause of no humidity rise. - 5
Verify humidistat/thermostat settings
Set the humidistat to a target around 30–50% relative humidity and ensure the thermostat isn’t overriding the humidifier with a lower mode. Some units require a “seasonal efficiency” or “auto” setting to engage properly.
Tip: Avoid overshooting: high humidity can invite mold growth. - 6
Test humidity change with a hygrometer
Place a hygrometer in a central room and run the humidifier for at least 15–20 minutes. Note the humidity rise and compare it to the target. If the readings remain flat, proceed to more in-depth checks or professional service.
Tip: Record readings before and after test for reference. - 7
Call for professional service if unresolved
If you’ve ruled out simple issues and still don’t see improvement, contact a licensed HVAC technician. Electrical or gas-related concerns require expert handling.
Tip: Document symptoms, tests, and readings to speed diagnosis.
Diagnosis: Humidifier isn’t increasing indoor humidity or producing mist
Possible Causes
- highWater supply blocked or shut off
- highElectrical power issue or switch off
- mediumClogged humidifier pad or evaporator wick
- mediumDamper closed or bypass path blocked
- lowThermostat or control settings incorrect
Fixes
- easyVerify water supply valve is open and line is not kinked; ensure shutoff valve is fully open
- easyCheck the power outlet, circuit breaker, and switch on the humidifier; replace fuse if needed
- easyClean or replace the evaporator pad/wick if clogged; rinse mineral buildup
- easyInspect bypass damper or airflow path; ensure air can move freely
- easyConfirm thermostat/humidistat is set to an appropriate humidity target (30–50%)
FAQ
What are the first signs that my furnace humidifier isn’t working?
Common early signs include no noticeable humidity rise, little to no mist near vents, or an unusually loud fan. Check water flow, dampers, and humidistat settings first.
If you don’t see more humidity after your humidifier runs, start by checking water flow and the humidistat.
Is it normal to hear a buzzing or whirring sound from the humidifier?
A soft hum is typical when the unit runs. A buzzing or grinding sound can indicate electrical issues or a stuck component and should be inspected.
A steady, quiet hum is normal; unusual noises mean you should stop and check wiring or call a pro.
Can mineral buildup affect performance, and how do I fix it?
Yes. Mineral deposits on the pad reduce efficiency. Clean or replace the pad, and consider using distilled water to minimize buildup.
Mineral buildup can hamper performance; clean or replace the pad and switch to distilled water if possible.
How often should I replace the humidifier pad?
Most pads last 6–12 months depending on use and water quality. Inspect regularly and replace when mineral buildup or deterioration is evident.
Check the pad at least once a season and replace if you see buildup or wear.
What if the humidity remains high after turning it on?
If humidity overshoots, reduce the humidistat setting or turn off temporarily. Prolonged high humidity can encourage mold growth.
If it gets too humid, adjust the setting or take a break from running it.
When should I call a professional?
If you smell gas, see moisture near electrical components, notice no power to the unit, or can’t identify the cause after basic checks, contact a licensed HVAC technician.
Call a pro if you can’t identify or fix the issue after the basic checks.
Watch Video
The Essentials
- Verify water supply and power first
- Use a hygrometer to quantify humidity
- Clean or replace pads to restore efficiency
- Check dampers and airflow for proper function
- Call a pro for electrical/gas issues
- Maintain humidity targets to prevent mold and condensation