Best Way to Disinfect Humidifier: Step-by-Step Guide
Learn the safest, most effective method to disinfect your humidifier. This practical guide covers prep, disinfectants, timing, and maintenance to prevent mold, mineral deposits, and odors.

To safely disinfect humidifiers, follow a two-step routine: first clean and rinse thoroughly, then apply a proven disinfectant according to the manufacturer’s guidance. The best way to disinfect humidifier combines mechanical cleaning with a brief, food-safe sanitizing solution. Always unplug the unit, empty the tank, rinse well, and dry all parts completely before reassembly. Repeat after each season or if you notice mineral deposits or odors.
Why disinfection matters for humidifiers
Humidifiers add moisture to indoor air, but they can become a breeding ground for bacteria, mold, and mineral scale if not cleaned regularly. The HumidifierBasics team emphasizes that the most important part of disinfection is not just killing germs, but preventing their return by drying and proper maintenance. The keyword the best way to disinfect humidifier should guide your routine, but you must tailor your approach to your device type and water source. In homes with high mineral content water, scale buildup can shield microbes and reduce performance, so a thorough cleaning becomes essential after each season or after extended use. By understanding the risks, homeowners and renters can approach disinfection with confidence rather than fear.
According to HumidifierBasics, regular disinfection reduces indoor contaminants and supports healthier humidity levels. Following a simple routine turns a potentially risky task into a straightforward home habit.
What to disinfect and what to avoid
Disinfect the tank, removable lid, cap, base, and any nozzle attachments. The heating element or metal components may have different disinfection needs, so always consult the manual. Avoid soaking rubber seals for long periods unless the manufacturer specifies it’s safe. Do not disinfect external housing with harsh chemicals that could damage finishes. If you use a filter or cartridge, clean or replace it according to the product directions, since a dirty filter can harbor germs even after disinfection.
Key takeaway: target all water-contact parts, and protect non-water-contact components from chemical exposure to preserve performance.
Choosing disinfectants safely
Use manufacturer-approved disinfectants whenever possible. Common home options include diluted white vinegar (5–6%), or 3% hydrogen peroxide, each used in a separate step. Vinegar is a gentle descale and sanitizing option for many units, while hydrogen peroxide provides more robust disinfection for stubborn residues. Do not mix cleaners, and never use bleach unless explicitly permitted by the manufacturer. For devices with metal parts, test a small area first and avoid prolonged exposure that could corrode seals.
If your model specifies a ready-made humidifier disinfectant, follow the label instructions exactly. This minimizes residue and ensures safe reuse of parts.
Prep steps before disinfection
Power off and unplug the humidifier. Empty all water from the tank and base, then remove any accessories. Disassemble as much as the manual allows, keeping track of small parts. Put parts in a clean basin filled with warm, soapy water for a quick initial scrub. Rinse each piece under running water and place them on a clean towel to dry briefly before applying disinfectants. Wearing gloves protects your hands from cleaners and mineral dust.
Tip: take photos during disassembly to help with reassembly later. This reduces the chance of leaving a gasket or lid out of place.
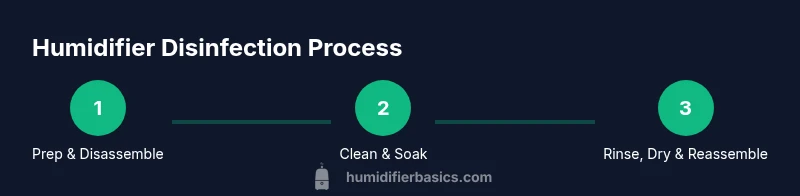
Step-by-step disinfection routine (home method)
A two-stage approach provides reliable results: don’t rush. Begin with cleaning, then disinfect. In cleaning, scrub each part with mild dish soap, rinse, and inspect for mineral buildup. For disinfection, alternate between a vinegar soak and a hydrogen peroxide soak, depending on the chosen method. After soaking, rinse thoroughly until no scent or film remains, then air-dry completely before reassembly. This routine helps prevent lingering odors and microbial growth.
Final check: ensure every crevice is dry, especially around gaskets and nozzles.
Frequency and maintenance calendar
Establish a cleaning schedule aligned with water hardness and usage. If you have hard water, disinfect after every season or after a few weeks of daily use. If you notice cloudy water, musty odors, or visible mineral scale, disinfect sooner. After the initial deep disinfection, perform lighter maintenance weekly: rinse with clean water, wipe surfaces dry, and inspect seals for wear. Keep a small calendar near the humidifier to track each step in your routine.
Pro tip: setting reminders on your phone can help maintain consistency. Consistency is the key to preventing mold and mineral buildup.
Troubleshooting common issues and odors
Odors after disinfection often indicate incomplete rinsing or trapped moisture. Revisit the rinse step, especially around seals and nozzles. If you still smell musty odors, repeat the disinfection cycle with a fresh batch of solution and allow extra drying time. Persistent mineral deposits can be reduced by using distilled or demineralized water. If deposits persist after multiple cleanings, consider replacing worn seals or filters which can harbor bacteria even after cleaning.
Warning: never skip drying; moisture left in the base cushions mold growth and complicates future cleanings.
Storage and long-term care after disinfection
Store parts in a clean, dry area until next use. Reassemble only when completely dry. Periodically inspect hoses, seals, and caps for cracks; replace worn parts to maintain hygiene. If you store the humidifier between seasons, run a light rinse before restarting to remove any settled dust. Keep the water reservoir clean and away from direct sunlight to minimize algae growth.
Bottom line: a dry, clean unit last longer and performs better.
Tools & Materials
- Dish soap (mild)(For initial cleaning, use warm water and gentle scrubbing)
- White vinegar (5–6%)(Descaling and sanitizing; do not mix with hydrogen peroxide in the same soak)
- Hydrogen peroxide (3%)(Safe disinfectant alternative; use alone in a separate soak)
- Soft-bristle brush or old toothbrush(Scrub hard-to-reach areas and nozzles)
- Clean cloth or microfiber towel(Dry surfaces thoroughly after rinsing)
- Gloves (nitrile or disposable)(Protect hands from cleaners and mineral dust)
- Measuring cup(Helpful for precise concentrations if needed)
- Bucket or large basin(Pre-soak parts or hold cleaning solution)
- Distilled/soft water (optional)(Use for final rinses to minimize mineral deposits)
Steps
Estimated time: 20-35 minutes
- 1
Power down and prepare
Unplug the humidifier, remove water from the tank and base, and gather all parts for disassembly. Put on gloves. This minimizes electrical hazards and keeps cleaning safe and efficient.
Tip: Keep cords away from water and unplug before touching any internal components. - 2
Disassemble and inspect
Take apart the tank, lid, base, and any nozzles or filters according to the user manual. Inspect gaskets and seals for cracks or wear, which can harbor germs.
Tip: Place small parts in a labeled container to avoid misplacement. - 3
Initial cleaning with soap
Soak components in warm soapy water and scrub with a soft brush to remove visible residues. Rinse each piece thoroughly to prevent soap residues.
Tip: Do not mix soap with disinfectants in the same soak. - 4
Prepare disinfectant solution
Choose between vinegar or hydrogen peroxide based on your model and disinfectant guidelines. Prepare only one solution at a time and never mix them in the same soak.
Tip: Always follow the product label and your manual. - 5
Disinfect and soak
Submerge parts in the chosen disinfectant for the recommended duration (typically 5–10 minutes for vinegar or 5 minutes for hydrogen peroxide). Avoid long exposure for delicate seals unless approved by the manufacturer.
Tip: Do not soak metal components for extended periods. - 6
Rinse and dry
Rinse all parts under clean water until no residue remains. Dry with a clean towel and then air-dry completely before reassembly.
Tip: Air-drying prevents hidden moisture that can promote mold.
FAQ
How often should I disinfect my humidifier?
Disinfect after each season or when you notice mineral buildup, odor, or cloudy water. Increase frequency with hard water or heavy use.
Disinfect after seasons or if you notice buildup or odors.
Can I use bleach to disinfect a humidifier?
Bleach is generally not recommended unless your manual explicitly allows it. If allowed, dilute very weakly and rinse thoroughly afterward.
Bleach is usually not advised; follow the manual.
Is vinegar safe for all humidifiers?
Vinegar is safe for many units but not all. Check the manual for compatibility with your model and test on a small area first.
Vinegar is often safe, but check your manual.
What about filters or cartridges?
Some humidifiers have replaceable filters. Clean or replace per the manufacturer; disinfection does not replace filters.
Filters usually need cleaning or replacement on schedule.
How should I dry parts to prevent mold?
Air-dry all parts in a clean area until completely dry before reassembly. Moisture left in crevices fosters mold.
Dry thoroughly to stop mold growth.
Can I disinfect while the unit is on?
No. Always unplug and power down before disinfecting or handling internal parts.
Never disinfect while it’s plugged in.
The Essentials
- Disinfect with a two-step routine: clean, then sanitize.
- Use manufacturer-approved disinfectants and never mix cleaners.
- Rinse thoroughly and dry completely before reassembly.
- Disinfect on a schedule aligned with water quality and usage.
- Follow the manual to protect seals and components.