What Humidifier for Cold: A Practical Guide
Learn how to pick the best humidifier for cold symptoms, maintain safe humidity levels, and prevent mold with practical steps, checks, and maintenance tips from HumidifierBasics.

You’re here to learn how to pick the right humidifier for cold symptoms. The key requirements are selecting a safe, easy-to-clean unit that matches your room size, choosing the right mist type (ultrasonic or evaporative), aiming for a steady indoor humidity around 40–60%, and using clean water. According to HumidifierBasics, comfort improves when you prioritize hygiene and consistent mist over flashy features.
Why a Humidifier Helps With a Cold
Colds often bring nasal congestion, dry throat, coughing, and irritated nasal passages. Indoor air that’s too dry can worsen these symptoms and disturb sleep. A humidifier adds moisture to the air, helping thin mucus, soothe irritated tissues, and improve overall comfort, especially at night. The HumidifierBasics team notes that many people buy units that are either undersized or difficult to clean, which blunts the relief. For real benefit, prioritize a model that fits your room, is easy to clean, and uses clean water to minimize mineral residues. When humidity stays within the right range, you’re less likely to wake up with a dry throat and nose, and you’ll sleep more soundly. According to HumidifierBasics, the most effective setups emphasize steady mist, automatic shutoff, and a simple maintenance routine over gadgety features.
Remember, what you’re really seeking is consistent moisture delivery and reliable hygiene—two factors that help your body recover faster from a cold.
What Humidity Levels Do for a Cold
Humidity plays a critical role in how comfortably you breathe when you’re sick. Target a steady indoor relative humidity (RH) in the 40–60% range to ease nasal congestion, throat irritation, and dry coughing. A hygrometer is inexpensive and helps you monitor RH without guesswork. Too little moisture leaves air dry and irritates mucous membranes; too much moisture creates damp surfaces that foster mold and dust mites. The HumidifierBasics analysis shows that most households notice better symptom relief when RH is consistently within the mid-range rather than fluctuating wildly. If you’re unsure, start at 45–50% and adjust by 5-percentage-point increments until you feel relief without dampness. Pair humidification with good ventilation to avoid stale air.
Practical tip: use a humidistat or an automated feature on your humidifier to maintain the target RH. Clean water and a well-sealed reservoir reduce mineral dust that can irritate airways during a cold.
Types of Humidifiers: Pros and Cons for Cold Relief
There are several humidifier types, each with trade-offs for cold relief. Ultrasonic models are quiet and energy-efficient but can emit fine mineral dust if you don’t use distilled water. Evaporative units naturally self-regulate output (as humidity rises, evaporation slows) and are less likely to over-humidify, but they can be noisier and require periodic filter changes. Steam (warm-mist) humidifiers kill some bacteria with heat but can pose burn risks and energy use concerns. Impeller models offer a gentle mist but may produce visible droplets if not sized correctly. When choosing, consider noise tolerance, cleaning effort, and whether you’ll prioritize simplicity (evaporative) or whisper-quiet operation (ultrasonic). For cold relief, the HumidifierBasics team recommends selecting a model that balances ease of cleaning with reliable humidity control, rather than chasing the most features.
If you sleep with a partner or child, a quieter ultrasonic model may reduce sleep disturbances while still delivering comfort. If you’re in a high-mineral-water area, prioritize distilled water to minimize dust and residue.
How to Choose Based on Room Size and Features
Matching the humidifier to your room is essential for effective cold relief. Start by calculating the room’s square footage and verify the device’s recommended coverage range. For small bedrooms, a compact unit with a modest water reservoir is typically enough; for living rooms or home offices, you’ll want a larger tank and an adjustable output. Essential features include a built-in humidistat, automatic shutoff when the tank is empty, and a straightforward cleaning routine. Look for models with wide-mouth tanks for easier filling, and consider a unit with a removable filter if you want improved air quality. Battery backup or programmable timers can be helpful if you need controlled operation during certain hours. Above all, prioritize safety and maintenance—easy disassembly for cleaning and clear labeling of parts will save you headaches later. For those balancing energy use with comfort, compare energy draw across devices and opt for efficient designs if possible.
In this selection process, think about whether you want cool-mist or warm-mist output and how frequently you’ll clean the unit. The HumidifierBasics guidance emphasizes choosing a model that’s easy to maintain and fits your space rather than chasing a single best feature.
If you’re unsure what humidifier for cold to buy, this practical approach helps you evaluate size, maintenance, and humidity control before purchase.
Setup and Safe Use for Cold Relief
Once you’ve chosen a unit, place it on a stable, water-resistant surface away from walls and electronics. Use distilled water to minimize mineral dust and prevent white residue on surfaces or bedding. Fill to the recommended level and turn on the humidifier, setting the humidity target within the 40–60% range. Keep the room ventilated to avoid condensation on walls and windows. If you’re using a model with a humidistat, calibrate it to maintain steady RH. Place the unit where it won’t be bumped by pets or kids, and ensure cords are tucked away safely. If you notice any unusual smells, inspect the tank and filters for mold or buildup and clean promptly. Finally, never leave the humidifier running unattended for long periods while you’re away from home.
In line with HumidifierBasics recommendations, prioritize consistent mist and easy cleaning to maximize comfort during a cold without introducing new hazards.
Maintenance to Prevent Mold and Bacteria
Regular cleaning is essential to avoid mold, bacteria, and mineral buildup inside water tanks. Empty the tank after each use, rinse with clean water, and dry the interior before the next fill. At least weekly, scrub the tank with a mild solution of white vinegar or hydrogen peroxide to disinfect, rinse thoroughly, and air-dry. Check and replace filters as needed, following the manufacturer’s schedule. Mineral accumulation can be reduced by using distilled water and by cleaning mineral deposits from the mist outlet and fan housing. Dry surfaces around the unit to prevent moisture from seeping into furniture or floors. By keeping a consistent cleaning schedule, you reduce health risks and extend the life of the device. HumidifierBasics notes that a clean unit contributes more to comfort during a cold than any extra gadgetry.
Tip: label a simple calendar reminder for weekly cleaning to stay on track, especially during flu season when use is high.
Common Mistakes and Quick Fixes
Common mistakes include using tap water, which leaves mineral dust, running the humidifier at the highest setting continuously, and placing the unit directly on carpet or near bed linens where moisture can accumulate. Another pitfall is neglecting regular cleaning, leading to mold or bacterial growth that worsens symptoms. A quick fix is to switch to distilled water, set a humidistat to maintain 40–60% RH, and schedule routine cleanings. If you notice unpleasant odors or unusual white dust, stop use and sanitize the tank. Remember to keep the unit away from direct sunlight and heat sources to avoid damage. By addressing these mistakes, you’ll maximize comfort during a cold and keep your air healthier. The HumidifierBasics perspective stresses that good hygiene and consistent humidity are more impactful than fancy features, especially when you’re sick.
Before you buy an extra gadget, consider whether you can meet your humidity needs with a properly sized unit and appropriate maintenance.
Authoritative sources and further reading
- EPA on Indoor Humidity and Air Quality: https://www.epa.gov/indoor-air-quality-iaq/humidity
- NIEHS humidity topic overview: https://www.niehs.nih.gov/health/topics/agents/pollution/humidity/index.cfm
- General health guidance from a major health authority: https://www.cdc.gov
Tools & Materials
- Humidifier (size matched to room)(Choose a model with the recommended coverage for your room size.)
- Hygrometer(Place in the same room to monitor humidity.)
- Distilled water(Reduce mineral dust and residue.)
- Cleaning brush(For regular tank cleaning.)
- White vinegar or hydrogen peroxide (3%)(Sanitize water tank periodically.)
- Soft microfiber cloth(Wipe surfaces and dry parts after cleaning.)
Steps
Estimated time: 45-60 minutes
- 1
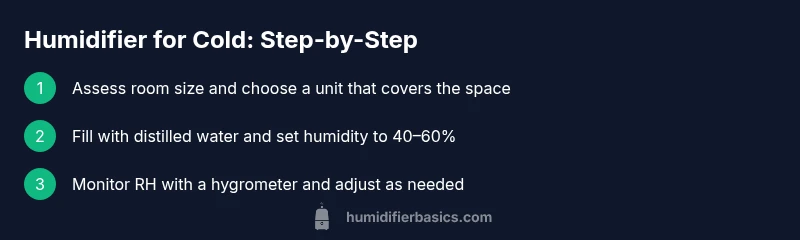
Assess room size and select a humidifier
Measure the room in square feet (length × width). Compare to the device’s recommended coverage to ensure adequate mist output without over-humidifying. If in doubt, choose a unit on the larger side of your room size.
Tip: Opt for a model with adjustable output and a built-in humidistat to simplify control. - 2
Place the humidifier safely
Set the unit on a stable, water-resistant surface at least 3 feet from walls and furniture. This reduces condensation on walls and avoids water contact with electronics.
Tip: Keep pets and children away from the unit when possible. - 3
Fill with distilled water and set target RH
Fill the tank with distilled water to minimize mineral dust. Use the humidifier’s controls to set a target RH within 40–60%.
Tip: Start at 45-50% and adjust based on comfort. - 4
Turn on and monitor humidity
Power on the unit and check the humidity reading with a hygrometer. If RH drifts, adjust output or range until you stay within the target window.
Tip: Avoid leaving the unit on “high” continuously if it’s not necessary. - 5
Establish a cleaning routine
Empty, rinse, and dry the tank daily after use; sanitize weekly with vinegar or peroxide. Clean nozzle and filter if applicable.
Tip: Record cleaning days on a calendar or app reminder. - 6
Reassess comfort and adjust
If you still have dry throat or nasal congestion, retest room RH and adjust humidity or placement. Consider alternative solutions if symptoms persist.
Tip: Sometimes small changes in room ventilation can improve comfort.
FAQ
What humidity level is best for cold symptoms?
Aim for 40-60% relative humidity. Use a hygrometer to monitor RH and adjust the humidifier accordingly.
Aim for 40 to 60 percent humidity and check with a hygrometer to stay within that range.
Is distilled water essential for humidifiers used for colds?
Using distilled water minimizes mineral dust and buildup in the unit and on surfaces.
Yes, distilled water helps keep the unit cleaner and reduces mineral dust.
Which type of humidifier is quieter for bedrooms?
Ultrasonic humidifiers are usually quieter than evaporative ones, but check the model’s decibel rating.
Ultrasonic models are generally quieter; always check the noise specification.
Can a humidifier cause mold?
Yes, if humidity stays above 60% or if the unit isn’t cleaned regularly.
Mold can develop if you over-humidify or skip cleaning.
How often should I clean a humidifier?
Clean the tank weekly and sanitize every 1–2 weeks; rinse and dry after each use.
Clean at least once a week, sanitize every couple of weeks for safety.
Is a warm-mist humidifier safer for kids?
Warm-mist units can reduce some bacteria with heat but pose burn risks; choose based on safety and preference.
Warm-mist can be warmer and safer for some, but watch for burns and choose what fits your home.
Watch Video
The Essentials
- Evaluate room size before buying a humidifier.
- Aim for 40–60% RH to relieve cold symptoms.
- Choose between ultrasonic and evaporative based on noise and maintenance.
- Use distilled water to reduce mineral dust.
- Maintain a regular cleaning routine to prevent mold.