Installing a Bypass Humidifier: A Practical Guide
Learn how to install a bypass humidifier safely and effectively. This guide covers compatibility, safety, tools, and a detailed installation workflow for homeowners seeking steady humidity.

In this guide, you will learn how to install a bypass humidifier and integrate it with your furnace for steady moisture. Before you begin, you’ll need basic HVAC tools, water supply access, and a compatible humidifier kit. According to HumidifierBasics, bypass humidifier installation typically requires sealing duct connections and verifying heat with the furnace blower.
What a bypass humidifier is and when to use it
A bypass humidifier is a water-based appliance mounted to your furnace or air handler that adds humidity to warm indoor air as it passes through the system. It uses a small water panel or pad and a bypass duct to route a portion of heated air across the water panel. When properly installed, it maintains more consistent humidity during heating seasons, reducing dry skin, irritated nasal passages, and static electricity. Installing a bypass humidifier is a common choice for homes that experience dry air in winter, or for households that want a passive humidity boost without a standalone portable unit. As you consider installing a bypass humidifier, think about your current humidity levels, the size of your home, and how the unit will integrate with your existing thermostat and furnace controls. HumidifierBasics emphasizes that the goal is stable humidity without over-wetting walls or woodwork, which means accurate sizing and sealing are essential.
System compatibility and sizing considerations
Compatibility starts with your furnace and ductwork. Most bypass humidifiers connect to the furnace return plenum via a bypass duct and a connection to the water supply. The size of the home, duct layout, and existing humidification needs dictate which model is suitable. A unit that is too small won’t move enough moisture, while a unit that’s too large can oversaturate spaces and cause condensation on windows or walls. Use a simple room-by-room humidity target (often in the 30–50% range) and verify the humidifier’s output rating against your home’s square footage. HumidifierBasics notes that proper sizing and placement are the precursors to effective performance and energy efficiency.
Safety, codes, and planning before you start
Before touching wiring or water lines, turn off power to the furnace and shut off the water supply to the unit. Review local building codes; some jurisdictions require a licensed HVAC technician for certain installations or for electrical wiring. Plan for a clean installation area with easy access to the water line, power source, and duct connections. Keep a clear workspace, use a drip tray or towels to catch leaks, and verify that the area remains accessible for future maintenance. As you plan, consider how the humidifier will interact with your thermostat and any smart-home features, ensuring compatibility with your existing system. This step helps prevent troubleshooting headaches later and aligns with best practices for safe installation.
Tools, materials, and planning for the install
Gather the essential tools and materials before you start, including the installation kit, a screwdriver set, pliers, duct tape or HVAC sealant, and a water-supply line. You may also need tin snips, a drill, and a handful of mounting screws. Having a plan for routing the bypass duct and securing the unit to a stable location will save time. Keep notes of the model’s required connection points and the valve placement for the shut-off. A well-planned layout minimizes air leaks and ensures the humidifier operates as designed.
How bypass humidifiers interact with HVAC controls
A bypass humidifier works passively in most setups, relying on the furnace blower to push air through the water panel. When the furnace is on, warm air travels through the bypass duct, contacts the water panel, and exits through the supply side as moister air. Some models include a humidistat or a control that integrates with the existing thermostat. Understanding how your unit’s control wiring ties into your system helps with achieving consistent humidity without manual adjustments. HumidifierBasics highlights that consistent humidity requires proper calibration and a functional control circuit.
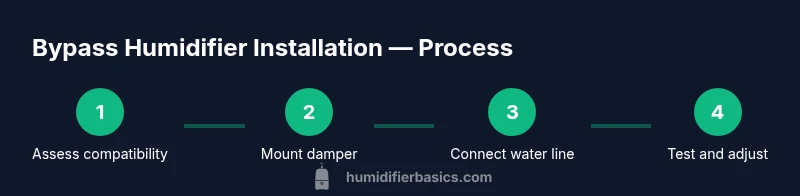
Step-by-step overview for the installation flow
The installation flow typically starts with turning off power and water, followed by mounting the bypass damper, connecting the water line, and attaching the humidifier housing. After securing the unit, you’ll seal all duct joints and ensure there are no air leaks. Finally, you’ll test the system with the furnace running and check humidity levels with a hygrometer. This overview provides a reliable blueprint that you can adapt to your home’s layout while keeping safety and code compliance in focus.
Maintenance and operational best practices
Maintenance is essential for long-term performance. Change water panels per manufacturer guidelines, inspect the bypass duct for kinks or leaks, and keep the water supply line free of obstructions. Regularly test the humidistat or control wiring, and monitor indoor humidity to avoid over-humidification. Clean the humidifier housing and water panel to prevent mineral buildup, and replace parts as needed. HumidifierBasics recommends scheduling periodic inspections to catch issues early and preserve indoor air quality.
Troubleshooting and common mistakes to avoid
Common mistakes include skipping the shut-off valve, not sealing duct joints, and neglecting a water filtration or mineral buildup issue. Leaks, uneven humidity, or window condensation can signal improper installation. If you notice erratic operation, check electrical connections and ensure the water panel is correctly oriented. Avoid over-tightening fittings, which can crack connections and introduce leaks. Following manufacturer instructions and adhering to safety precautions reduces the risk of damage and ensures reliable performance.
Quick-start maintenance checklist after installation
Create a simple checklist: verify power is off before any work, confirm water supply is connected, test the blower and damper operation, seal all joints with sealant, run a humidifier test, check humidity with a hygrometer, and schedule ongoing maintenance. Keeping a record of replacement parts and service dates helps ensure a long service life and consistent comfort. This approach aligns with HumidifierBasics’ emphasis on practical maintenance for homeowners.
Tools & Materials
- Bypass humidifier installation kit(Includes mounting hardware, water panel, gasket, and fittings)
- Screwdriver set (Phillips and flat-head)(Used for mounting brackets and securing panels)
- Drill with appropriate bits(For creating mounting holes in ductwork or cabinet)
- Tin snips or utility knife(To trim ducting as needed)
- HVAC-rated sealant or duct tape(Seal all joints to prevent air leaks)
- Water supply line tubing (3/8(Match to unit's inlet; include shut-off valve)
- Teflon tape(For threaded connections to prevent leaks)
- Bucket, towels, and rags(Catch any incidental leaks during setup)
Steps
Estimated time: 2-4 hours
- 1
Shut off power and water
Turn off the furnace at the main switch and disconnect power to the humidifier circuit. Close the water supply valve to prevent accidental leaks during installation. Verify that the area is dry before touching any components to minimize slip hazards.
Tip: Double-check that all power sources are off before handling electrical connections. - 2
Locate mounting location and mark holes
Identify a sturdy return plenum spot or adjacent cabinet where the humidifier will be mounted. Use a pencil to mark drill points for the mounting brackets, ensuring clearance for the water line and bypass duct. Ensure there is enough space for service access.
Tip: Choose a location that minimizes duct bends and avoids obstruction of airflow. - 3
Mount the humidifier housing
Attach the mounting bracket to the selected surface and secure the humidifier housing with screws. Verify the damper linkage can operate smoothly and that there is no interference with nearby components. Install any required gaskets to seal the connection.
Tip: Test damper movement before proceeding to wiring or duct connections. - 4
Connect the bypass duct and damper
Connect the bypass duct from the return plenum to the humidifier inlet and install the bypass damper as specified by the model. Ensure the duct is straight, free of kinks, and sealed with HVAC sealant or foil tape.
Tip: Keep the bypass duct as short and straight as possible to reduce airflow resistance. - 5
Install the water line and shut-off valve
Pipe the cold water line to the humidifier’s inlet using the appropriate fittings. Install a shut-off valve if one isn’t already present, and flush the line to remove debris before connecting to the humidifier. Secure the line to prevent movement.
Tip: Flush the line until clear water runs to ensure no sediment enters the panel. - 6
Wire the controls and humidistat
Connect any control wires or humidistat to the furnace or thermostat as directed by the manufacturer. Ensure power is off during wiring and secure all connections with wire nuts. Keep a clean separation between electrical and plumbing components.
Tip: Label wires if you’re adding multiple control points for easier future service. - 7
Seal joints and insulate where needed
Apply HVAC sealant or duct tape to all duct joints and any open seams. If the humidifier is near an unheated space, insulate exposed duct sections to prevent condensation and heat loss. Check for obvious gaps and correct as needed.
Tip: Inspect joints visually and test for air leaks using a soapy water solution once power is back on. - 8
Restore power, test operation, and adjust
Turn the furnace and humidifier back on. Open the water supply slowly and observe for leaks. Run the system for a cycle and monitor humidity using a hygrometer. Adjust the humidistat or controller to maintain the target relative humidity.
Tip: Keep towels handy during initial testing to catch any unexpected leaks.
FAQ
What is a bypass humidifier and how does it work?
A bypass humidifier attaches to the furnace return and uses a bypass duct to pass warm air through a water panel, adding humidity to heated rooms. It operates whenever the furnace runs and can be controlled by a humidistat or thermostat. This setup is common for whole-house humidity needs.
A bypass humidifier attaches to your furnace, adding humidity to your home whenever the furnace runs. It’s controlled by a humidistat or thermostat and is a neat way to humidify your whole house.
Do I need a professional to install a bypass humidifier?
Many homes can handle installation, but some setups involve gas, electrical wiring, and duct modifications. If you’re uncomfortable with wiring, water connections, or code requirements, consult a licensed HVAC technician. Local codes may require professional installation for certain components.
If you’re unsure about wiring or codes, hire a licensed HVAC technician. Local rules may require professional installation for safety and warranty reasons.
What furnace types support bypass humidifiers?
Most standard gas or oil furnaces with a return air plenum can support a bypass humidifier, provided there is adequate space for the damper and ductwork. Electric furnaces may require different configurations. Always check the manufacturer’s compatibility guide for your specific model.
Most traditional gas or oil furnaces can support a bypass humidifier, but check your model’s compatibility guide to be sure.
What maintenance does a bypass humidifier require?
Regular maintenance includes cleaning or replacing the water panel, inspecting the water line for leaks, and testing the humidistat. Mineral buildup can reduce efficiency, so use clean or distilled water when possible and replace components as recommended by the manufacturer.
Keep the water panel clean, check for leaks, and test the humidistat. Replace parts as suggested by the maker.
Can a bypass humidifier affect my HVAC warranty?
Installation can influence warranties depending on the terms and whether the work is performed by a licensed technician or uses approved components. Always review your warranty documents and consult the manufacturer or installer to avoid voiding coverage.
Warranties may be affected if installation isn’t done to spec or by a pro. Check your terms and confirm with the maker.
What water quality considerations exist?
Minerals in hard water can lead to buildup on the water panel and reduced efficiency. If you have hard water, consider using softened or distilled water and routinely inspect for mineral deposits. Follow the manufacturer’s guidance for best results.
Minerals in hard water can cause buildup. Use softened or distilled water if possible and inspect for deposits regularly.
Watch Video
The Essentials
- Plan for correct sizing and placement first
- Shut off power and water before starting
- Seal all duct joints to prevent leaks
- Test humidity and adjust controls after install