Humidifier to Help Breathing: A Practical Guide for Home
Learn how to choose, set up, and maintain a humidifier to support breathing. Practical steps, safety guidelines, and maintenance routines to improve air quality at home. HumidifierBasics analysis supports safe humidity targets for comfort.

Goal: Use a humidifier to help breathing safely and comfortably. This quick answer previews how to choose the right unit, set the optimal indoor humidity (about 30-50%), keep water clean, and prevent mold or mineral dust. You’ll need a suitable humidifier for your space, distilled or filtered water, and a regular cleaning and filter/wick replacement routine.
Why a humidifier can help breathing
According to HumidifierBasics, roughly balanced indoor humidity can support the natural defenses of the airways. Dry air irritates nasal passages, throat, and sinuses, which can worsen congestion and coughing. A properly used humidifier adds moisture to the air, helping keep mucus membranes hydrated and making it easier to clear irritants. For people with allergies or asthma, maintaining humidity in the 30-50% range may reduce uncomfortable symptoms, while avoiding overly damp environments that encourage mold is essential. In this block we’ll cover how to choose a unit, what features matter for breathing comfort, and practical setup considerations for typical home spaces. By following practical steps, you can create a healthier breathing environment without over-humidifying the room.
Key considerations when choosing a humidifier for breathing
Selecting the right device matters. For breathing support, prioritize room-appropriate capacity, a built-in humidistat (or an accurate external hygrometer), and simple maintenance. Electric cool-mist units are often quieter and easier to clean than some warm-mist options. Distilled water reduces mineral dust that can irritate airways, while filters or wicks help trap impurities. Noise, energy use, and safety features such as auto shutoff are also important if the unit will run overnight. HumidifierBasics analysis shows that keeping the humidity between roughly 30-50% helps breathing comfort without promoting mold growth. Consider the layout of your space: a smaller room might need a smaller device with less mist, while larger living areas may require multiple units or a higher-output model. In all cases, read the manufacturer’s instructions and track humidity with a reliable hygrometer.
How to set up your humidifier for healthy air
Begin by selecting a safe, stable surface away from direct heat sources and edges where water spills could cause slips. Fill with distilled or filtered water to the recommended level; never use moldy or reused water. Plug in, turn on, and set the humidity target to about 40% as a starting point. If your unit has a hygrometer, verify the reading and adjust gradually. Leave space for air to circulate; do not place the humidifier against walls or upholstery. Run a quick test for 10-15 minutes and observe if there is condensation on surfaces; if so, reduce output slightly. Document the initial settings so you can replicate them in the future. This careful setup helps breathing comfort while minimizing moisture-related issues in your home.
Daily use: maintaining safe humidity and air quality
Maintaining stable humidity is an ongoing practice. Check the humidity level at least twice daily during rapid climate changes, and adjust the output to stay within the target range. Use a clean water supply; wash the tank and lid weekly and empty water daily if you notice mineral dust. If you’re using a room with a sleeping baby or a pet, ensure the mist direction is away from the bed and kept at a lower output. Keep the area ventilated by occasionally opening doors or using a fan to prevent stagnant air. Track symptoms such as coughing or nasal congestion; improvements may indicate better airway moisture, while persistent symptoms may require medical advice. The HumidifierBasics team emphasizes safety and routine as keys to sustainable breathing comfort.
Cleaning and maintenance to prevent mold and bacteria
Routine cleaning is essential for breathing health. Empty the tank daily if the device sits unused for long periods and rinse with clean water. Perform a deeper clean weekly using a mixture of water and white vinegar or a mild detergent, then rinse thoroughly to remove any residue. Replace filters or wicks as recommended by the manufacturer; never operate a unit with a damaged or missing component. Dry all parts completely before reassembly to prevent bacteria growth. Keep the surrounding area dry and free of visible moisture on walls or surfaces. Regular maintenance reduces mineral buildup and odors, helping you breathe easier.
Common pitfalls and safety tips
Avoid using hot water in cool-mist units, which can damage components. Don’t run a humidifier in a poorly ventilated room at full output for long periods; this can create condensation and mold risk. Never ignore unusual smells, discoloration, or visible mold on surfaces near the device. Use distilled water whenever possible to minimize mineral dust that can irritate airways. If you have kids or pets, place the unit out of reach and ensure cords are secured. Finally, don’t rely on a single device to fix chronic breathing conditions—consult a healthcare professional for persistent symptoms.
When to avoid using a humidifier
Severe or persistent coughing, fever, or signs of mold growth in the living space require medical evaluation before adjusting humidity. If you notice persistent condensation on windows or walls, or musty odors, stop use and ventilate the room. High humidity can worsen asthma triggers in some individuals, so observe personal responses and adjust or discontinue use if symptoms worsen. People with compromised immune systems or respiratory illnesses should discuss humidity control with their doctor before implementing a humidifier for breathing support.
How to monitor effects on breathing and adjust
Keep a simple log of humidity readings and breathing symptoms for a week to identify patterns. Compare daily symptoms, sleep quality, and nasal dryness. If you notice improvement with adjustments, note the settings. If symptoms worsen, reduce humidity or switch to a different model with a gentler output. Environmental factors like heat, ventilation, and clothing influence results; incorporate these into your plan. The HumidifierBasics guidance supports using measured humidity as a practical proxy for respiratory comfort rather than relying on subjective impressions alone.
Practical recommendations for different spaces
Bedroom: a quiet cool-mist unit with a lower output near the foot of the bed is often best for sleeping comfort. Living room: distribute humidity using a mid-output unit while ensuring you have an open path for airflow. Nursery: choose a model with a closed water tank and an automatic shutoff; keep water clean and avoid over-humidification. Home office: consider a compact unit with adjustable mist and a hygrometer. In all areas, avoid direct mist toward walls or electronics, and maintain regular cleaning schedules to prevent mineral buildup. A consistent routine helps breathing and reduces dry air symptoms.
Choosing accessories and water quality considerations
Consider accessories such as demineralization cartridges, replacement filters, or microfibre cleaners to simplify upkeep. Water quality matters: distilled water reduces mineral dust; filtered water can be acceptable if it meets your unit’s guidance. If you use a water-softening system, double-check your humidifier’s compatibility. Keep spare parts on hand and follow manufacturer guidelines for replacement schedules. These practical steps help you maintain clean, safe air and support breathing.
Putting it all together: a simple routine
Create a weekly routine that includes humidity checks, daily water top-ups, and a 15-minute weekly cleaning session. Start the day by verifying the humidity target with a hygrometer and adjusting as needed. In the evening, run the humidifier for short intervals to support breathing while allowing the room to breathe. The HumidifierBasics team recommends documenting settings and symptom changes to track what works for your household.
Authority sources and further reading
For authoritative guidance on indoor humidity and air quality, consult trusted sources such as the Environmental Protection Agency’s IAQ pages, the Centers for Disease Control and Prevention on respiratory health, and university extension resources for indoor air quality. These sources provide foundational context for safe humidity practices and appliance maintenance.
Tools & Materials
- Humidifier unit appropriate for room size(Choose a unit rated for your room square footage; check coverage in square feet (AHAM rating if available))
- Distilled water or filtered water(Avoid tap water to minimize mineral dust and deposits)
- Hygrometer or built-in humidistat(Use to monitor room humidity; aim for 30-50% RH)
- Soft cloth and white vinegar or mild detergent(For weekly cleaning of tanks and parts)
- Soft-bristled brush(For mineral buildup and hard-to-reach corners)
- Replacement filters/wicks(Depends on model; replace per manufacturer schedule)
- Measuring cup or pitcher(Helpful for precise water filling)
- Gloves or sanitizing wipes(Protect hands during cleaning)
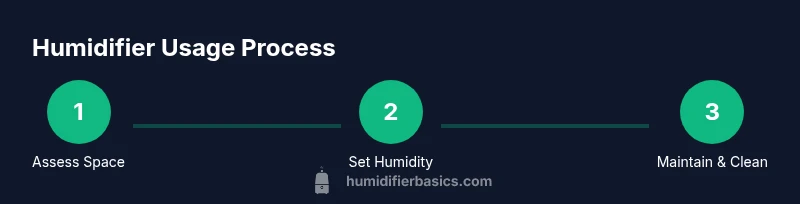
Steps
Estimated time: Estimated total time: 25-45 minutes (initial setup); daily 2-5 minutes for checks
- 1
Assess room and select the right unit
Measure room size and review the unit’s capacity and AHAM rating. Choose a model that can comfortably supply mist without overloading the space. This ensures your breathing remains comfortable and avoids excess moisture.
Tip: Start with a unit rated for a slightly smaller room than yours if you’re unsure of exact needs. - 2
Position the humidifier safely
Place on a hard, level surface away from edges, walls, and electronics. Ensure at least 3 feet of air circulation around the device and keep it away from direct contact with bedding.
Tip: Do not place on carpet where moisture can wick into fibers; use a tray if needed. - 3
Fill with water
Turn off and unplug the unit. Fill with distilled or filtered water to the recommended max line. Never use water that looks cloudy or has visible debris.
Tip: Room-temperature water helps prevent thermal shock to the tank. - 4
Power on and set humidity target
Plug in, switch on, and set the humidity target to around 40% as a starting point. If your unit has a humidistat, verify readings with a separate hygrometer and adjust gradually.
Tip: Begin at 40% RH and fine-tune in 5% increments as needed. - 5
Run a test and observe
Run the unit for 10–15 minutes and check for even mist distribution. Look for condensation on windows or walls, which indicates you may be over-humidifying.
Tip: Adjust output if you see droplets or damp spots within the room. - 6
Monitor humidity over time
Check humidity readings a few hours after setup and again after a day. Maintain steady RH within the target band to support breathing without fostering mold.
Tip: Use a separate hygrometer in the living area closest to the unit for accuracy. - 7
Ongoing maintenance and cleaning
Drain and rinse the tank daily if the unit sits unused for long periods. Perform a deeper clean weekly with vinegar or mild detergent, then rinse thoroughly and dry parts completely.
Tip: Keep a cleaning schedule to prevent mineral buildup and odors. - 8
Night use and safety checks
If using overnight, reduce output and ensure the mist is not directed at bedding. Confirm there are no signs of dampness in the room by morning.
Tip: Place the unit away from cribs or sleeping areas if relevant to your household.
FAQ
Can a humidifier really help breathing?
Yes. Humidifiers can ease nasal dryness and throat irritation by adding moisture to the air, which may improve breathing comfort. Effects vary per person and depend on maintaining safe humidity levels.
Yes. Humidifiers can ease dryness and breathing discomfort by adding moisture to the air, though results vary by person.
What humidity level should I set?
Aim for about 30-50% relative humidity. Avoid exceeding 60% as higher humidity can promote mold and dust issues.
Aim for 30 to 50 percent relative humidity; avoid going above 60 percent.
Is distilled water necessary?
Distilled or filtered water reduces mineral dust and buildup. Tap water can leave deposits that irritate airways and require more cleaning.
Distilled or filtered water is best to minimize mineral dust and deposits.
How often should I clean my humidifier?
Empty and rinse daily if used heavily; perform a deeper clean weekly with vinegar or mild detergent and rinse thoroughly.
Clean weekly and rinse daily when in heavy use.
Can a humidifier worsen mold?
If not cleaned properly, moisture can promote mold growth. Regular cleaning and keeping humidity balanced reduce risk.
Mold risk increases if you don’t clean; keep humidity balanced and clean regularly.
Are humidifiers safe around children or pets?
Yes with caution: place the unit out of reach, avoid direct mist toward sleeping areas, and monitor for moisture buildup.
Yes, with caution—keep it out of reach and ensure no moisture buildup near kids or pets.
Watch Video
The Essentials
- Aim for 30-50% RH to support breathing.
- Regular cleaning prevents mold and mineral buildup.
- Choose room-appropriate humidifier and monitor humidity.
- Avoid over-humidification to prevent condensation.
- Follow manufacturer guidance for safe operation.