Is it normal for a humidifier to make noise? A practical troubleshooting guide
Urgent troubleshooting guide to diagnose and fix noisy humidifiers at home. Learn common causes, quick fixes, and safety tips to restore quiet operation and improve air quality.

Yes, some noises are normal, but persistent or sharp sounds indicate issues. Begin with simple checks: tighten loose screws, clean the tank, and switch to distilled water. If the noise persists, follow the diagnostic flow to identify the likely cause and safe fixes.
Is the noise normal? Understanding the basics
If you're wondering is it normal for humidifier to make noise, you're not alone. Humidifiers rely on moving parts, water action, and airflow, all of which produce sound. In many homes, a soft hum or gentle bubbling is expected, especially when a fan is active. However, persistently loud or sharp noises can signal a maintenance issue or a faulty component. According to HumidifierBasics, most early-noise problems come from simple causes like loose panels, mineral buildup, or improper placement, not a failing device. The best first step is to observe the sound: when it occurs (during start-up, while running at high humidity, or only when water runs low) and where you hear it (base, motor housing, or diffuser). This baseline check helps you decide whether you can safely troubleshoot yourself or if professional help is warranted.
Common Noise Types and Their Causes
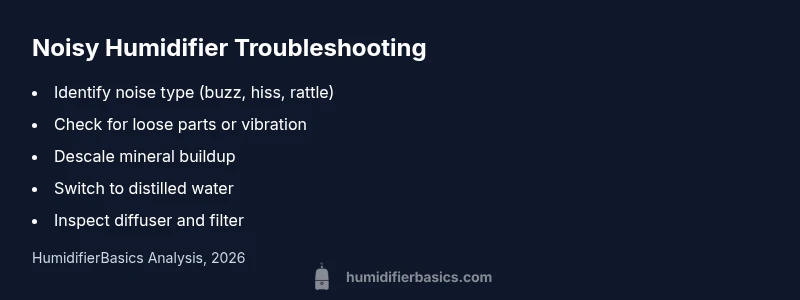
Humidifiers can produce several distinct sounds, and identifying the type of noise helps pinpoint the cause. A light, high-pitched whine often indicates a loose fan blade or a misaligned housing. A steady buzzing may come from electrical components or a worn motor bearing. Bubbling or splashing noises usually stem from mineral buildup in the water tank or diffuser plate. A rattling sound can come from a loose filter or a vent cover vibrating against the cabinet. Finally, an irregular clunk or grind is a sign of internal wear or a failing pump. Recognize these categories: electrical/engine noises (buzz, whine), water action noises (bubble, splash), and physical contact noises (rattle, click). This taxonomy guides your troubleshooting, letting you skip to the most likely fix and avoid unnecessary disassembly.
Quick Fixes You Can Try Right Now
Start with the simplest, safest steps before diving into deeper maintenance. First, unplug the unit and inspect for loose screws or a loose cabinet panel; tighten if needed. Next, move the humidifier away from walls or furniture to reduce vibration against surfaces. Empty the tank and descale with a vinegar solution or manufacturer-recommended cleaner, then rinse thoroughly. Refill with distilled or demineralized water to minimize mineral buildup. Clean or replace filters and diffusers as directed by the manufacturer. Finally, reassemble and run the unit at a low setting to observe whether the sounds subside. If the noise persists after these steps, proceed to a more detailed diagnostic flow.
Diagnostic Approach: Symptom to Solution
This section helps you structure your troubleshooting so you don’t miss obvious culprits. Start with visual checks (loose screws, cracked housing, clogged vents). Move to water quality (mineral scale, scale on the diffuser). Then assess electrical safety (cord damage, plug warmth). If you hear mechanical sounds during startup, the fan or pump is a likely culprit. For each symptom, there is a natural progression of fixes from easy to hard: tighten, descale, replace, or service. Remember safety: never service a plugged-in unit, and discontinue use if you detect heat, smoke, or buzzing that worsens.
Step-by-Step Fixes for the Most Common Cause: Mineral buildup
The most frequent noise source is mineral buildup on the diffuser and base. Here is a safe, methodical approach designed to minimize risk while restoring quiet operation. Begin by powering down and unplugging the humidifier. Disassemble only as far as the manufacturer allows and avoid touching internal electrical components. Prepare a vinegar solution (1:1) to descale the affected parts, soaking for 15–30 minutes. Rinse thoroughly with clean water, and repeat if visible deposits remain. After descaling, rinse every component, including filters or wicks, with warm soapy water and a final rinse to remove all soap residues. Reassemble, fill with distilled water, and run on a low setting to confirm the fix. If noise remains, you may be dealing with a worn motor or diffuser—consider professional service or replacement.
Prevention and Safe Usage to Minimize Noise
Routine maintenance is the best defense against noise. Establish a weekly check-in during periods of heavy use: inspect for loose parts, ensure the unit sits on a stable surface, and wipe down visible mineral buildup. Use distilled water or demineralized water to reduce scale, and follow manufacturer recommendations for filter or diffuser replacement. Store the humidifier away from heat sources and out of high-traffic areas to reduce vibration transfer. Finally, document a simple maintenance schedule that aligns with your water hardness and usage to prevent future issues. HumidifierBasics emphasizes that consistent care not only reduces noise but also extends equipment life and maintains air quality.
Steps
Estimated time: 45-60 minutes
- 1
Power down and safety check
Unplug the humidifier and allow any moving parts to stop. Inspect for obvious safety hazards and loose screws around the cabinet. If you see cracked housings or exposed wires, do not operate the unit and seek professional service.
Tip: Always unplug before handling internal parts to prevent electric shock. - 2
Check placement and stability
Move the unit away from walls and furniture to prevent vibration transfer. Place it on a flat, level surface and ensure the base sits snugly against the surface. A wobbly base can amplify rattling noises.
Tip: Use a small anti-slip mat or foam pad under the base for stability. - 3
Descale and clean
Prepare a descaling solution (follow manufacturer guidance or a 1:1 vinegar solution for mineral deposits). Soak detachable parts as recommended, then rinse thoroughly until odor-free. Clean the tank, diffuser, and any filters.
Tip: Rinse thoroughly to avoid leaving vinegar taste in the water. - 4
Switch to distilled water
Empty and rinse the reservoir again, then fill with distilled water. Mineral content in tap water is a common source of ongoing buildup and noise.
Tip: Distilled water reduces scale and keeps the diffuser cleaner longer. - 5
Inspect filters/diffusers
Check for clogs, wear, or damage. Replace as directed by the manufacturer. A clogged diffuser or worn filter can produce unusual sounds and reduce efficiency.
Tip: Use the original parts recommended by the brand. - 6
Test run and monitor
Reconnect power and run at a low setting for 5–10 minutes. Listen for changes in noise level and observe for any abnormal smells or heat. If noise persists, escalate to professional service or consider replacement.
Tip: Keep a short maintenance log to track your results.
Diagnosis: Humidifier is making noticeable noise
Possible Causes
- highLoose parts or cabinet vibration
- mediumMineral buildup in reservoir or diffuser plate
- lowWater level too low causing pump cavitation
- lowDamaged fan or pump bearing
Fixes
- easyTighten cabinet screws and secure loose panels; reposition unit on stable surface
- easyDescale and clean reservoir and base using vinegar solution or manufacturer descaler
- easyRinse and refill with distilled or demineralized water; replace filter if applicable
- hardInspect fan housing and motor; if abnormal wear, replace component or contact service
FAQ
Why is my humidifier making a loud buzzing sound?
A buzzing sound often points to motor electrical issues or a loose component. Check for loose screws, cable strain, and a failing fan. If the noise remains after tightening and cleaning, seek professional service.
A buzzing sound usually means motor or electrical parts are loose or worn; check fasteners and replace worn parts if needed.
Is an ultrasonic humidifier louder than an evaporative one?
Ultrasonic units can be slightly louder due to vibrating plates, especially if mineral buildup is present. Evaporative models tend to be quieter with a steady hum. Regular cleaning helps both keep noise down.
Ultrasonic humidifiers can be a bit louder, but good maintenance keeps the noise low.
Can mineral buildup cause noise in a humidifier?
Yes. Deposits can clog the diffuser and moving parts, causing rattling or grinding. Descale and switch to distilled water to prevent recurrence.
Mineral buildup can cause noise; descale and use distilled water to prevent it.
What should I do if there is smoke or burning smell from my humidifier?
Unplug immediately. A burning smell signals an electrical fault or overheating. Do not use the unit again until inspected by a professional or replaced.
If you smell burning, unplug it now and seek help.
How often should I replace humidifier parts to reduce noise?
Follow the manufacturer’s schedule for filters, wicks, and diffusers. Replacing worn parts reduces noise and maintains performance.
Change parts as the manual recommends to keep noise down.
When is it time to replace a noisy humidifier?
If noise persists after cleaning and maintenance, or there are electrical signs of damage, replacement is wise. Look for quieter, energy-efficient models.
If noise continues after maintenance, consider replacement.
Watch Video
The Essentials
- Inspect for loose parts and tighten as needed.
- Descale to remove mineral buildup and run on distilled water.
- Use a stable surface and proper placement to reduce vibration.
- If noise persists, consult a professional or replace the unit.