Humidifier for Living Room: A Practical Guide
Learn how to choose, place, and maintain a humidifier for your living room to improve air quality, comfort, and health. This guide covers types, humidity targets, water quality, placement, safety, and maintenance tips for homeowners and renters.

Choose the right humidifier, place it away from walls and furniture, and run it to maintain a target humidity around 40-60%. Use distilled water, clean the unit regularly, and monitor moisture with a hygrometer. This quick answer outlines the setup essentials; see the full step-by-step guide for details. Also consider noise level and energy use when selecting the model.
Why a humidifier for living room matters
In the heart of the home, the living room is where families gather, guests relax, and daily life unfolds. Dry air can leave skin itchy, eyes irritated, and noses congested, especially in winter heating seasons or arid climates. A well-chosen humidifier for living room can raise indoor humidity to a level that feels more comfortable and supports respiratory comfort without creating damp conditions. According to HumidifierBasics, balancing indoor humidity to roughly 40-60% can reduce irritation and improve perceived comfort, particularly for people with dry skin or allergies. HumidifierBasics analysis shows that stable humidity in common living spaces also helps minimize static electricity and protect wooden furniture and musical instruments from excessive drying. The right device, placed correctly, becomes a practical tool for daily living, not just a gadget. Remember that humidity is a spectrum, not a single target; you’ll fine-tune it based on season, outdoor climate, and personal comfort. This section sets the foundation for selecting and using a humidifier that serves your living room well, without turning the space into a damp environment.
Choosing the right humidifier for your living room
Humidifiers come in several types, each with its own strengths and trade-offs. Ultrasonic models produce whisper-quiet mist using a vibrating diaphragm; evaporative units rely on a wick filter and a fan to add moisture naturally; warm-mist devices boil water for a comforting, visible steam but use more energy and require careful handling around kids and pets. For a living room, consider room size, noise tolerance, water quality, and ease of cleaning. If you want low maintenance and quiet operation, an ultrasonic unit with a sealed water reservoir is a strong choice. If you need to raise humidity quickly in a larger space, an evaporative model with a larger tank may be more effective. For households with small children or pets, prioritize safety features such as automatic shutoff when the water is low and a secure lid. The HumidifierBasics team recommends starting with a mid-range model that can handle your room’s square footage, then adjust placement and humidity settings based on observations over the first week.
Placement and setup for optimal comfort
Place the humidifier on a stable, water-proof surface at least a few inches away from walls, curtains, and furniture. Avoid placing it directly on carpets, which can absorb moisture and harbor mold. If your space has high ceilings or open-concept layout, position the unit toward the center of the room so air blends evenly. Run the device with doors closed in winter to maintain stable humidity, but monitor humidity with a hygrometer to prevent over-humidification. Keep the humidifier away from heat sources and direct sunlight, and ensure cords are tucked away to prevent tripping.
Target humidity and how to measure it
Humid air can feel comfortable at 40-60% relative humidity, but personal comfort varies. Start at the middle of that range (around 50%) and adjust by 5-10% depending on symptoms and the environment. Use a reliable hygrometer placed at breathing height in the living room, not on the floor or behind furniture. If you notice condensation on windows or a musty odor, you may be over-humidifying; reduce target humidity or relocate the unit. In environments with dry winters or high dust, maintaining consistent humidity is especially helpful for throat and nasal comfort.
Water quality and maintenance routines
Water quality matters for air quality and unit longevity. Tap water can leave mineral deposits that lead to white dust. Distilled or demineralized water minimizes mineral residue and reduces cleaning frequency. Whichever water you use, empty the reservoir daily, rinse, and dry to prevent bacterial growth. Clean the humidifier weekly with a solution of white vinegar or a manufacturer-recommended cleaner to remove mineral buildup. If your model has a filter, replace it according to the manufacturer’s schedule and keep spare filters on hand. After cleaning, rinse thoroughly to avoid introducing cleaner residues into the air.
Safety, energy use, and common pitfalls
Humidifiers are generally safe when used as directed, but there are common hazards to watch for. Over-humidification can lead to mold or mildew in walls and furnishings, particularly in poorly ventilated spaces. Use the auto-shutoff feature to avoid waste and dryness. If children or pets are nearby, ensure the unit is out of reach and tip-resistant. Look for energy-efficient models and avoid running the device at full blast all day unless needed. Lastly, never mix essential oils directly into the humidifier unless the device is designed for them.
Troubleshooting common issues and quick fixes
White dust on surfaces often signals mineral deposits from hard water. Switch to distilled water and clean the unit thoroughly. If the mist seems weak, check water level, filter condition, and if the fan is functioning. A musty smell or visible mold around the unit suggests cleaning is overdue or poor ventilation; pause operation and clean the unit and surrounding area. If the unit stops, verify the power supply and any safety shutoffs, then consult the user manual.
Regular maintenance and care schedule
Create a simple weekly and monthly routine to keep your living room humidifier efficient. Weekly: inspect the tank seal, clean reservoir, wipe exterior, and check for mineral buildup. Monthly: replace filters if your model uses them, sanitize the reservoir with vinegar solution, and replace old parts as recommended by the manufacturer. Document observations such as humidity levels, noise, and any odors to track changes over time.
Start now: quick-start checklist
- Determine room size and humidity needs.
- Choose a suitable humidifier type for your living room.
- Place the unit on a stable, raised surface away from walls.
- Fill with distilled water and power on.
- Set target humidity to 40-60% and verify with a hygrometer.
- Run for 24 hours and observe changes in comfort.
- Clean the unit and reservoir weekly; replace filters as needed.
- Maintain a regular maintenance schedule to prevent mineral buildup and mold.
Tools & Materials
- Humidifier for living room(Primary device)
- Distilled water(Minimize mineral dust)
- Hygrometer(Monitors humidity levels)
- Soft cloth(Clean exterior and reservoir)
- Mild detergent (gentle cleaner)(For routine cleaning)
- Soft brush(Dislodge mineral buildup)
- Replacement filters(Depends on model)
- Decalcifying solution or white vinegar(Use for mineral removal)
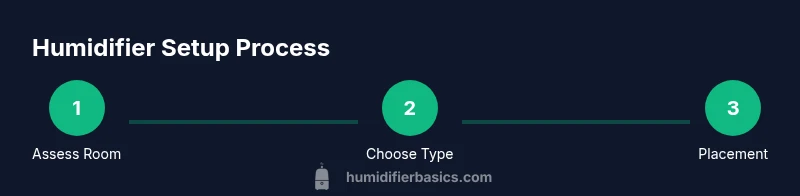
Steps
Estimated time: 30-60 minutes
- 1
Assess room needs
Measure the living room and estimate its square footage to guide humidifier capacity. Consider ceiling height and furniture layout, since obstructions affect airflow and moisture distribution. The goal is to choose a model that can maintain comfortable humidity without oversaturating corners.
Tip: Use a tape measure and calculate total floor area (length x width) to estimate required tank size. - 2
Choose the humidifier type
Select between ultrasonic, evaporative, or warm-mist based on noise tolerance, safety concerns, and cleaning preferences. For living rooms with kids or pets, prioritize models with secure lids and auto shutoff.
Tip: If quiet operation is paramount, favor ultrasonic units with built-in safety features. - 3
Prepare placement
Find a stable, elevated surface away from walls, drapes, and electronics. Ensure the area is dry and easy to clean. Avoid placing on carpet or near windows where condensation may occur.
Tip: Keep at least 6-12 inches of clearance on all sides for airflow. - 4
Fill with water and power up
Fill the tank with distilled water if possible. Install the tank securely, plug in, and switch on the device. Set initial humidity target to a middle range (around 50%).
Tip: Do not overfill beyond the max fill line to prevent spills. - 5
Set humidity target and run test
Adjust the humidity target to 40-60% based on comfort and readings from the hygrometer. Run the unit for at least several hours to observe mist output and fan noise. Fine-tune as needed.
Tip: Record starting humidity to track progress. - 6
Monitor and adjust
Check the hygrometer every few hours for the first day. If windows fog or condensation forms, reduce target humidity or reposition the unit.
Tip: Winter conditions may require a slightly higher target in living rooms with dry air. - 7
Establish a cleaning rhythm
Empty and rinse the reservoir daily; clean the unit weekly with a mild detergent and vinegar solution to remove mineral buildup.
Tip: Always dry all parts before reassembly to prevent bacterial growth. - 8
Document and adjust
Keep a simple log of humidity readings, symptoms, and any odors or issues. Review monthly to decide if you need a larger unit or a more frequent cleaning schedule.
Tip: A quick log helps identify seasonal needs.
FAQ
What is the ideal humidity range for a living room?
Most living rooms are comfortable around 40-60% relative humidity. Individual comfort may vary, so start near 50% and adjust in small increments while monitoring with a hygrometer.
Aim for about 50% humidity and adjust within a 40 to 60 percent range depending on comfort and condensation signs.
Can I use tap water in my humidifier?
Tap water can be used, but it may leave mineral deposits and white dust. Distilled or demineralized water minimizes this issue and simplifies cleaning.
Tap water works but can create mineral dust; distilled water reduces that risk.
How often should I clean my humidifier?
Clean the reservoir weekly and perform a thorough cleaning monthly or according to the manufacturer's guidelines. Regular cleaning prevents mold, odors, and mineral buildup.
Clean weekly, and do a deeper clean monthly or per your manual.
Which humidifier type is best for allergy sufferers?
Evaporative models with cleanable filters or ultrasonic units with sealed reservoirs are good options. Ensure you maintain clean water and replace filters as needed.
Evaporative or sealed ultrasonic models help, but keep filters clean and water fresh.
Can a humidifier cause mold or mildew?
Yes, if humidity stays too high or if ventilation is poor. Use the auto-shutoff, monitor humidity, and ensure the room is ventilated when needed.
Mold risk comes from high humidity and poor ventilation; monitor and ventilate.
How do I know if my living room is too humid?
Indicators include condensation on windows, damp surfaces, and a lingering musty odor. Lower humidity or move the unit to a larger space with better airflow.
Look for window condensation and damp spots; reduce humidity if you see them.
Watch Video
The Essentials
- Assess room size to pick an appropriate unit
- Maintain 40-60% humidity for comfort and health
- Use distilled water to minimize mineral dust
- Regular cleaning prevents mold and bacteria