How to Use a Humidifier Safely at Home
A comprehensive, safety-first guide to choosing, setting up, and maintaining a humidifier to improve indoor air quality while preventing mold and mineral buildup.

Learn how to choose, set up, and safely operate a humidifier to improve indoor air quality. This guide covers essential safety checks, water quality considerations, filter maintenance, and proper humidity targets. You'll also discover warning signs, cleaning routines, and when to replace parts to prevent mold, mineral buildup, or over-humidification in your home.
Why Safe Humidity Matters
Humidity levels in your home affect comfort, health, and even the integrity of building materials. According to HumidifierBasics, safe humidity levels typically fall in the 30%–50% relative humidity range. Maintaining this range helps reduce skin dryness, nasal irritation, and static electricity, while also limiting condensation that can encourage mold growth on walls, furniture, and textiles. This is not just about comfort—it's a safety and maintenance decision for your living space.
- Benefits of proper humidity: improved skin hydration, better respiratory comfort, and reduced static.
- Risks of excess humidity: mold, dust mite proliferation, and moisture-related damage to wood and fabric.
- Short-term targets: monitor daily fluctuations and aim for a stable average in the mid-range.
Next, we’ll cover how humidifiers work, what to look for when selecting a device, and practical steps to achieve reliable, safe humidity without overshoot.
How Humidifiers Work: A Quick Primer
Humidifiers add moisture to dry indoor air and come in several core types: ultrasonic, evaporative, and warm-mist. Ultrasonic units produce a cool mist using high-frequency vibrations and are typically quiet and energy-efficient. Evaporative models use a wick or a sieve with a fan to evaporate water, which tends to be self-regulating. Warm-mist units boil water to create steam, which can be comforting but raises a burn risk and uses more energy. Understanding these basics helps you choose the right device for bedrooms, living rooms, or nurseries and sets expectations for maintenance and cleaning.
- Ultrasonic: quiet, compact, and often requires distilled water to minimize white dust.
- Evaporative: self-limiting output and generally easy to maintain with a filter.
- Warm-mist: fastest humidity boost but hotter and energy-intensive.
Whichever type you choose, always follow the manufacturer’s instructions and focus on safe operation, maintenance, and humidity monitoring to avoid over-humidification and mold growth.
Choosing the Right Humidifier for Your Space
Selecting a humidifier begins with room size and your target humidity. Look for a model whose maximum output matches the square footage of the room and whose mist settings let you fine-tune humidity without overshooting. Check for features that matter in real homes: a simple on/off switch, an accessible water tank, an indicator when cleaning is due, and compatibility with distilled water to minimize mineral buildup. Energy efficiency matters too, particularly for bedrooms and nurseries where the device runs for hours.
- For small bedrooms (around 100 sq ft), a low-output unit is usually enough.
- For larger living spaces, consider a higher-output model and a separate humidistat to track RH (relative humidity).
- If someone in the home has allergies or asthma, choose an evaporative or ultrasonic model with filters, and ensure easy cleaning.
Avoid models with overly complex controls that are difficult to maintain or that produce visible mineral dust from tap water. The right humidifier should feel like a simple, reliable ally in your home’s air-quality strategy.
Setup and Operation: Safe Practices
Safe setup starts with placement. Put the humidifier on a stable, water-resistant surface away from walls, electronics, or doorways where mist can condense. Keep it out of reach of children and pets, and use a power source that matches the unit’s voltage. Fill with distilled water to minimize mineral scaling, and never run a humidifier dry. Set the target humidity to around 40–50% for most homes and monitor with a hygrometer to prevent over-humidification, which can encourage mold growth.
- Position the unit 3–4 feet off the ground to promote even distribution.
- Use a hygrometer in the room to track RH accurately.
- Start with a lower setting and gradually adjust as needed based on readings.
- If the unit has a built-in humidistat, ensure it’s calibrated according to the manual.
Regular maintenance is essential. Plan routine checks for leaks, tank cleanliness, and proper valve function. Even small leaks can create damp spots that invite mildew and unpleasant odors.
Cleaning, Maintenance, and Water Quality
Mineral buildup and microbial growth are the two most common problems with humidifiers. Regular cleaning prevents these issues and extends the device’s life. A weekly cleaning routine combined with a light descaling every month is usually enough for most households. Start by unplugging the unit, disassembling the tank and components per the manual, and rinsing every part with clean water. For mineral scale, soak parts in a diluted white vinegar solution (one part vinegar to one part water) for 20–30 minutes, then brush away residues and rinse well. Dry all parts completely before reassembling.
Water quality matters too. Tap water often contains minerals that create white dust and promote scale buildup. Distilled water minimizes mineral traces and helps keep sensitive surfaces clean. Replace filters as recommended by the manufacturer, and avoid adding essential oils or humidifier cleaners unless the device is designed for them, as these can damage components.
- Wipe down the exterior with a damp cloth after heavy use.
- Rinse out the tank at least once a week and between refills.
- If you notice unusual odors, run a minute-long cleaning cycle and replace the water.
Humidity Targets and Real-World Scenarios
Air moisture levels vary by room use and season. In bedrooms, a target RH of 40–50% tends to support comfortable sleep without excessive dampness. In living spaces with hardwood floors or furniture, aim for a similar range to protect materials while maintaining comfort. In winter, indoor air dries out quickly due to heating systems; a humidifier can help you reach the target range, but avoid overcompensation by using a timer or humidity sensor. In warmer months, outdoor humidity can already be high, so monitor indoor RH to prevent excess moisture inside.
- For nurseries or child rooms, opt for quiet, low-output ultrasonic models with easy-to-clean components.
- In homes with wood furniture, maintain RH near 40-45% to reduce cracking or warping.
- Use a hygrometer in multiple rooms to get a clear picture of overall humidity levels.
These practices support a healthier living environment and simpler maintenance, reducing the risk of mold, mildew, and dust mites.
Troubleshooting Common Issues
Even well-maintained humidifiers can run into common issues. If the device won’t start, check the power supply and confirm the tank is seated correctly. If mist output is weak or nonexistent, ensure the water tank is properly filled and the outlet isn’t blocked by lint or debris. White dust around the unit typically indicates minerals from hard water; switch to distilled water and clean mineral deposits from the vents. If you notice a musty odor or visible mold in the tank, discontinue use, clean thoroughly, and consider replacing the unit if odors persist.
- Keep the water tray clean to prevent bacteria growth.
- Clean monthly with a vinegar solution to remove mineral buildup.
- Store the unit dry when not in use to prevent mold in the tank.
- If symptoms persist, contact the manufacturer’s support line for model-specific guidance.
Tools & Materials
- Humidifier unit(Any type (ultrasonic, evaporative, warm-mist) that matches room size.)
- Distilled water(Minimizes mineral buildup and white dust.)
- Cleaning brush(Soft-bristle brush for tanks and vents.)
- White vinegar(Descale mineral deposits (1:1 with water).)
- Mild dish soap(For routine cleaning of exterior parts.)
- Soft microfiber cloth(Drying and wipe-down after cleaning.)
Steps
Estimated time: 30-60 minutes
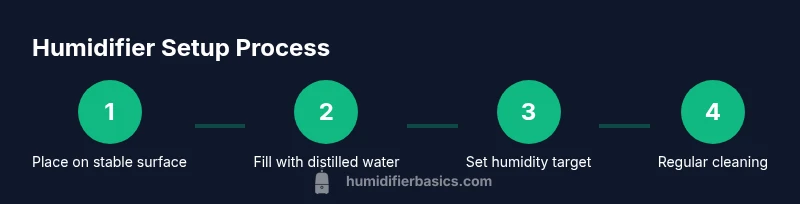
- 1
Choose safe placement
Place the humidifier on a stable, water-resistant surface away from walls, electronics, and doorways to prevent direct mist on surfaces. Ensure it’s out of reach of children and pets. This reduces spill risk and accidental use.
Tip: Set it on a level surface that’s easy to clean in case of spills. - 2
Fill with distilled water
Fill the tank to the recommended max line with distilled water. Avoid tap water to reduce mineral buildup and white dust. Refill only when the tank is cool and never run the unit dry.
Tip: Use a measuring cup for consistent filling and prevent overflow. - 3
Power on and set humidity
Plug in the unit and turn it on. If your model has a humidistat, set a target around 40–50% RH. Use a separate hygrometer in the room to verify readings for accuracy.
Tip: Start with a lower setting and adjust gradually based on RH readings. - 4
Monitor mist and RH
Observe the mist output and check RH with a hygrometer. If the room humidity climbs above 50%, reduce output or shorten running intervals to prevent mold. If it drops below 30%, increase output slightly.
Tip: Avoid rapidly changing RH to reduce condensation on surfaces. - 5
Regular cleaning routine
Disassemble according to the manual and clean weekly. Descale monthly with a vinegar solution, rinse thoroughly, and dry all parts before reassembly.
Tip: Don’t skip drying; moisture left in the tank encourages bacteria growth. - 6
Maintenance and replacement
Replace filters as recommended by the manufacturer. Inspect seals, gaskets, and the power cord for wear. Store the unit dry when not in use.
Tip: Keep a calendar reminder for maintenance to avoid neglected parts.
FAQ
Is running a humidifier dangerous if not monitored?
Yes, over-humidification can lead to mold growth and moisture damage. Always monitor RH and avoid running units in unventilated spaces without a humidity target.
Over-humidification can cause mold and dampness, so keep an eye on humidity levels with a hygrometer.
Should I use distilled water in my humidifier?
Yes. Distilled water minimizes mineral buildup and white dust, which helps keep the device cleaner and the room feel more comfortable.
Distilled water helps prevent mineral dust and keeps the unit cleaner.
How do I know what humidity level to target?
Aim for about 40–50% relative humidity in most rooms. Use a hygrometer to verify and adjust the humidifier settings as needed.
Hold humidity around forty to fifty percent and check with a hygrometer.
How often should I clean my humidifier?
Clean the unit weekly and descale monthly if you have mineral buildup. Rinse parts thoroughly and dry before reassembly.
Clean at least once a week, and scale off minerals monthly.
Can a humidifier help with allergies or asthma?
Humidity alone isn’t a cure; it can help with dryness but you must prevent mold by keeping RH within target and cleaning regularly. Consult a healthcare professional for persistent symptoms.
Humidifiers can help dry air, but mold and dust can worsen allergies if not managed.
The Essentials
- Maintain 40–50% RH for comfort and mold prevention.
- Use distilled water to minimize mineral buildup and dust.
- Regular cleaning prevents bacterial growth and odors.
- Choose a unit sized for your room and monitor RH with a hygrometer.