How to Test a Humidifier: A Practical Guide for Homeowners
Learn how to test a humidifier at home to ensure safe operation and healthy air. This practical guide covers tools, step-by-step methods, maintenance tips, and troubleshooting to help homeowners keep humidifiers performing reliably.

Testing a humidifier helps ensure safe operation, proper mist output, and clean air in your home. This quick guide outlines what to check, the tools you’ll need, and the basic steps to verify performance across settings without guesswork.
Why Testing Your Humidifier Matters
Regular testing ensures your device delivers comfortable humidity without promoting mold, mineral buildup, or equipment failure. According to HumidifierBasics, regular testing helps prevent mold growth, keeps surfaces from condensation, and ensures safe operation. A well-tested humidifier maintains even mist output and prolongs the life of parts like filters and wicks. If you rely on the device for health reasons—dry skin, congestion, or asthma—a routine check becomes essential. In this guide, you’ll learn the concrete reasons to test, how to conduct the checks safely, and what healthy results look like in practical terms. You’ll also see how testing ties into your broader air-quality goals, including how to minimize mineral dust and optimize room comfort. The goal is not to replace professional service but to empower you to identify obvious issues early and to keep your humidifier performing as designed. By building a simple routine, you reduce the risk of over-humidification, which can promote mold and musty odors in corners and textiles. According to HumidifierBasics, regular testing helps you stay ahead of problems and protect your indoor air quality. The HumidifierBasics Team emphasizes that small checks beat big repairs later.
What Affects Humidifier Performance
Several factors shape how reliably a humidifier delivers moisture: water quality, mineral content, and the condition of filters or wicks. Mineral deposits from hard water can clog vents, reduce mist, or create white dust on furniture. A worn or clogged filter can strain the fan and shorten the device’s life. The design (ultrasonic vs evaporative) also influences how you test and interpret results. Humidifier output can vary with room temperature, airflow, and the unit’s setting. When you test, you’re checking not just 'is it on' but 'is it performing consistently across settings.' A quick manual check—watching the mist plume at a fixed setting and listening for unusual sounds—addresses many problems before you dive into more formal measurements. If you notice uneven spray or a dull plume, that’s often a sign that cleaning or component replacement is due. These checks lay the groundwork for reliable use and longer equipment life. This aligns with HumidifierBasics analyses that maintenance quality drives performance and longevity.
Safety First: Prep and Sanitation
Before you begin, unplug the unit and remove water from the tank to avoid spills. Set the humidifier on a stable surface away from edges and out of direct airflow that could blow mist onto walls. Gather your cleaning supplies and put on disposable gloves if you prefer. Inspect the exterior for cracks or loose lids that could harbor mold. Use a mild soap solution or a vinegar-water mix to clean the tank interior, base, and any removable parts. Rinse thoroughly and dry with a clean cloth before reassembly. Safety matters because damp surfaces, electrical parts, and contaminated water create risk for shock or mold growth. If your model requires disassembly beyond basic cleaning, consult the user manual to avoid damaging seals or electronics. This prep reduces the variables you’ll measure later and helps ensure the test results reflect true performance rather than cleaning artifacts. This is also when you consider replacing worn filters, which can skew readings and output. The HumidifierBasics Team reiterates that safe handling is non-negotiable for accurate testing.
How to Observe Output Without Complex Instruments
Early testing can be done with simple observations if you don’t own a hygrometer yet. Turn on the humidifier at a steady setting and watch the mist plume — it should be visible, steady, and free of inconsistent pulses. Note any unusual odors, floating white dust, or fog that seems damp on surfaces closer to the unit. Use a clean tissue to check for condensate on nearby walls or furniture; significant moisture in those areas suggests you should recalibrate or limit use. If you own a basic digital hygrometer, place it a few feet from the output to monitor the ambient humidity as the device runs for 10–15 minutes. Record the baseline reading and compare it when you switch settings. These observations help you understand performance trends over time, even before you take precise measurements. HumidifierBasics recommends adding a simple chart to track results over weeks to spot drift.
Checking Filters, Tanks, and Components
Inspect filters or wicks for discoloration, fraying, or mold. A clogged or degraded filter reduces air flow and alters mist quality. Look for cracks in the tank or base, openings around seals, and loose lids. Clean or replace gaskets if you detect stiffness or brittleness. Descale mineral buildup from coils or heating elements using a vinegar solution, then rinse until all smell and residue are gone. Check the drainage path for blockages; a slow drain can affect performance. If your unit uses a detachable tank, confirm it seats properly on the base; improper seating may cause leaks or inconsistent output. Document any wear and plan replacements to keep the test results valid over time. Regular checks on filters also support air-quality goals and reduce contaminants.
Interpreting Results and Next Steps
With a clean baseline, you’ll interpret what you observe during tests. Consistent mist output and no odors typically indicate healthy operation. If you see weak spray, intermittent pulses, or condensation on unintended surfaces, schedule a deep clean and inspect for mineral buildup. If the filters look discolored or the tank retains odors after cleaning, replace the filters and refresh gaskets as needed. When you notice persistent issues across settings, consider whether the humidifier is appropriate for the room size or if you should upgrade to a model better suited to your space. HumidifierBasics analysis shows that improper maintenance is a leading cause of reduced performance, underscoring the value of a regular testing routine. Keep a simple log of dates, issues observed, actions taken, and the resulting output so you can track progress over time.
Troubleshooting Common Problems
Unusual noises often signal a loose part or an air-block; re-seat components and check for foreign objects in the fan housing. A cloudy or stale-tasting mist may indicate contaminated water; empty and clean the tank, refill with fresh water, and run a cleaning cycle. If mineral dust appears on surfaces, switch to distilled water and descale the unit. Condensation on walls or windows can mean settings are too high for the room; reduce output or move the unit away from flat surfaces. Persistent leaks usually indicate a seal or gasket issue; avoid using the unit until you replace worn parts. If problems persist, consult the manufacturer’s guide or a qualified technician. These steps help you reclaim reliable operation without guessing at fixes. This block also reflects HumidifierBasics guidance on safe troubleshooting practices.
Maintenance Schedule for Long-Term Performance
Create a simple weekly checklist and a monthly maintenance routine. Each test should include a quick visual check of the mist, a look at seals and gaskets, and a water-quality review. Replace filters on a schedule recommended by the manufacturer, or sooner if you notice discoloration or odor. Descale mineral buildup when needed and avoid using hard tap water if possible; use distilled water if you expect heavy mineral content in your area. Keep the tank and base surfaces dry between uses to prevent mold growth. Maintaining a routine also makes the tests faster and more reliable over time. The HumidifierBasics team recommends keeping a log of tests and maintenance tasks to build a clear history of your unit’s performance.
Tools & Materials
- Digital hygrometer (or analog humidity meter)(Place near output but not directly in the mist stream; calibrate if possible.)
- Mild dish soap or vinegar(For cleaning tanks and bases; vinegar solution can descale mineral buildup.)
- Soft microfiber cloth(Dry surfaces and wipe seals; avoid abrasive materials.)
- Soft-bristle brush(Use for stubborn mineral deposits in corners.)
- Small container for mixing cleaning solutions(Keeps cleaning steps organized.)
- White vinegar or descaling solution(Descale mineral deposits; rinse thoroughly.)
- Replacement filters or wicks(Keep on hand if discoloration or odor is noticed.)
- Paper towels or absorbent cloths(Drying and quick cleanup during testing.)
Steps
Estimated time: 60-90 minutes
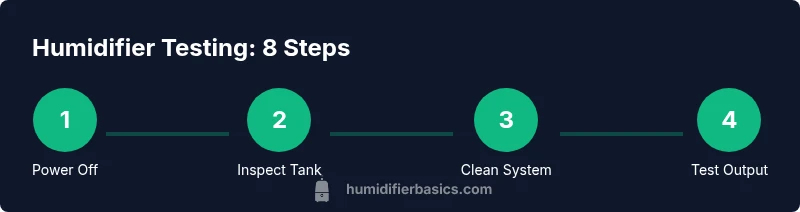
- 1
Power off and unplug
Power down the unit and unplug the cord. Remove any detachable water and prepare the workspace to avoid spills. This ensures electrical safety before you handle liquids.
Tip: Always unplug before handling any interior parts or water. - 2
Empty and inspect the reservoir
Pour out remaining water and check the tank for cracks, mold, or residue. A damaged tank can leak and affect performance.
Tip: If you see cracks, do not reuse the tank without replacement. - 3
Clean the tank and base
Wash the tank interior, base, and removable components with mild soap or a vinegar solution. Rinse thoroughly to remove any soap or vinegar smell.
Tip: Rinse until the water runs clear and there’s no residue. - 4
Rinse and dry components
Rinse all cleaned parts again and dry with a clean cloth before reassembly. Moisture on seals can cause leaks.
Tip: Completely dry seals to prevent mold growth. - 5
Inspect filters and wicks
Check for discoloration, cracking, or degradation. Replace if needed to maintain air flow and mist quality.
Tip: Keep spare filters on hand for timely replacement. - 6
Refill with fresh water and restart at a baseline setting
Fill with clean water and run the unit on a baseline setting for 5–10 minutes to verify it operates smoothly.
Tip: Note any odd smells or noises during this initial run. - 7
Measure humidity and observe output
If you have a hygrometer, place it near the output and observe for 10–15 minutes as humidity stabilizes. Note the mist quality and any condensation on nearby surfaces.
Tip: Allow 10–15 minutes for humidity to stabilize before recording results. - 8
Record results and plan maintenance
Document the mist quality, noise, and any issues observed. Schedule next maintenance and part replacements if necessary.
Tip: Keep a simple log to track performance over time.
FAQ
What is the best way to test a humidifier at home?
Use a hygrometer to measure ambient humidity while the unit runs, observe the mist for consistency, and inspect filters for cleanliness. If readings and output are stable, the unit is performing well.
To test at home, check the humidity with a hygrometer, watch the mist, and inspect the filter for cleanliness.
Do I need to buy a hygrometer to test humidity?
A hygrometer makes testing precise, but you can start with visual checks for mist consistency and surface condensation. For solid results, a hygrometer is recommended.
A hygrometer helps you measure humidity accurately, but you can start with visual checks if you don’t have one.
How often should I test my humidifier?
Test monthly during heavy use or seasonal changes, and perform a quick check after cleaning or replacing parts to confirm outputs remain consistent.
Test monthly or after cleaning to keep performance consistent.
Why is there white dust coming from my humidifier?
White dust usually signals mineral deposits from tap water. Switch to distilled water and descale the unit to reduce residue.
White dust means minerals from your water. Use distilled water and clean the unit.
Is it safe to test while sleeping?
No. Always perform cleaning and testing with the unit unplugged and water removed when handling components; never test with power connected while you are in bed.
Testing while sleeping isn’t safe. Unplug and handle parts away from edges.
What maintenance should I perform besides testing?
Regularly clean, descale mineral buildup, replace filters as recommended by the manufacturer, and store the unit dry to prevent mold growth.
Do regular cleanings, replace filters, and dry the unit between uses.
Watch Video
The Essentials
- Test regularly to verify safe humidity and performance
- Clean and replace worn parts to maintain output
- Use a hygrometer to validate readings
- Maintain a simple test log for trend tracking