How to clean a Dyson humidifier: a practical guide
Learn how to clean a Dyson humidifier effectively, prevent mineral buildup, and maintain clean, safe mist. Step-by-step guidance, tools, and maintenance tips from HumidifierBasics.

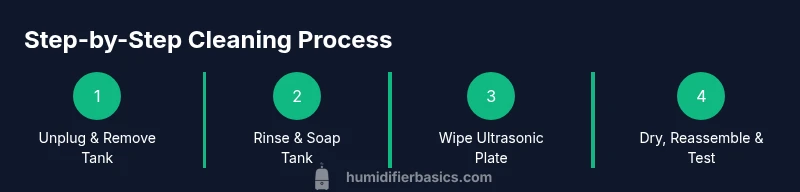
To clean a Dyson humidifier, unplug it first, disassemble the removable parts, and rinse with warm water. Use mild soap for stuck deposits, then rinse thoroughly and reassemble. Dry all components completely before reconnecting to avoid mold growth. Follow the manufacturer guidelines for filter maintenance and sanitize monthly as needed.
Why cleaning a Dyson humidifier matters
According to HumidifierBasics, regular cleaning helps prevent mineral buildup, mold, and unpleasant odors from propagating through mist. When you keep the water contact surfaces clean, you reduce the risk of bacteria and mineral deposits that can degrade performance and air quality. A well-maintained humidifier also lasts longer and operates more efficiently, which can save you time and energy in the long run. Homeowners and renters who follow a practical maintenance routine notice steadier humidity levels and fewer musty smells in living spaces. For best results, use distilled or demineralized water to minimize mineral residue and keep replacement parts in good condition. In short, consistent cleaning is a low-effort, high-reward habit that supports healthier indoor air quality and a more pleasant home environment.
Safety and prep before you start
Before any cleaning task, ensure the unit is unplugged and completely cold. Remove the water tank and any detachable components one at a time so you don’t misplace parts. Use a clean workspace and keep small screws in a labeled container to prevent loss. Work in a well-ventilated area and wear gloves if you have sensitive skin or you’re using cleaning solutions. Avoid aggressive scouring pads or abrasive cleaners that could scratch plastic parts or damage seals. Always consult the user manual for model-specific cautions, especially around electrical components and safety features.
Understanding your Dyson humidifier parts
A Dyson humidifier generally consists of a water reservoir, a vaporization surface (such as an ultrasonic plate or similar element), a base with motor housing, and removable covers. Some models include a filter or cartridge designed to improve water quality; others rely on the tank surface alone. The key cleaning targets are the tank interior, the vaporization surface, and any gasket or sealing surfaces. Keeping the reservoir free of mineral deposits is essential because mineral buildup can impede mist output and create white dust on nearby surfaces. By knowing the parts involved, you can organize your cleaning routine and avoid accidentally damaging sensitive components.
Cleaning methods for mineral deposits and residues
Mineral deposits are the most common issue with humidifiers that use tap water. If you notice white crusts around the tank or mist output, a mild cleaning approach usually helps. A mixture of distilled water and a small amount of white vinegar (typically 1:1) can help dissolve mineral buildup on non-electrical surfaces. Do not soak electronic parts or exposed wiring. After treating deposits, rinse each surface thoroughly with clean water to remove any vinegar scent or residue. If you prefer not to use vinegar, a dedicated humidifier descaling solution can be used following the product instructions. Always air-dry parts completely before reassembly to prevent mold.
Cleaning the water reservoir and tank
The reservoir should be emptied and rinsed with warm water at least every cleaning cycle. Use a soft cloth or brush to scrub the interior gently, focusing on corners and any mineral staining. Avoid harsh brushes that could scratch surfaces. Scrub the exterior lightly to remove dust, then wipe dry with a clean microfiber cloth. If your model uses a removable filter, check the filter housing for buildup and clean or replace according to the manufacturer’s schedule. For best results, rinse the tank twice with fresh water after any soap or vinegar cleaning to ensure no residue remains.
Sanitizing and odor control
Sanitizing is an optional step for many households but can be helpful if you notice any odor or after prolonged storage. Use a solution approved by the manufacturer, or a mild mixture of 1 teaspoon of unscented, mild household cleaner per gallon of water, depending on the model’s instructions. Rinse thoroughly after sanitizing and allow to air-dry completely before reassembly. Regular sanitizing can reduce the growth of algae and bacteria, contributing to cleaner mist and better air quality.
Drying, reassembly, and post-cleaning maintenance schedule
Dry every component completely before reassembling to prevent mold and mildew. Reattach the tank and seals securely, then fill with clean distilled water and run a short test cycle without occupants to verify proper operation. Establish a routine: clean the humidifier every 1-2 weeks during heavy use or every 1-2 months for light use, and sanitize every 2-3 months depending on water quality and usage. Keeping a simple log helps you stay consistent and avoids forgetting essential steps.
Common mistakes to avoid (and why they matter)
Avoid using harsh chemicals or bleach, which can damage seals and produce fumes when heated. Don’t skip drying steps, as residual moisture invites mold growth. Never operate the unit with a damaged seal or exposed wiring. Finally, don’t ignore mineral buildup in the tank; it reduces efficiency and can degrade air quality over time. Following the steps above minimizes these risks and keeps your humidifier performing reliably.
Tools & Materials
- Power outlet and unplugged Dyson humidifier(Unplug before starting; ensure unit is cool.)
- Mild, fragrance-free dish soap(Use a small amount for cleaning.)
- Distilled or demineralized water(Preferred for refills to reduce deposits.)
- Soft microfiber cloth(For drying and wiping surfaces.)
- Soft-bristled brush or old toothbrush(Gently scrub hard-to-reach areas.)
- White vinegar(Use 1:1 with water for mineral deposits (optional).)
- Small bowl or basin(Mix cleaning solutions here.)
- Gloves (optional)(Wear if you have sensitive skin or use stronger cleaners.)
Steps
Estimated time: Total time: 25-45 minutes
- 1
Unplug and prepare
Turn off, unplug, and remove the water tank. Detach any removable components so you can access the interior surfaces safely. Keep small parts organized to avoid misplacing them.
Tip: Place small screws in a labeled container to prevent loss. - 2
Empty and rinse the tank
Pour out remaining water and rinse the tank with warm water. Use a small amount of mild soap if you see residue, then rinse until soap-free.
Tip: Never leave soapy residue; it can affect mist quality. - 3
Clean interior surfaces
Dampen a microfiber cloth with warm soapy water and wipe all interior surfaces of the reservoir. For stubborn spots, use a soft brush gently.
Tip: Avoid abrasive tools that could scratch plastic. - 4
Treat mineral deposits
If you notice mineral buildup, apply a vinegar solution to non-electrical surfaces for a short period, then scrub lightly and rinse thoroughly.
Tip: Do not apply vinegar directly to electrical components. - 5
Rinse and dry parts
Rinse all cleaned parts with fresh water until there is no soap or vinegar smell. Dry thoroughly with a clean cloth, then air-dry any damp seals.
Tip: Ensure all components are bone-dry before reassembly. - 6
Reassemble and test
Reattach the tank and covers, fill with distilled water, and run a short test cycle to verify operation and no leaks.
Tip: If mist output is weak, re-check seals and rinse thoroughly. - 7
Sanitize and schedule upkeep
Sanitize if desired using manufacturer-approved solutions and set a maintenance reminder for 1–2 months depending on usage and water quality.
Tip: Keep a maintenance log to track cleaning dates. - 8
Store or resume use
If storing, empty and dry completely; store in a dry area away from sunlight. When resuming use, replace old water with fresh distilled water.
Tip: Avoid leaving water in the tank for long periods.
FAQ
How often should I clean my Dyson humidifier?
Clean the unit every 1-2 weeks during heavy use or every 1-2 months for light use. Sanitize every 2-3 months depending on water quality and usage.
Clean the humidifier every one to two weeks if you use it often, or every one to two months otherwise. Sanitize every few months based on water quality.
Can I use vinegar to descale mineral deposits?
Yes, a diluted vinegar solution can help dissolve mineral deposits on non-electrical surfaces. Rinse thoroughly after treatment and avoid contact with any electrical parts.
A diluted vinegar solution can help with mineral deposits, but rinse well and avoid any electrical parts.
Is it safe to run the humidifier after cleaning?
Yes, once all parts are completely dry and all residues are rinsed away, you can run a test cycle with plain water to verify proper operation.
Yes, after drying and rinsing, run a quick test with water only to ensure it’s functioning properly.
What should I do if I see a lingering odor?
Re-clean the interior surfaces, ensure complete drying, and consider sanitizing with an approved product. Odors often come from residual moisture or deposits.
If you smell something unusual, re-clean, dry thoroughly, and consider sanitizing with an approved product.
Can I clean it in a dishwasher?
Most humidifier components are not dishwasher safe. Clean manually with soap and water, and avoid submerging electrical parts.
Don’t put parts in the dishwasher; clean by hand with soap and water.
Do I need to replace parts after cleaning?
Replace worn seals or filters according to the manufacturer’s schedule. Regular inspection helps prevent leaks and maintains performance.
Check seals and filters regularly and replace as recommended by the manual.
Watch Video
The Essentials
- Regular cleaning prevents mineral buildup and mold.
- Use mild soap and avoid harsh chemicals.
- Dry all parts thoroughly before reassembly.
- distilled water reduces residue and extends life.
- Follow manufacturer guidelines for sanitizing.