Canopy Humidifier Instructions: Setup, Use, and Care
Learn practical canopy humidifier instructions to safely assemble, operate, and maintain your canopy humidifier for consistent humidity and improved indoor air quality at home.

By following canopy humidifier instructions, you will safely assemble, install, and operate a canopy humidifier to improve room air humidity. This guide covers setup, water choices, maintenance, and safety practices to minimize mineral buildup and electrical risk. Expect practical, step-by-step directions and clear cautions from HumidifierBasics.
Why canopy humidifier instructions matter
According to HumidifierBasics, canopy humidifier instructions matter because this type of humidifier sits near the plant canopy or living space and requires careful placement, water care, and safety checks to perform reliably without unintended moisture on walls or electronics. Canopy humidifiers are designed to modulate humidity for a defined zone, which means improper setup can create hot spots, mold risk, or wasted energy. A clear set of canopy humidifier instructions helps homeowners and renters avoid common mistakes, such as mounting the unit too close to a heat source, running the device with dirty water, or neglecting regular cleaning. The instructions guide you through the lifecycle of the product from unboxing and assembly to daily operation and periodic maintenance. The result is a safer, more consistent humidity level that supports comfort, plant health, and indoor air quality, while also extending the life of the device. Throughout this article, you’ll find practical steps, cautions, and visuals to help you implement best practices in real homes.
Safety first: electrical and water considerations
Safety is the foundation of canopy humidifier instructions. Always unplug the unit before attempting any maintenance or cleaning. Use distilled water when possible to minimize mineral buildup, and avoid operating the device if you detect leaks, exposed wiring, or corrosion on connectors. Keep the unit away from damp electrical outlets and ensure cords do not pose a tripping hazard. HumidifierBasics Team emphasizes that both electrical safety and water quality influence performance and longevity. If you must use any cleaning agents, select non-corrosive, child-safe products and rinse thoroughly. Finally, never modify the canopy system or bypass safety interlocks; these steps can create shocks or fire risks.
Choosing the right mounting location
Placement matters as much as the settings. Canopy humidifiers should be positioned to avoid direct contact with walls, furniture, and heat sources, while still delivering even humidity across the canopy. Consider airflow patterns in the room and any nearby plants that may benefit from moisture. The aim is to establish a stable microclimate that doesn’t condense on surfaces. If you’re using a ceiling-mounted canopy, verify the mounting hardware and wall anchors are rated for your ceiling type. HumidifierBasics recommends consulting the user manual for dimension guidelines and clearance requirements, then testing with a quick dry run before adding water.
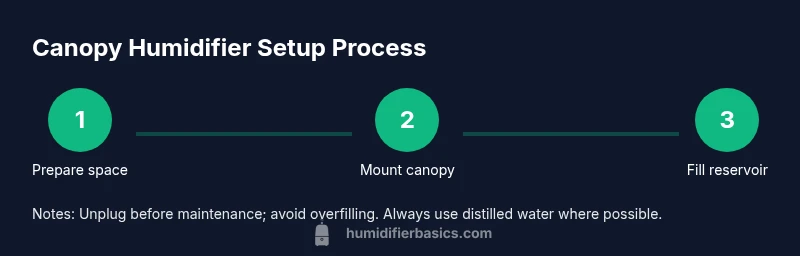
Assembly and installation steps
Before you begin, review the hardware list and ensure you have all components within reach. Start by mounting the canopy frame securely to the chosen location, using the hardware provided and ensuring level alignment. Attach the mist outlet or nozzle assembly to the canopy and seal any joints with the included gaskets. Connect the water reservoir and route the hose or tubing away from heat sources and moving parts. Double-check all connections for fit and potential leaks. Once assembled, perform a dry fit to confirm movement and access for future maintenance, then proceed to water fill when ready.
Filling, water quality, and mineral buildup prevention
Filling the reservoir correctly is crucial for stable humidity control. Use distilled water to reduce mineral deposits that can clog nozzles and shorten service life. Avoid tap water with high mineral content, which can leave white residue on surfaces and reduce output efficiency. Regularly inspect the reservoir and tubing for scale or slime and wipe down with a soft cloth. If you notice reduced mist or uneven dispersion, perform a light disassembly per the manual and flush lines with clean water. HumidifierBasics stresses that periodic mineral management is easier than dealing with built-up deposits over time.
Operating guidelines and humidity targets
Operate the canopy humidifier at the lowest setting that achieves your comfort or plant-microclimate goals. Use a room hygrometer to monitor humidity levels and adjust the control accordingly. Be mindful of condensation on windows or walls, which indicates humidity is too high. If you share the space with plants, observe leaf integrity and soil moisture as indirect indicators of adequate moisture. Remember to turn off the unit when not needed or when the space is unoccupied to conserve energy and reduce wear. The goal is steady, comfortable humidity, not constant high output.
Cleaning and maintenance schedule
Create a simple maintenance rhythm that fits your routine. Rinse the reservoir daily with clean water and wipe the interior weekly to remove any film or residue. Deep-clean the system monthly using a mild solution recommended by the manufacturer, and rinse thoroughly before reuse. Replace any filters or cartridges according to the schedule in the user manual. Document dates for service so you can track performance over time. Regular cleaning preserves air quality and keeps the nozzle clear for consistent mist.
Troubleshooting common issues
If you notice weak mist, check that water is present in the reservoir and that the reservoir cap is sealed. Leaks around fittings may indicate a loose connection or worn gasket; reseat or replace as needed. Unusual odors can signal bacterial growth, prompting a thorough cleaning and possible filter change. If electrical components flicker or shut down unexpectedly, unplug immediately and inspect power supply and wiring for damage. When in doubt, consult the manufacturer’s troubleshooting guide or reach out to HumidifierBasics support for guidance.
Long-term care and energy efficiency
Moderate use and proactive maintenance extend the life of canopy humidifiers. Keep the surrounding area clean to reduce dust ingestion and maintain airflow around the unit. Consider seasonal adjustments: in drier months, run the unit longer or at a higher setting; in more humid seasons, reduce operation to prevent over-saturation. ENERGY-EFFICIENT habits include turning off the device when doors or windows are open and scheduling maintenance during off-peak energy hours when possible. Following these practices helps sustain healthy humidity levels while minimizing energy waste.
Tools & Materials
- Canopy humidifier unit(Select a model appropriate for your room size and canopy area)
- Distilled water(Preferred to minimize mineral buildup)
- Soft microfiber cloth(For wiping surfaces and drying)
- Screwdriver (Phillips #2)(For mounting and disassembly)
- Measuring cup (optional)(For accurate reservoir filling)
- Towel or protective mat(Protect surfaces from spills)
- Safety gloves(During cleaning or disassembly)
Steps
Estimated time: 60-90 minutes
- 1
Prepare workspace and review the manual
Clear a flat area and lay a protective mat. Unbox the canopy humidifier and verify all parts are present. Read the setup instructions to understand mounting requirements and safety notes before handling any components.
Tip: Lay out parts in order of assembly to speed up the process. - 2
Unbox and identify components
Spread the contents on a clean surface and identify the canopy frame, mounting hardware, reservoir, tubing, and nozzle. If anything is missing, contact the retailer or manufacturer before proceeding. This step helps prevent mid-task interruptions.
Tip: Cross-check parts list against what’s in the box. - 3
Mount the canopy unit at the chosen location
Securely attach the canopy frame to the wall or ceiling as directed by the hardware kit. Ensure the unit is level and stable to avoid vibration or misalignment during operation. If mounting on metal studs or masonry, use appropriate anchors.
Tip: Use a level and verify clearance from walls and fixtures. - 4
Attach the mist outlet to the canopy
Connect the mist outlet or nozzle assembly and ensure sealing gaskets are properly seated to prevent leaks. Tighten fittings firmly without over-tightening which could crack components. Align tubing to minimize bends and prevent kinks.
Tip: Hand-tighten first, then give a light tighten with a tool if needed. - 5
Fill reservoir with distilled water
Remove the reservoir and fill it with distilled water to the recommended level. Replace the cap securely and wipe any drips. Reinstall the reservoir onto the unit, ensuring a clean seal for optimal mist output.
Tip: Never use hot water or exceed the fill line. - 6
Power up and test without load
Plug in the unit and power on at a low setting to verify airflow and mist. Look for uniform dispersion from the nozzle and listen for unusual sounds. If there are leaks or odd vibrations, power off immediately and recheck fittings.
Tip: Test with an empty space nearby to observe the mist pattern safely. - 7
Calibrate humidity control to desired range
Set the humidity control to your target range using care to avoid condensation on surfaces. Use an independent hygrometer to verify actual room humidity. Make small adjustments and recheck after a few minutes to achieve stability.
Tip: Avoid relying solely on perceived humidity; measure with a hygrometer. - 8
Record setup details
Note the model, serial number, mounting height, and initial settings for future reference. This helps with troubleshooting and when you need to reorder parts. Keeping a setup log saves time later.
Tip: Store the log in a known place and set reminders for maintenance. - 9
Schedule first maintenance
Create reminders for weekly cleaning and monthly deep cleaning if applicable. Regular maintenance keeps the nozzle clear and prevents mineral buildup. Consistency reduces downtime and extends the device life.
Tip: Add a calendar reminder soon after installation. - 10
Shut down and prep for storage
Power off, unplug, and allow the unit to cool before draining the reservoir. Rinse all components with clean water and dry thoroughly before storage. Store in a dry place away from direct sunlight.
Tip: Always drain and dry to prevent microbial growth during storage.
FAQ
What is a canopy humidifier and where should I place it?
A canopy humidifier sits near the canopy or living space to manage humidity in a defined zone. Place it away from walls, heat sources, and direct sunlight to prevent condensation and equipment wear. Follow the mounting guidelines in the manual for best results.
A canopy humidifier sits near the area you want to humidify. Place it away from walls and heat sources and follow the manual for proper mounting.
How often should I clean the canopy humidifier?
Clean the reservoir and nozzle weekly and perform a deeper clean monthly or as recommended by the manufacturer. Regular cleaning prevents mineral buildup and ensures consistent mist output.
Clean weekly and deeper clean monthly or per the manual to prevent mineral buildup.
Can I use tap water in a canopy humidifier?
Tap water can leave mineral deposits that clog nozzles and reduce performance. Distilled or demineralized water is preferred to maintain output and prolong the unit’s life.
It's better to use distilled water to avoid mineral buildup.
What should I do if the unit leaks or makes strange noises?
First, unplug and inspect for loose fittings or damaged seals. Tighten connections or replace worn gaskets as needed. If the issue persists, consult the manufacturer’s troubleshooting guide or contact support.
Unplug, check fittings, replace seals if needed, and if it persists, seek support.
Is canopy humidifier safe around children and pets?
Can be safe when properly installed and maintained. Keep the unit out of reach of small children and pets, ensure water sources are clean, and supervise use to avoid spills or contact with hot surfaces.
Yes, with proper placement and supervision.
How do I verify that humidity levels are correct?
Use an independent hygrometer placed in the same room as the canopy humidifier to verify humidity levels. Adjust the device settings slowly and re-check after a short period to confirm stability.
Use a hygrometer and adjust gradually until you reach the target range.
Watch Video
The Essentials
- Follow canopy humidifier instructions for safe setup
- Use distilled water to reduce mineral buildup
- Monitor humidity with a hygrometer and avoid condensation
- Clean regularly to sustain performance and lifespan
- Document settings and maintenance for future reference